You know those recipes that just *feel* like home? The ones you crave on a rainy afternoon, the ones that fill your kitchen with the most incredible aroma, the ones that instantly transport you back to happy memories? Well, this Zucchini Bread is *that* recipe for me. It’s the one my Grandma perfected over years, and honestly, it’s what I think of when people say “zucchini bread.” Forget those dry, bland versions you might have tried before; this one is unbelievably moist, packed with warm spices, and has this perfect sweet-tartness from the zucchini itself. It’s ridiculously easy to whip up, too, which makes it a total lifesaver on those days when you need something delicious without a fuss. It’s like a hug in edible form, and I’m so excited to finally share it with you. Seriously, get ready, because this is going to become your go-to zucchinibread recipe!
What is Zucchini bread?
So, what exactly *is* zucchini bread? At its heart, it’s a sweet quick bread, kind of like a cake batter, but baked in a loaf pan. The star ingredient, of course, is zucchini! Now, I know what you might be thinking – zucchini in a sweet bread? Trust me on this one. The zucchini doesn’t really impart a strong vegetable flavor; instead, it adds this incredible moisture and a subtle, earthy sweetness that makes the whole loaf wonderfully tender. It’s a bit like how carrots do their magic in carrot cake. My Grandma always said it was her way of making sure we ate our veggies without even realizing it! Think of it as a humble, comforting, and surprisingly decadent loaf that’s perfect for breakfast, a snack, or even a light dessert. It’s the kind of baking that feels both classic and entirely unfussy.
Why you’ll love this recipe?
Oh, where do I even begin with why this zucchini bread is so special? First off, the flavor. It’s not just sweet; it’s got this deep, warm spice profile – cinnamon and nutmeg are my go-tos, but a pinch of allspice is lovely too – that just sings. And that moisture! It’s genuinely melt-in-your-mouth tender. I’ve tried other recipes that were borderline sawdusty, and that’s just a culinary crime in my book. This one stays moist for days, which is amazing for leftovers (if you even have any!).
Then there’s the simplicity. You don’t need any fancy equipment. Just a bowl, a whisk, and a loaf pan. I can literally whip this up from start to finish in about 15 minutes of active time, then it just bakes away. This makes it an absolute lifesaver on busy weeknights when I want to surprise the kids with a homemade treat, or even on weekend mornings when we want something special without a ton of effort. It’s also incredibly cost-effective, especially if you’re growing your own zucchini in the summer – then it’s practically free deliciousness!
What I truly adore, though, is its versatility. You can toss in a handful of chocolate chips (a non-negotiable for my kids!), some chopped walnuts or pecans for a bit of crunch, or even a bit of lemon zest for brightness. It’s also a fantastic base for a cream cheese frosting or a simple vanilla glaze if you’re feeling fancy. Honestly, it’s my favorite way to use up that abundant summer zucchini harvest. It’s so much better than just sautéing it, and everyone wins!
How do I make Zucchini bread?
Quick Overview
This zucchini bread is all about combining simple ingredients into pure deliciousness. We’ll start by whisking together our dry ingredients, then mixing the wet ingredients separately, and finally bringing them together to create a perfectly moist batter. The grated zucchini is the secret weapon here, adding incredible texture and moisture. We’ll pour it into a prepared loaf pan and bake until golden and fragrant. The whole process is straightforward, and the result is a tender, flavorful loaf that will disappear in no time. It’s honestly one of the easiest quick breads you can make!
Ingredients
For the Main Batter:
2 cups all-purpose flour: I always go for a good quality unbleached all-purpose flour. It gives a nice structure without being too heavy. If you have it, a bread flour will also work, giving it a slightly chewier texture.
1 teaspoon baking soda: This is our primary leavener, ensuring a nice rise.
1/2 teaspoon salt: Essential for balancing the sweetness and bringing out all the flavors.
1 teaspoon ground cinnamon: My absolute favorite warm spice. Feel free to add a little more if you’re a big cinnamon fan like me!
1/2 teaspoon ground nutmeg: Just a hint adds such wonderful depth. Freshly grated is always best if you have it!
1/4 teaspoon ground allspice (optional, but recommended!): This adds a subtle complexity that’s just divine.
1 and 1/2 cups granulated sugar: You can reduce this slightly if you prefer, but it does contribute to the moistness.
2 large eggs: At room temperature, they incorporate better.
1 cup vegetable oil (or melted unsalted butter): I’ve used both, and honestly, oil makes it incredibly moist and tender. Melted butter adds a slightly richer flavor, so it’s a toss-up! If using butter, make sure it’s cooled slightly.
1 teaspoon vanilla extract: Pure vanilla extract makes a huge difference here.
1 and 1/2 cups grated zucchini: This is the magic ingredient! Make sure to squeeze out any excess moisture. I usually use a box grater on the medium-sized holes.
For the Filling (Optional, but highly recommended for chocolate lovers!):
1 cup semi-sweet chocolate chips: Or dark chocolate, milk chocolate – whatever your heart desires! Mini chocolate chips distribute more evenly.
For the Glaze (Optional):
1 cup powdered sugar: Sifted, if you want it super smooth.
2-3 tablespoons milk (or almond milk/water): Start with 2 tablespoons and add more until you reach your desired drizzling consistency. Almond milk adds a subtle creamy note!
Step-by-Step Instructions
Step 1: Preheat & Prep Pan
First things first, preheat your oven to 350 degrees Fahrenheit (175 degrees Celsius). This ensures the oven is nice and hot when the batter is ready. Then, grab a standard 9×5 inch loaf pan. Grease it generously with butter or cooking spray, and then lightly flour it. This step is crucial for preventing any sticking. You can also line the bottom and sides with parchment paper, leaving a little overhang on the sides to help you lift the bread out easily once it’s baked. I learned this trick after a particularly stubborn loaf got stuck once – never again!
Step 2: Mix Dry Ingredients
In a large mixing bowl, whisk together your flour, baking soda, salt, cinnamon, nutmeg, and allspice (if using). Give it a good whisk to make sure everything is evenly distributed. This is important because you want the leavening agents and spices to be spread throughout the batter, not clumped in one spot. You’re looking for a light, airy mixture. Don’t skip the whisking; it really does make a difference in the final texture.
Step 3: Mix Wet Ingredients
In a separate medium bowl, whisk together the granulated sugar and eggs until they’re well combined and slightly lighter in color. Then, pour in the vegetable oil (or cooled melted butter) and vanilla extract. Whisk it all together until everything is smooth and emulsified. You should have a nice, glossy mixture. Make sure the eggs are well incorporated into the oil; we don’t want any little eggy surprises!
Step 4: Combine
Now, pour the wet ingredients into the bowl with the dry ingredients. Gently fold them together with a spatula or wooden spoon until *just* combined. It’s really important not to overmix at this stage. A few streaks of flour are okay! Overmixing develops the gluten in the flour, which can lead to a tough, dense bread. We want tender and light, remember? Once it’s mostly mixed, add your grated zucchini. Fold that in gently until it’s just distributed. If you’re adding chocolate chips or nuts, fold those in now, too.
Step 5: Prepare Filling
If you’re adding chocolate chips, just have them ready. They’ll be folded into the batter in the next step. There’s no real “preparation” needed for them, other than deciding if you want to use them at all! I find semi-sweet chips give the best balance of sweetness without being overpowering. Sometimes I’ll even mix in a few dark chocolate chips for extra richness.
Step 6: Layer & Swirl
Pour about half of the batter into your prepared loaf pan and spread it evenly. If you’re adding chocolate chips as a layer, sprinkle half of them over this first layer of batter. Then, carefully pour the remaining batter over the top, spreading it to cover. Sprinkle the rest of the chocolate chips on top. If you’re feeling really adventurous and want that swirled look, you can reserve a small amount of batter, mix in some cocoa powder or extra cinnamon into that small portion, and then dollop and swirl it on top. For this basic recipe, just topping with chips is perfect!
Step 7: Bake
Place the loaf pan in the center of your preheated oven. Bake for 50-65 minutes. The exact time can vary depending on your oven, so start checking around the 50-minute mark. You’ll know it’s done when a wooden skewer or toothpick inserted into the center comes out clean, with no wet batter clinging to it. The top should be golden brown and the edges should be pulling away slightly from the sides of the pan. If the top is browning too quickly, you can loosely tent it with aluminum foil for the last 10-15 minutes of baking.
Step 8: Cool & Glaze
Once baked, remove the loaf pan from the oven and let the zucchini bread cool in the pan for about 10-15 minutes. This allows it to set up properly. Then, carefully invert the pan onto a wire rack to release the bread. If you used parchment paper, you can gently lift it out. Let it cool completely on the wire rack before you even *think* about glazing it. If you glaze it while it’s warm, the glaze will melt and become a drippy mess. For the glaze: whisk together the powdered sugar and milk until smooth and pourable. Drizzle it over the completely cooled loaf. Let the glaze set for about 15-20 minutes before slicing.
Step 9: Slice & Serve
Once the glaze is set (or if you skipped the glaze, once the bread is completely cool), it’s time to slice! Use a sharp, serrated knife for the cleanest cuts, especially if you have chocolate chips or nuts in there. Slice it into thick, generous pieces – about 3/4 inch thick is usually perfect. Serve at room temperature. The smell alone is enough to make your mouth water, and that first bite… pure bliss! It’s so moist and flavorful, you’ll wonder why you ever bought store-bought.
What to Serve It With
This zucchini bread is honestly a chameleon when it comes to pairings. For a simple, comforting breakfast, it’s divine with just a cup of hot coffee or a glass of cold milk. It’s just enough to satisfy that morning sweet craving without being too heavy. My kids sometimes ask for a thin schmear of butter on their slice, which is also lovely.
For a more leisurely brunch spread, it’s fantastic. I love to serve it alongside some fresh fruit salad, maybe some Greek yogurt with berries, or even alongside some savory breakfast items like scrambled eggs and bacon. It adds that perfect sweet counterpoint. A mimosa or a nice cup of herbal tea would be a lovely beverage pairing here.
As a dessert, it really shines. It’s not overly sweet on its own, which makes it a great canvas. Drizzle it with that simple vanilla glaze I mentioned, or even a light cream cheese frosting. It pairs wonderfully with a scoop of vanilla bean ice cream or a dollop of whipped cream. For a more decadent dessert, try it warm with a caramel sauce drizzled over the top – absolute heaven!
And for those cozy snack moments? This is it. When you’re curled up on the couch with a good book and a cup of tea, or when the kids need an after-school pick-me-up, this zucchini bread is the answer. It’s comforting, familiar, and always hits the spot. I’ve even been known to have a slice (or two!) late at night when that sweet craving hits, but I don’t want to bake a whole cake. It’s that perfect, easy treat.
Top Tips for Perfecting Your Zucchini Bread
Zucchini Prep: This is probably the most crucial step. You *must* squeeze out as much moisture as possible from your grated zucchini. I usually do this by placing the grated zucchini in a fine-mesh sieve set over a bowl and pressing down firmly with the back of a spoon or a spatula. Alternatively, you can wrap it in a clean kitchen towel or cheesecloth and wring out the excess liquid. Leaving too much moisture can make your bread gummy and heavy. Also, I find that medium shreds work best – too fine and it can disappear, too coarse and you might get weird pockets of water. Don’t peel the zucchini; the skin adds nutrients and a lovely subtle color.
Mixing Advice: Remember that “just combined” rule for quick breads? It’s your best friend. Overmixing develops gluten, leading to a tough texture. So, when you combine the wet and dry ingredients, mix only until you no longer see dry flour streaks. A few small lumps are perfectly fine! The zucchini itself will add more moisture as it bakes, so don’t worry if the batter seems a little thick initially.
Swirl Customization: While my Grandma’s recipe is simple, you can absolutely get creative with swirls. For a chocolate swirl, mix a tablespoon or two of unsweetened cocoa powder into about 1/4 cup of the batter. Dollop spoonfuls of this chocolate batter randomly over the plain batter in the pan, then use a skewer or knife to gently swirl them together. Don’t over-swirl, or you’ll just end up with a brown loaf!
Ingredient Swaps: I’ve tested this with different flours! For a slightly denser, more wholesome loaf, you can try substituting half of the all-purpose flour with whole wheat flour. For a dairy-free version, use a plant-based milk like almond or oat milk in the glaze, and ensure your oil is a neutral vegetable oil. For nut allergies, just omit the nuts! If you don’t have vegetable oil, melted coconut oil works, but it will impart a slight coconut flavor.
Baking Tips: Oven temperatures can be so finicky! I always recommend using an oven thermometer to ensure your oven is calibrated correctly. If your oven tends to brown the top too quickly, tent the loaf loosely with foil during the last 15-20 minutes of baking. Also, try to bake the loaf on the center rack for even heat distribution. For the doneness test, aim for the thickest part of the loaf, avoiding any large pockets of chocolate chips.
Glaze Variations: If you’re not a fan of a sweet glaze, a simple dusting of powdered sugar is beautiful. Or, try a lemon glaze by replacing some of the milk with fresh lemon juice for a zesty kick. For a richer finish, melt some good quality dark or semi-sweet chocolate and drizzle that over the cooled loaf. You could even add a tiny pinch of salt to the glaze to enhance the sweetness.
Storing and Reheating Tips
This zucchini bread is remarkably forgiving when it comes to storage, which is one of the reasons I love it so much. At room temperature, it will stay wonderfully moist and delicious for about 2-3 days. To keep it fresh, I always wrap it tightly in plastic wrap or place it in an airtight container. Make sure it’s completely cooled before wrapping, otherwise, you’ll trap condensation, which can make it soggy.
If you think you’ll need more than a few days to get through it (which, let’s be honest, rarely happens in my house!), the refrigerator is your friend. It can be stored in an airtight container in the fridge for up to a week. The texture might become a little firmer when chilled, but it’s still perfectly good. I find it tastes even better the next day, and the flavors really meld together.
And yes, you can freeze it! This is a fantastic make-ahead strategy. Once the loaf is completely cooled, I like to wrap it very snugly in plastic wrap, and then again in a layer of aluminum foil or place it in a heavy-duty freezer bag. It will keep well in the freezer for up to 3 months. When you’re ready to enjoy it, let it thaw at room temperature for a few hours. The quality is usually excellent!
Glaze Timing Advice: If you plan to freeze your zucchini bread, I highly recommend glazing it *after* it has thawed. Freezing with the glaze on can sometimes make the glaze a bit sticky or uneven in texture. So, let it thaw completely, and then whip up a fresh glaze to drizzle over the top. It will look and taste like you just baked it!
Frequently Asked Questions
Final Thoughts
There you have it – my beloved Zucchini Bread recipe! This isn’t just a recipe to me; it’s a little piece of my family history, a testament to simple ingredients coming together to create something truly special. It’s the kind of baking that feels effortless but delivers incredible results, making it perfect for beginners and seasoned bakers alike. Whether you’re looking for a way to use up that overflowing summer zucchini, a comforting treat for a chilly morning, or a crowd-pleasing dessert, this loaf has got you covered. I truly hope you give it a try and that it brings as much joy to your kitchen as it does to mine.
If you love this recipe, you might also enjoy my Easy Banana Bread or my Classic Blueberry Muffins. They share that same home-baked comfort and simplicity!
I can’t wait to hear how yours turns out! Please leave a comment below with your thoughts, any fun additions you made, or your own family memories associated with baking. And if you share a photo on social media, be sure to tag me – I’d love to see your beautiful loaves!
Happy baking!
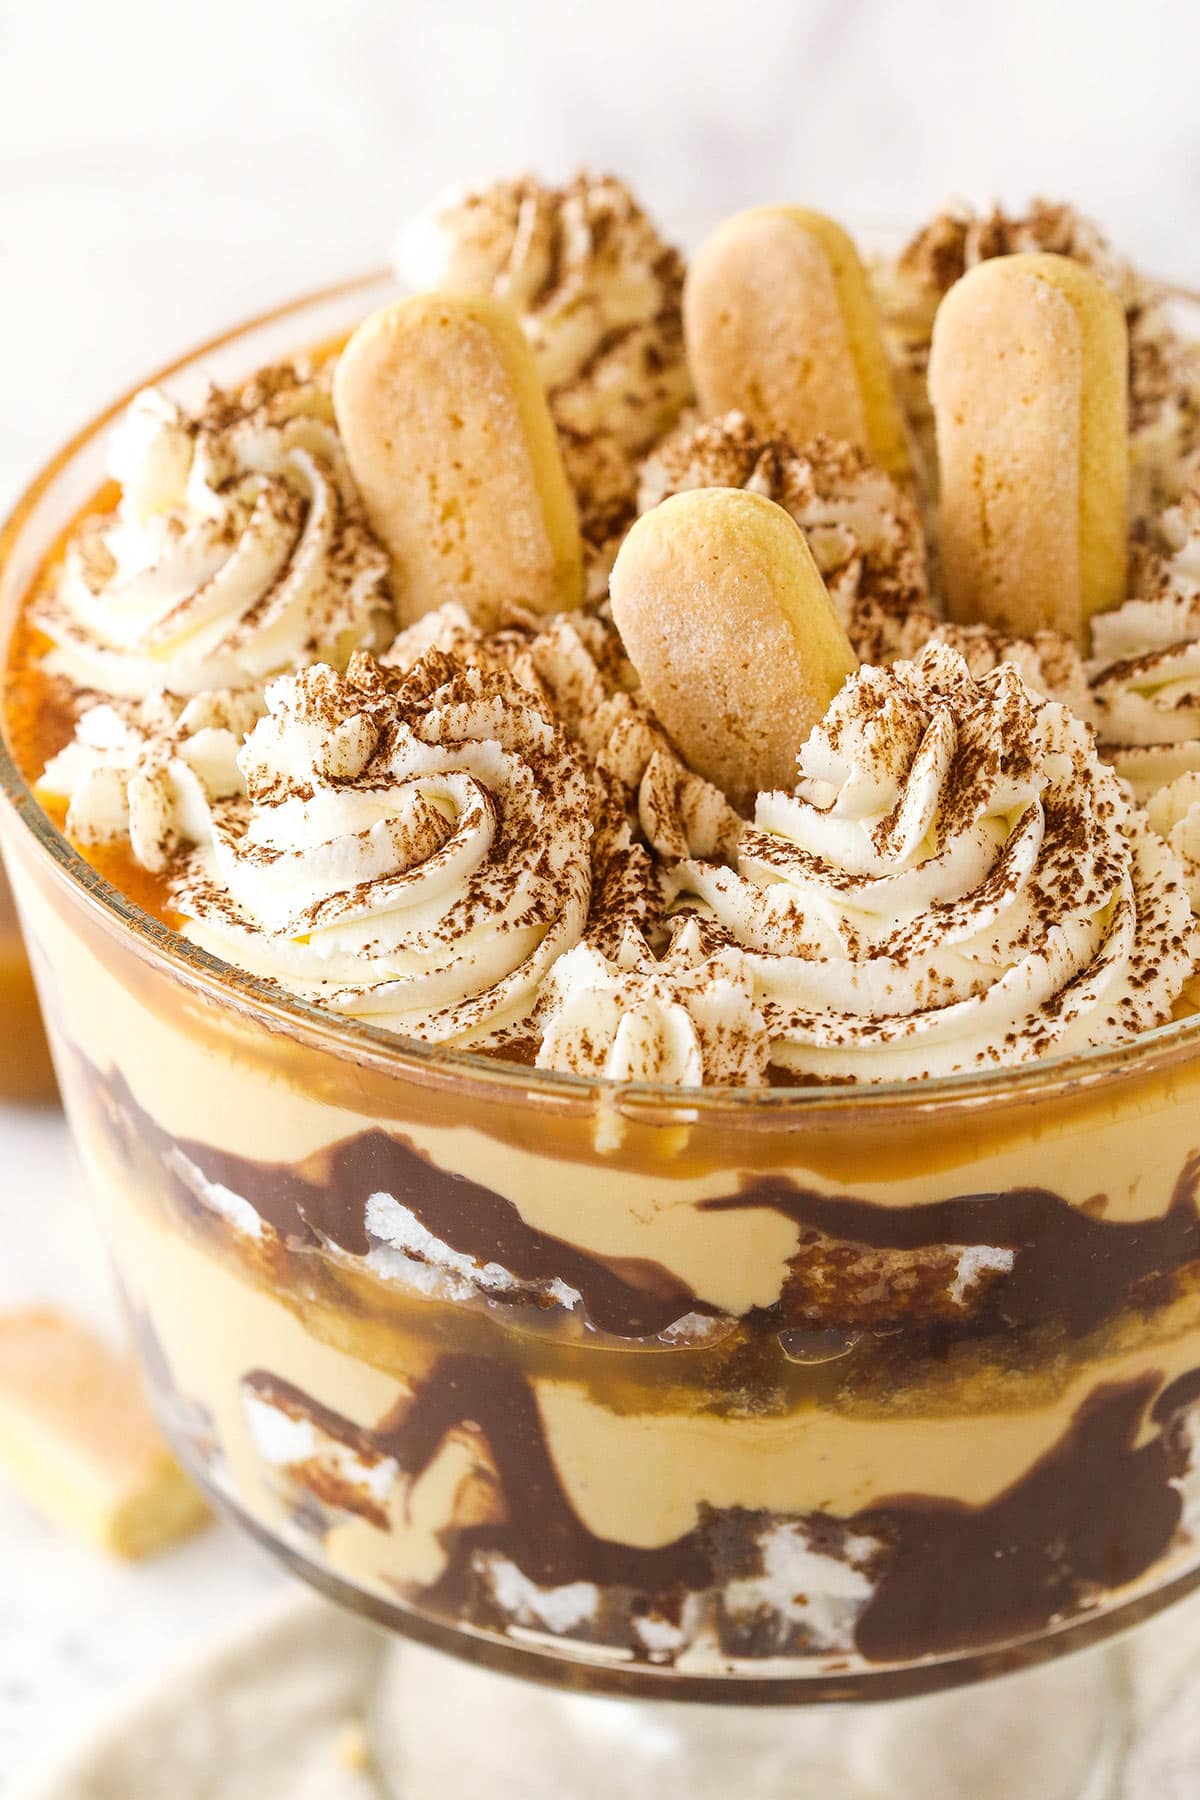
Caramel Coffee Trifle
Ingredients
Method
- Combine the espresso granules, granulated sugar, and warm water in a small bowl. Stir until the sugar and espresso are fully dissolved. Set this mixture aside to cool completely.
- Prepare the butterscotch pudding according to the package directions, using 4 cups of milk. Once made, set the pudding aside to cool slightly and thicken.
- To make the Nutella ganache, combine the Nutella, semi-sweet chocolate chips, and 0.5 cup heavy whipping cream in a medium microwave-safe bowl. Heat in 15-20 second intervals, stirring well after each, until the mixture is melted and smooth. Allow it to cool for 5-10 minutes; it should still be pourable but not too hot.
- For the whipped cream, add 1.5 cups cold heavy whipping cream, powdered sugar, and vanilla extract to a large mixer bowl. Whip on high speed until stiff peaks form. Gently fold one-third of this whipped cream into the cooled butterscotch pudding mixture. Set the remaining plain whipped cream aside for later.
- Begin building your trifle by placing about half of the angel food cake pieces evenly in the bottom of a large trifle dish. Drizzle generously with 5-6 tablespoons of the cooled espresso mixture.
- Drizzle or spread about half of the prepared Nutella ganache evenly over the angel food cake layer.
- Next, add about half of the butterscotch pudding mixture (the one folded with whipped cream) and spread it evenly over the previous layers. Then, add about half of the caramel sundae syrup, spreading it out.
- Repeat the layering process with the remaining angel food cake pieces, espresso mixture, Nutella ganache, pudding mixture, and caramel sauce, creating beautiful distinct layers.
- Finish the trifle by spreading the remaining plain whipped cream (from step 4) evenly over the top. You can decorate as desired with additional caramel drizzle, chocolate shavings, or a few whole coffee beans.
- Place the trifle in the refrigerator to chill for at least 2-3 hours before serving. This allows the flavors to meld and the layers to set. The trifle is best enjoyed within 2-3 days.