Oh, where do I even begin with this zucchini bread? It’s more than just a recipe; it’s a hug in a loaf, a little slice of my childhood that I get to recreate whenever the craving strikes. Honestly, the smell alone as it bakes is enough to transport me back to Grandma’s kitchen, sunbeams slanting through the window, the gentle hum of her ancient stand mixer. We used to make a lot of things together, but this zucchini bread? It was always the star. It’s got that perfect balance of moistness and tender crumb, with just the right amount of sweetness. People always ask me what makes it so good, and I have to admit, there’s a little secret I picked up from her, a simple twist that elevates it from good to absolutely unforgettable. It’s not a fancy trick, just pure, honest goodness. If you’ve ever tried making zucchini bread and it turned out… well, just okay, or maybe a little gummy, then trust me, you need this recipe. It’s like the beloved chocolate chip cookie but in a loaf form, and it’s ridiculously satisfying.
What is Zucchini bread?
So, what exactly *is* zucchini bread? At its heart, it’s a quick bread, meaning it relies on chemical leaveners like baking soda and baking powder for its lift, rather than yeast. Think of it as a cake that happens to be baked in a loaf pan, and instead of just being sweet, it’s got this wonderful earthy undertone thanks to the star ingredient: zucchini! The zucchini itself doesn’t really impart a strong flavor, but it works pure magic on the texture, making the bread unbelievably moist and tender. It’s essentially a genius way to sneak in some extra veggies without anyone noticing, especially the picky eaters in your life. My kids honestly have no idea how many zucchinis they’ve devoured this way. The name itself is pretty straightforward – it’s a bread that features zucchini. But oh, the possibilities beyond that simple description! It’s a canvas for spices, nuts, chocolate chips, you name it. It’s the culinary equivalent of a comfy sweater on a chilly day, and it’s just so comforting.
Why you’ll love this recipe?
There are so many reasons why this zucchini bread has earned a permanent spot in my recipe binder, and I just know you’re going to feel the same way once you try it. First off, the flavor is simply divine. It’s not overly sweet, which I appreciate, and the subtle warmth from the cinnamon and nutmeg is just perfection. It’s like a gentle hug for your taste buds. And the texture? Oh, the texture is where it truly shines. It’s incredibly moist, thanks to the secret ingredient (which I’ll get to!), and it stays that way for days. No dry, crumbly loaves here! What I also adore about this recipe is its sheer simplicity. You don’t need any fancy equipment or a culinary degree. If you can stir things together in a bowl, you can make this zucchini bread. It’s a lifesaver on busy weeknights when you need a quick dessert or a comforting breakfast treat. And speaking of budget-friendly, zucchini is usually so affordable, especially when it’s in season. You get so much flavor and satisfaction from such simple, humble ingredients. Plus, it’s wonderfully versatile. I’ve got friends who love adding chocolate chips, others who swear by chopped walnuts, and I’ve even seen it made with a hint of lemon zest. It’s the kind of recipe that adapts to your mood and what you have on hand. It’s not quite as straightforward as my What is the best banana bread recipe?What is a family favorite, but the slight extra step is SO worth it for the incredible result.
How to Make My Grandma’s Zucchini Bread Bliss
Quick Overview
The process for this zucchini bread is wonderfully straightforward. You’ll be grating zucchini, mixing up your wet and dry ingredients separately, then combining them gently to form a batter. The magic happens when you fold in the secret ingredient and then bake it until golden and fragrant. It’s a simple stir-and-bake method that yields spectacular results. You really can’t mess this up, even if you’re a beginner baker. I’ve made this countless times, often with little helpers in tow, and it always turns out beautifully. The aroma that fills your kitchen is half the reward!
Ingredients
For the Main Batter:
3 cups all-purpose flour. Make sure it’s not packed too tightly. Spoon it into your measuring cup and level it off with a straight edge. This is key for getting the right texture!
2 teaspoons ground cinnamon. I like to use a good quality cinnamon for the best flavor.
1 teaspoon ground nutmeg. Freshly grated is amazing if you have it, but good old ground nutmeg works wonders.
1 teaspoon baking soda. Make sure it’s not expired!
1/2 teaspoon baking powder. This gives it an extra lift.
1/2 teaspoon salt. Just to balance out all those sweet flavors.
1.5 cups granulated sugar. You can adjust this slightly if you prefer it less sweet, but I find this amount perfect.
3 large eggs. At room temperature is best; they incorporate better into the batter.
1 cup vegetable oil. You can also use canola oil or a light olive oil for a subtle flavor.
1/4 cup buttermilk. This is my little secret! It adds incredible moisture and a tender crumb that you just can’t get with regular milk. If you don’t have buttermilk, you can make a quick substitute by adding 1 tablespoon of lemon juice or white vinegar to 1/4 cup of regular milk and letting it sit for 5 minutes.
For the Filling:
2 cups grated zucchini. Make sure to squeeze out as much excess moisture as you can! This is super important. I usually grate it using the medium holes on a box grater and then wrap it in a clean kitchen towel or paper towels and give it a good squeeze.
1/2 cup chopped walnuts or pecans (optional). If you’re a nut person, these add a lovely crunch and depth of flavor. Toasting them first really brings out their best taste.
1/2 cup chocolate chips (optional). Semi-sweet or dark chocolate chips are my go-to. They melt into pockets of pure joy!
For the Glaze:
1 cup powdered sugar. Sifted to avoid lumps.
2-3 tablespoons milk or lemon juice. Start with 2 tablespoons and add more until you reach your desired consistency. Lemon juice adds a lovely tang that complements the zucchini bread beautifully.
Step-by-Step Instructions
Step 1: Preheat & Prep Pan
First things first, get your oven preheated to 350 degrees Fahrenheit (175 degrees Celsius). This ensures it’s nice and ready when your batter is. Now, grab a standard 9×5 inch loaf pan. Grease it really well with butter or cooking spray, and then lightly dust it with flour. You can also line it with parchment paper, leaving an overhang on the sides, which makes lifting the bread out so much easier. I always use the parchment paper trick – it’s a lifesaver for getting those perfect edges!
Step 2: Mix Dry Ingredients
In a large mixing bowl, whisk together the flour, cinnamon, nutmeg, baking soda, baking powder, and salt. Give it a good whisk to make sure everything is evenly distributed. This step ensures your leaveners are spread throughout, which means an even rise and no funny-tasting pockets.
Step 3: Mix Wet Ingredients
In a separate medium bowl, whisk together the granulated sugar, eggs, vegetable oil, and the star of the show – the buttermilk! Whisk until everything is well combined and the mixture looks smooth and creamy. The buttermilk really is key here; it adds a subtle tang and moisture that makes all the difference. I’ve tested this with almond milk and other non-dairy options, and while they work, the texture just isn’t quite as tender as with buttermilk.
Step 4: Combine
Now, pour the wet ingredients into the bowl with the dry ingredients. Using a spatula or a wooden spoon, gently fold everything together. Be careful not to overmix! Overmixing develops the gluten too much, which can lead to a tough bread. Stop mixing as soon as you no longer see streaks of dry flour. A few little lumps are perfectly fine. This is the point where you’ll fold in your grated, squeezed zucchini and any optional add-ins like walnuts or chocolate chips.
Step 5: Prepare Filling
This step is really about ensuring your zucchini is ready to go. As I mentioned before, it’s crucial to squeeze out as much liquid as possible from the grated zucchini. You can do this by placing the grated zucchini in a clean kitchen towel or cheesecloth and twisting it firmly over the sink. The more moisture you remove, the less likely your bread is to be gummy. If you’re adding nuts or chocolate chips, make sure they’re chopped to your desired size and, if using nuts, consider toasting them lightly in a dry skillet for a few minutes until fragrant.
Step 6: Layer & Swirl
(Wait, this isn’t a swirled bread recipe! My mistake! This part is for a marbled cake, not this lovely zucchini loaf. Let me correct myself!) Oops, my brain went on a little detour! For this zucchini bread, you simply pour the batter evenly into your prepared loaf pan. Make sure to spread it out so it’s level. The goal here is a beautiful, even bake, not a swirl pattern. I usually give the pan a gentle tap on the counter to help settle the batter and get rid of any large air bubbles.
Step 7: Bake
Place the loaf pan in the preheated oven on the center rack. Bake for 50-65 minutes. The exact time will depend on your oven, so start checking around the 50-minute mark. You’ll know it’s done when a wooden skewer or toothpick inserted into the center comes out clean, with just a few moist crumbs attached. If it’s browning too quickly on top, you can loosely tent it with aluminum foil for the last 15-20 minutes of baking.
Step 8: Cool & Glaze
Once baked, let the loaf cool in the pan for about 10-15 minutes. This helps it set up nicely. Then, carefully invert it onto a wire rack to cool completely. Don’t try to glaze it while it’s warm, or the glaze will just melt and slide right off! Once it’s completely cool, you can whip up the glaze. In a small bowl, whisk together the powdered sugar and milk (or lemon juice) until smooth. If it’s too thick, add a tiny bit more liquid; if it’s too thin, add a little more powdered sugar. Drizzle or spread the glaze over the top of the cooled loaf. Let the glaze set for a few minutes before slicing.
Step 9: Slice & Serve
Once the glaze has set, it’s time for the best part! Use a serrated knife to slice the bread. A gentle sawing motion works best for a clean cut. Serve it at room temperature, and just watch it disappear. It’s perfect on its own, but a little smear of butter is also divine. Enjoy every moist, delicious bite!
What to Serve It With
This zucchini bread is so versatile, it works for almost any occasion! For a cozy breakfast, I love it toasted and served with a generous smear of cream cheese or a dollop of plain Greek yogurt. It pairs beautifully with a strong cup of coffee or a soothing mug of herbal tea. For a more elegant brunch spread, I’ll slice it a bit thinner and arrange it on a pretty platter, perhaps with some fresh berries on the side to add a pop of color and freshness. It’s also a fantastic addition to a dessert buffet. Served slightly warm, it’s incredible on its own, but you could also pair it with a scoop of vanilla bean ice cream or a drizzle of caramel sauce for an extra-special treat. And for those moments when you just need a comforting snack, this bread is an absolute winner. It’s perfect for a mid-afternoon pick-me-up or a late-night craving. My family loves it with a glass of cold milk, and honestly, who can blame them? It’s just pure comfort food. I’ve also found it to be a wonderful accompaniment to a light soup or salad for a more substantial meal, believe it or not!
Top Tips for Perfecting Your Zucchini Bread
Over the years, I’ve picked up a few tricks and learned from a few mistakes (don’t ask about the time I forgot the baking soda!). So, here are my absolute top tips to help you achieve zucchini bread perfection every single time.
Zucchini Prep: This is arguably the most critical step. Grating the zucchini is easy, but squeezing out that excess moisture is non-negotiable. If you skip this, you’ll end up with a dense, gummy loaf. I’ve found that using the medium holes on a box grater works best. It gives you enough surface area for moisture to escape when you squeeze, but the shreds aren’t so fine that they disappear into the batter. Using a cheesecloth or a clean kitchen towel is the most effective way to wring out that liquid. Don’t be shy; give it a good, firm squeeze!
Mixing Advice: Remember, when you’re combining the wet and dry ingredients, less is more. As soon as you no longer see big pockets of dry flour, stop mixing. A few tiny lumps in the batter are totally fine and actually preferable to overmixing, which develops the gluten in the flour and can lead to a tough, rubbery texture. We want tender, cake-like zucchini bread, not a dense brick!
Swirl Customization: (Again, my mind is playing tricks! This bread isn’t swirled. Let’s stick to the zucchini bread!) Okay, focusing back on our star loaf! For customization, if you’re adding things like chocolate chips or nuts, toss them with a tablespoon of the dry flour mixture before adding them to the batter. This helps prevent them from sinking to the bottom of the loaf during baking. It’s a little trick that makes a big difference in how evenly your add-ins are distributed.
Ingredient Swaps: The buttermilk is truly the magic ingredient for moisture, but if you’re in a pinch, the DIY substitute of milk with lemon juice or vinegar works well. For the oil, you can experiment with lighter oils like grapeseed or even melted coconut oil, though coconut oil might impart a slight coconut flavor. If you’re not a fan of nuts, feel free to omit them entirely or swap them for seeds like sunflower or pumpkin seeds for a different kind of crunch.
Baking Tips: Ovens can be finicky! Keep an eye on your bread towards the end of the baking time. If the top is browning beautifully but the center still needs more time, loosely tent the loaf pan with aluminum foil. This protects the crust from over-browning while allowing the inside to finish cooking. Doneness is best tested with a wooden skewer or toothpick inserted into the thickest part of the loaf; it should come out clean or with a few moist crumbs clinging to it. If it comes out with wet batter, it needs more time.
Glaze Variations: The simple powdered sugar glaze is lovely, but don’t be afraid to experiment! For a hint of spice, add a pinch of cinnamon or cardamom to the glaze. For a citrusy kick, use fresh lemon or orange juice instead of milk. If you want a richer glaze, you can use a combination of powdered sugar and a little bit of melted butter before adding the liquid. The key is to get the consistency right – thick enough to coat the bread without dripping off too much, but thin enough to spread easily.
Storing and Reheating Tips
The great thing about this zucchini bread is that it stays incredibly moist for days, making it perfect for making ahead. Here’s how I like to store it to keep it tasting fresh.
Room Temperature: Once the bread is completely cooled (this is crucial – don’t wrap it while it’s still warm, or you’ll create steam and make it soggy!), you can store it at room temperature. I usually wrap the loaf tightly in plastic wrap, and then tuck that into an airtight container or a resealable bag. It stays lovely and moist like this for about 3-4 days. The glaze can sometimes make it a little trickier to wrap tightly, so I often wait to glaze until I’m ready to serve it, or I’ll just glaze the top half.
Refrigerator Storage: If you live in a very warm climate, or if you simply want it to last a bit longer, you can store it in the refrigerator. It will last for about a week this way. Again, make sure it’s well-wrapped to prevent it from drying out. The texture might be a little firmer straight from the fridge, but it softens up nicely at room temperature.
Freezer Instructions: This bread freezes beautifully, which is fantastic for having a homemade treat on hand whenever you want one. Once completely cooled, wrap the loaf tightly in a layer of plastic wrap, then a layer of aluminum foil, and then place it in a freezer-safe bag or container. It will keep well in the freezer for up to 3 months. To thaw, remove it from the freezer and let it thaw overnight at room temperature, still wrapped. If you’ve glazed it, the glaze might get a little sticky upon thawing; you can always add a fresh dusting of powdered sugar before serving.
Glaze Timing Advice: As I mentioned, it’s often best to glaze the bread *after* it has cooled completely. If you’re planning to freeze the bread, I highly recommend glazing it *after* it has thawed. If you must glaze before freezing, be aware that the glaze might crack or become a bit soft upon thawing. For room temperature storage, glazing after cooling is usually fine. The key is always to ensure the bread is fully cooled before any covering or glazing occurs!
Frequently Asked Questions
Final Thoughts
So there you have it – my Grandma’s beloved zucchini bread recipe! It’s more than just a delicious baked good; it’s a connection to cherished memories and a testament to how simple ingredients can create something truly magical. I hope this recipe brings as much joy and comfort to your kitchen as it has to mine. The moist crumb, the warm spices, and that subtle hint of zucchini working its magic – it’s just perfect. If you love this recipe, you might also enjoy my Moist Blueberry Muffin Recipe for another easy and delightful treat. Give this zucchini bread a try, and I promise you won’t be disappointed. I can’t wait to hear what you think and how it turns out for you! Happy baking, everyone!
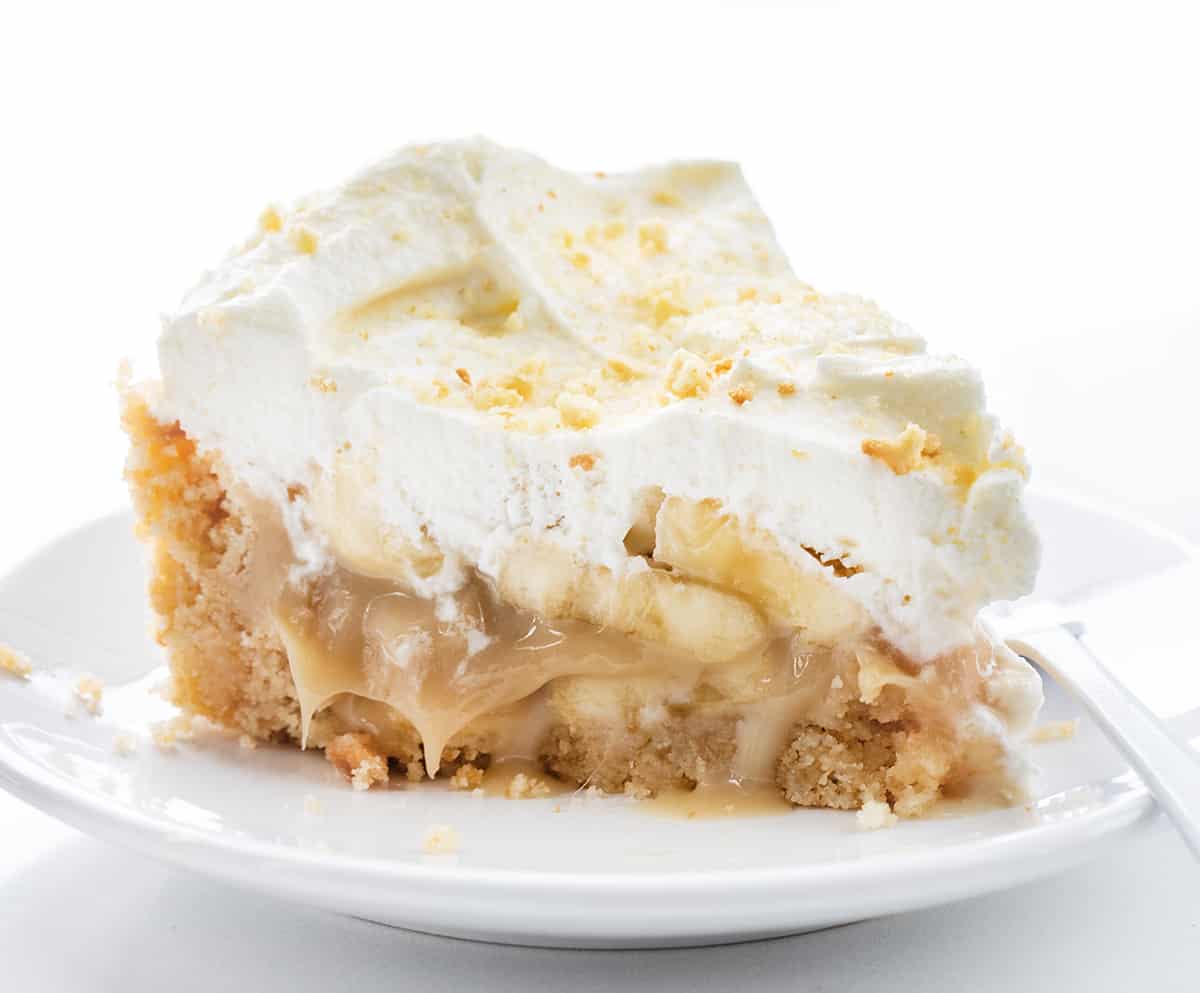
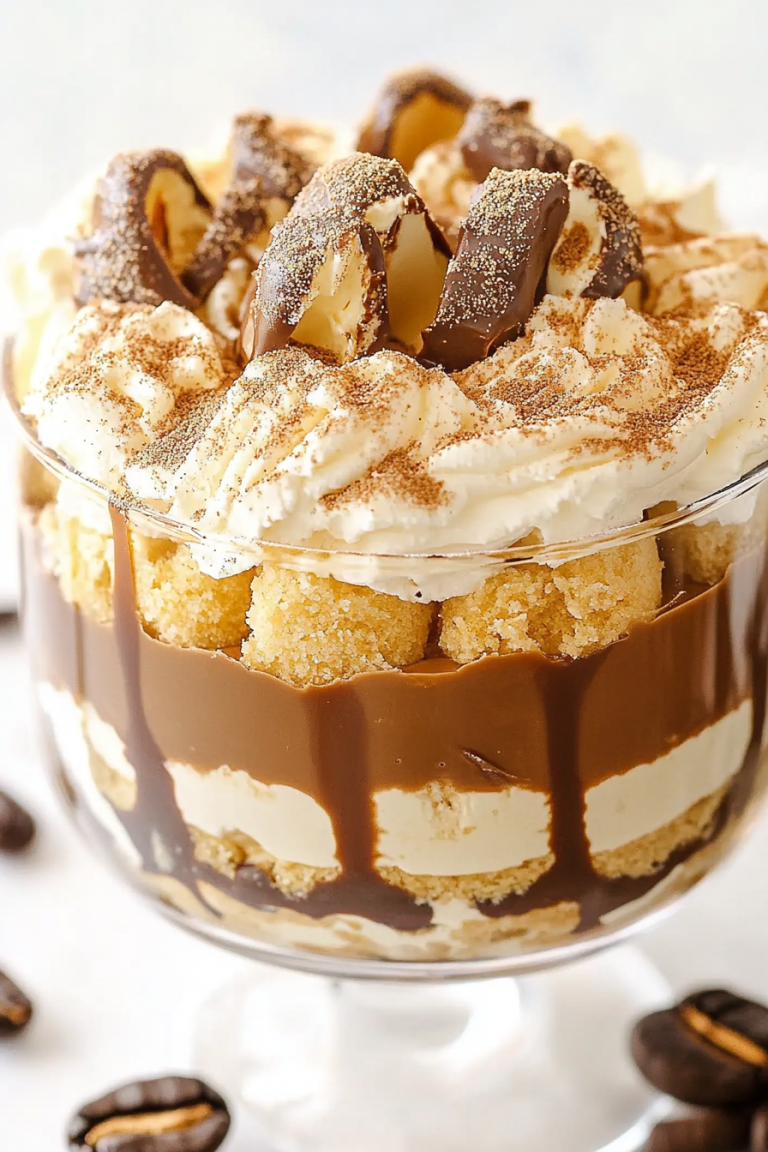
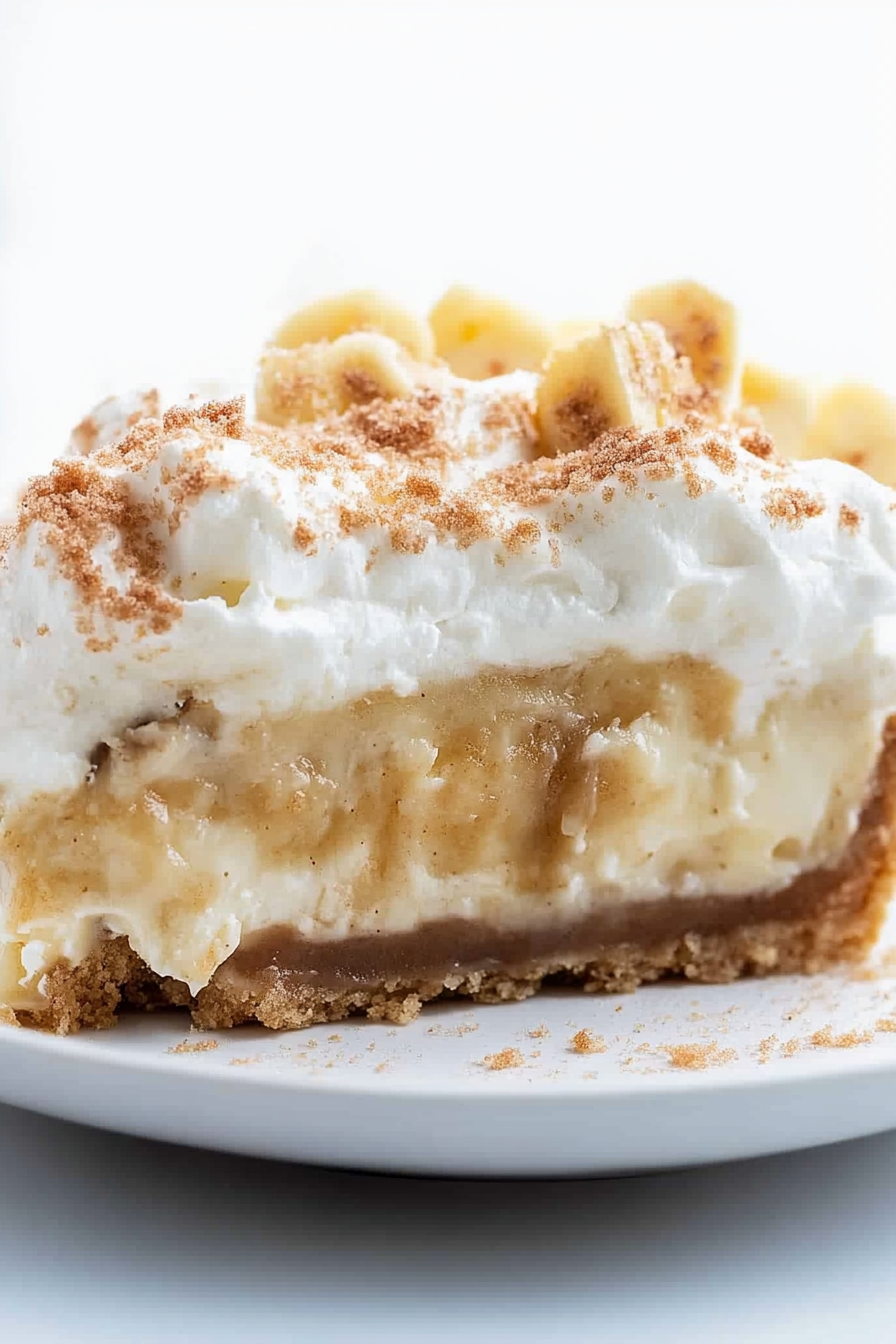
banoffee pie recipe
Ingredients
Method
- Spray an 8-inch springform pan with parchment paper and spray with nonstick cooking spray.
- In a bowl, combine shortbread crumbs and melted butter with a fork. Press the crust into the bottom of and halfway up the sides of the prepared springform pan. Set aside as you make the filling.
- In a medium saucepan over low heat, melt the butter and brown sugar, stirring until the sugar has dissolved.
- Add the sweetened condensed milk. Increase the temperature to medium-low, bringing the mixture to a low simmer. Stir continuously for 16-18 minutes, or until the mixture thickens and turns a golden caramel color.
- Remove from heat and set aside as you make the whipped cream.
- In a stand mixer with the whisk attachment, whip cream until stiff peaks are just about to form (about 1.5 minutes). Beat in confectioners' sugar until stiff peaks form.
- Layer half of the banana rounds over the crust.
- Pour the toffee sauce over the bananas. Add the remaining bananas.
- Top with whipped cream.
- Transfer the pie to the refrigerator to chill for 1 hour, up to overnight.
- Serve chilled, sprinkled with extra shortbread crumbs.