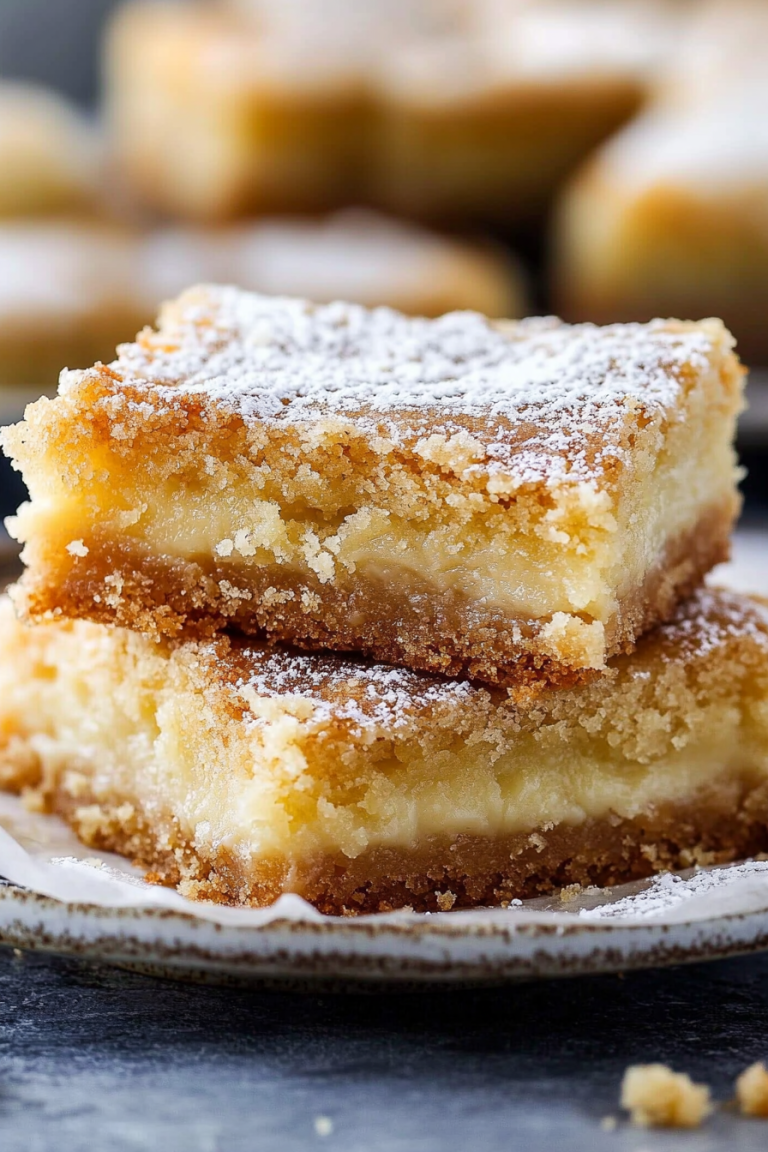
There are certain smells that just instantly transport me back in time, and the aroma of warm spices and sweet zucchini baking is one of them. It’s the smell of lazy Sunday mornings, of my grandma’s kitchen, and honestly, of pure, unadulterated comfort. I’ve been making this zucchini bread for what feels like forever, and it’s hands-down my favorite recipe when I want something truly delicious without all the fuss. It’s not quite a cake, not quite a quick bread, but something wonderfully in-between. If you’ve ever had a really good banana bread and wondered if anything could top it, trust me, this zucchini bread might just be the contender. It’s the perfect way to use up those garden zucchini that seem to multiply overnight, and the best part? You’d never even guess there’s zucchini in it, which is a total win in my book, especially with the picky eaters in my house!
What is Zucchini bread?
So, what exactly is zucchini bread? At its heart, it’s a quick bread, meaning it uses chemical leaveners like baking soda and baking powder instead of yeast, so you don’t have to wait around for dough to rise. The star ingredient, of course, is zucchini! But don’t let that fool you. When grated and baked into a batter, zucchini becomes incredibly tender and moist, adding a wonderful subtle richness without any overpowering flavor. Think of it as nature’s secret weapon for baking. It’s essentially a sweet, spiced loaf that’s incredibly versatile – perfect for breakfast, a snack, or even a light dessert. My grandma always called it her “secret weapon” for a reason; it’s so forgiving and always turns out wonderfully moist. It’s the kind of thing that makes your whole house smell amazing while it’s baking, and it’s usually gone in a day!
Why you’ll love this recipe?
Honestly, where do I even start with why I adore this zucchini bread recipe? First off, the flavor is just divine. It’s got that perfect balance of warm spices – cinnamon, nutmeg, sometimes a little hint of clove if I’m feeling fancy – all mingling with a subtle sweetness. The texture is where it really shines for me. It’s incredibly moist and tender, thanks to the zucchini, with just enough crumb to make it satisfying. I’ve tried other zucchini bread recipes, and some can be a bit gummy, but this one always has a lovely, cake-like crumb. And let’s talk about simplicity! This is a one-bowl wonder for the batter, which means less cleanup, and who doesn’t love that? It’s also surprisingly budget-friendly, using common pantry staples. What I love most about this is its versatility. It’s fantastic on its own, but I’ll often add chopped walnuts or pecans for a little crunch, or even a handful of chocolate chips (my kids’ favorite variation!). It’s also a lifesaver on busy mornings; I can whip up a loaf on a Saturday and have delicious breakfast on the go all week. Compared to something like a dense fruitcake or a complicated layer cake, this is just pure, effortless joy in a loaf pan.
How do I make Zucchini bread?
Quick Overview
The beauty of this zucchini bread is its straightforward nature. You’ll grate your zucchini, whisk together some dry ingredients, then a few wet ingredients, combine them gently, fold in the zucchini, and bake. That’s pretty much it! The magic happens in the oven where the zucchini melts into the batter, creating an unbelievably moist and tender loaf. It’s so simple, even beginner bakers can nail it. This method ensures maximum moisture and flavor without any complicated steps.
Ingredients
For the Main Batter:
2 cups all-purpose flour (I always use unbleached, it seems to give a better texture)
1 teaspoon baking soda
1/2 teaspoon baking powder
1/2 teaspoon salt
1 teaspoon ground cinnamon
1/4 teaspoon ground nutmeg
1/4 teaspoon ground cloves (optional, but I love it!)
1 1/2 cups granulated sugar (you can use a mix of granulated and brown sugar for extra depth)
2 large eggs, at room temperature
1 cup vegetable oil (or a neutral oil like canola; I’ve even used melted coconut oil with great success!)
1 teaspoon vanilla extract
For the Zucchini:
2 cups grated zucchini (from about 2 medium zucchini). Make sure to squeeze out as much liquid as you can! I’ll show you how below.
For the Glaze (Optional, but highly recommended!):
1 cup powdered sugar
2-3 tablespoons milk (or half-and-half for extra richness)
1/2 teaspoon vanilla extract
Step-by-Step Instructions
Step 1: Preheat & Prep Pan
First things first, get your oven preheating to 350 degrees Fahrenheit (175 degrees Celsius). Grab a standard 9×5 inch loaf pan. I like to grease it really well with butter or non-stick cooking spray, and then I dust it with a little flour. This ensures that beautiful golden crust doesn’t stick. If you’re feeling fancy, you can also line it with parchment paper, leaving some overhang so you can easily lift the bread out later. That’s a trick I learned after one too many loaves got stuck!
Step 2: Mix Dry Ingredients
In a large bowl, whisk together the flour, baking soda, baking powder, salt, cinnamon, nutmeg, and cloves (if you’re using them). Whisking them together really well helps distribute the leavening agents evenly, which means a nice, even rise for your loaf. You don’t want any pockets of baking soda in your perfectly tender bread!
Step 3: Mix Wet Ingredients
In a separate medium bowl, whisk together the sugar, eggs, vegetable oil, and vanilla extract. Make sure the eggs are well incorporated. The mixture should be smooth and uniform. If your eggs are cold, the oil might seize up a bit, which is why room temperature eggs are helpful here.
Step 4: Combine
Now, pour the wet ingredients into the bowl with the dry ingredients. Stir everything together *just until combined*. Seriously, don’t overmix! Overmixing develops the gluten in the flour, which can lead to a tough bread. A few streaks of flour are okay; they’ll get incorporated when you add the zucchini. I always tell myself to stop mixing the second I don’t see dry flour anymore. It’s a little bit of an art!
Step 5: Prepare Filling
This is a crucial step for the best texture! Take your grated zucchini and place it in a clean kitchen towel or some paper towels. Squeeze out as much moisture as you possibly can. Seriously, wring it out like you’re trying to get every last drop of water from a sponge. The more liquid you remove, the less likely your bread is to be gummy, and the more concentrated the zucchini flavor (what little there is!) will be. Once squeezed, gently fold this dried zucchini into your batter. If you’re adding nuts or chocolate chips, fold them in now too!
Step 6: Layer & Swirl
Pour the batter into your prepared loaf pan. It might seem a little thick, that’s normal! You can smooth the top a little with your spatula. If you’re feeling adventurous, you can do a pretty cinnamon-sugar swirl on top by mixing a tablespoon of sugar with 1/2 teaspoon of cinnamon and sprinkling it over the batter. It gives it a lovely crunchy topping!
Step 7: Bake
Pop that pan into your preheated oven and bake for 50-65 minutes. The exact time can vary depending on your oven, so keep an eye on it. You’ll know it’s done when a toothpick inserted into the center comes out clean or with just a few moist crumbs attached. If the top starts browning too quickly before the inside is cooked, you can loosely tent it with foil.
Step 8: Cool & Glaze
Once it’s baked, let the loaf cool in the pan for about 10-15 minutes. This helps it firm up a bit. Then, carefully invert it onto a wire rack to cool completely. It’s *so* tempting to cut into it right away, but it really needs to cool down before you glaze it, otherwise, the glaze will just melt and run off. For the glaze, whisk together the powdered sugar, milk, and vanilla extract until smooth. You want it thick but pourable. Drizzle it over the cooled loaf and let it set. It’s perfection!
Step 9: Slice & Serve
Once the glaze has set, slice your beautiful zucchini bread. I like to use a serrated knife for clean cuts. Serve it at room temperature for the best flavor and texture. Enjoy the moist, tender goodness!
What to Serve It With
This zucchini bread is so versatile, it honestly works for almost any meal or craving. For breakfast, I love a thick slice toasted and slathered with a little butter. It’s hearty enough to keep you full until lunch. Coffee is its absolute best friend in the morning! For a more substantial brunch spread, I’ll often bake two loaves. One I’ll keep plain or with nuts, and the other I’ll add chocolate chips to for a bit of decadence. It pairs wonderfully with a fresh fruit salad or a light yogurt parfait. As a dessert, it’s surprisingly satisfying. I’ll serve a warm slice with a dollop of whipped cream or a scoop of vanilla bean ice cream, maybe even a drizzle of caramel sauce if I’m feeling indulgent. For those cozy, late-night snack cravings, a simple slice is all you need. It’s that perfect something sweet without being overly heavy. My family also loves it with a glass of cold milk – it’s a classic for a reason!
Top Tips for Perfecting Your Zucchini Bread
I’ve made this loaf more times than I can count, and I’ve learned a few things along the way that I’m happy to share!
Zucchini Prep: Seriously, don’t skip squeezing the moisture out of the zucchini. It’s the single most important step to avoid a gummy loaf. I usually grate about 2-3 medium zucchini at a time and then store the excess in the fridge or freezer for my next batch.
Mixing Advice: I can’t stress this enough: do not overmix the batter. As soon as you don’t see streaks of dry flour, stop. A few lumps are totally fine. The less you work the flour, the more tender your bread will be. It’s a common mistake people make with quick breads, and it makes a huge difference.
Swirl Customization: If you’re doing a cinnamon-sugar swirl on top, make sure your batter isn’t too wet. A slightly thicker batter will hold the swirl better. You can also experiment with other spices like cardamom or even a little orange zest for a different flavor profile in your swirl.
Ingredient Swaps: I’ve tested this with whole wheat flour, but you might need an extra tablespoon or two of liquid as it tends to absorb more. For the oil, melted butter can work, but it can sometimes result in a slightly denser loaf. If you’re dairy-free, I’ve had great luck with using a good quality plant-based yogurt or even unsweetened applesauce instead of eggs, though the texture might be slightly different. For sweetness, you can reduce the sugar by about 1/4 cup if you prefer it less sweet, but it will affect the overall moisture and texture slightly.
Baking Tips: Ovens can be so different! Start checking for doneness around the 50-minute mark. If the top is golden but the center feels soft, tent it with foil. I usually bake mine on the middle rack of the oven. Trust your toothpick test – it’s the most reliable way to tell if it’s done through.
Glaze Variations: If you’re not a fan of the sweet glaze, you can simply dust the cooled loaf with a little powdered sugar. A cream cheese glaze is also divine! For a more citrusy note, add a teaspoon of lemon or orange zest to the glaze. You can also thin the glaze out with more milk for a thinner drizzle or make it thicker for a more frosting-like consistency.
Storing and Reheating Tips
Proper storage is key to keeping this delicious zucchini bread tasting fresh. At room temperature, once completely cooled and glazed, I usually store it in an airtight container or wrapped tightly in plastic wrap. It’s usually good for about 2-3 days. If I know we won’t finish it that quickly, or if the weather is particularly warm, I’ll pop it in the refrigerator. In the fridge, it can last for up to a week, though I find the texture is best within the first 4-5 days. When I’m ready to eat it from the fridge, I’ll often warm up a slice in the toaster oven or microwave for a few seconds to bring back that fresh-from-the-oven warmth. For longer storage, you can absolutely freeze this zucchini bread! Once it’s completely cooled, I wrap it tightly in a double layer of plastic wrap, followed by a layer of aluminum foil. It freezes beautifully for up to 3 months. To thaw, unwrap it and let it sit at room temperature for a few hours, or thaw slices in the microwave. I often freeze loaves before glazing, as the glaze can sometimes get a bit sticky when thawing. You can always add a fresh glaze or a dusting of powdered sugar after thawing.
Frequently Asked Questions
Final Thoughts
This zucchini bread recipe is more than just a way to use up extra zucchini; it’s a hug in loaf form. It’s the kind of recipe that brings people together, sparking conversations and creating sweet memories. I truly believe that baking should be joyful, not stressful, and this recipe embodies that perfectly. It’s forgiving, delicious, and always a crowd-pleaser. If you love a good quick bread, I think you’ll also really enjoy my Classic Banana Bread Recipe – it shares that same comforting, easy-to-make vibe. Give this zucchini bread a try; I have a feeling it might just become a favorite in your kitchen too. I can’t wait to hear what you think! Let me know in the comments how yours turns out, or if you’ve tried any fun variations!

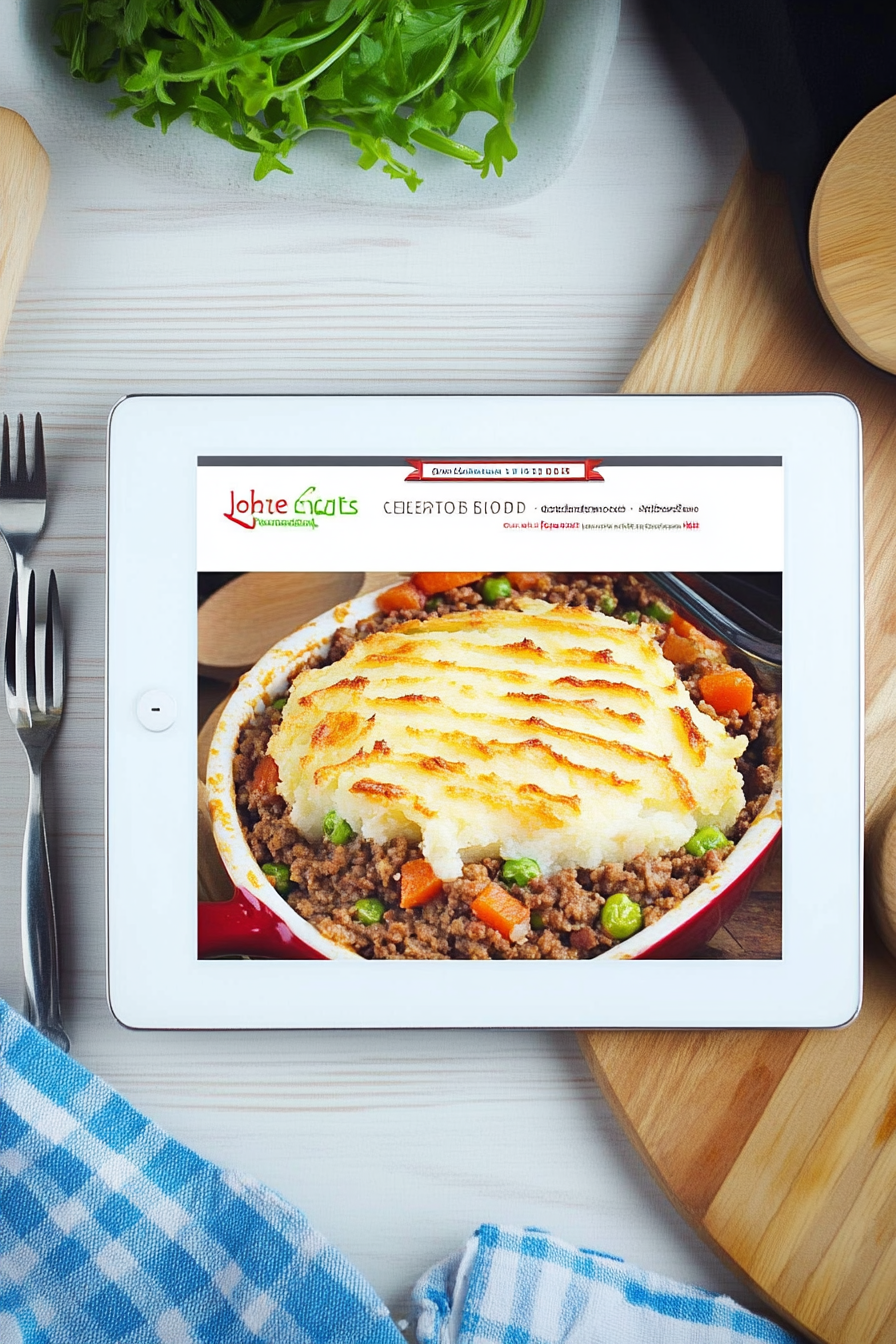
healthy shepherd's pie
Ingredients
Method
- Preheat your oven to 375°F (190°C).
- To prepare the topping, steam or boil the cauliflower florets until they are very tender, about 10-15 minutes. Drain thoroughly.
- Transfer the cooked cauliflower to a large bowl. Mash with milk, butter, salt, and pepper until smooth and creamy. Stir in the grated Parmesan cheese if you are using it. Set aside.
- For the filling, heat olive oil in a large skillet or Dutch oven over medium-high heat. Add the lean ground beef and cook, breaking it up with a spoon, until it is thoroughly browned. Drain any excess fat.
- Add the chopped onion, diced carrots, and diced celery to the skillet with the beef. Cook for 5-7 minutes, stirring occasionally, until the vegetables begin to soften.
- Stir in the minced garlic and cook for another minute until fragrant.
- Add the tomato paste to the skillet and cook for 1 minute, stirring constantly, to deepen its flavor.
- Pour in the beef broth and bring the mixture to a simmer, scraping up any browned bits from the bottom of the pan. Stir in the dried thyme.
- Reduce the heat to medium-low. Stir in the frozen peas and frozen corn. Season the filling with salt and black pepper to taste. Simmer for about 5 minutes, allowing the sauce to thicken slightly.
- Pour the hot filling into a 9x13 inch baking dish (or 6 individual oven-safe ramekins). Carefully spread the mashed cauliflower topping evenly over the filling, ensuring it covers the meat mixture completely.
- Bake in the preheated oven for 20-25 minutes, or until the filling is bubbly and the cauliflower topping is lightly golden brown. For a deeper golden crust, you can broil for the last 2-3 minutes, watching carefully to prevent burning.
- Remove from the oven and let stand for 5-10 minutes before serving, allowing the pie to set.