Okay, so you know how some recipes just feel like a warm hug? This zucchini bread is that for me. It’s the kind of thing I used to beg my grandma to make on lazy Sunday afternoons, the smell of cinnamon and sugar wafting through her whole house. Now, whenever I bake it, it’s like I’m right back there, little hands reaching for a warm slice before it’s even properly cooled. And let me tell you, it’s a game-changer. Forget those dense, dry loaves you might have tried before. This one? It’s ridiculously moist, packed with flavor, and surprisingly simple to whip up. It’s honestly in a league of its own, kind of like how a perfectly grilled cheese is so much more than just cheese between bread. If you’re looking for a truly decadent, yet utterly comforting bake that will have everyone asking for the recipe, you’ve found it. This is my absolute favorite way to use up all that summer zucchini, and trust me, the result is pure magic. It’s my go-to when I need a little bit of sunshine in my kitchen.
What is Zucchini bread?
So, what exactly is this magical creation we call zucchini bread? Well, at its heart, it’s a quick bread, meaning it doesn’t rely on yeast for leavening. Think of it as a delicious, slightly sweet cake that just happens to have zucchini in it. Don’t let that make you shy away! The zucchini doesn’t impart a strong vegetable flavor; instead, it works wonders to make the bread incredibly tender and moist. It’s like a secret superpower for baked goods! The name itself is pretty straightforward, pointing to its star ingredient, but the magic lies in how it’s transformed. It’s a testament to how simple, humble ingredients can come together to create something truly extraordinary. It’s the kind of treat that feels both wholesome and indulgent, a perfect balance that’s hard to find.
Why you’ll love this recipe?
Honestly, where do I even begin? There are so many reasons why this zucchini bread has earned a permanent spot in my recipe rotation, and I’m pretty sure it’ll do the same for you. First off, the flavor is just out of this world. It’s got this warm, comforting blend of cinnamon and nutmeg, with just the right amount of sweetness. The zucchini keeps every single bite incredibly moist and tender, so you never get that dry, crumbly texture that can sometimes plague quick breads. And speaking of moisture, if you’ve ever struggled with dense baked goods, this is your lifesaver. It’s also ridiculously budget-friendly. Zucchini is usually pretty inexpensive, especially when it’s in season, and the other pantry staples are things you probably already have on hand. Plus, it’s so versatile! I love it plain, but adding chocolate chips or chopped walnuts takes it to another level. It’s like a blank canvas for deliciousness. I’ve even experimented with adding a little bit of espresso powder to the batter, which brings out the chocolate notes if you add those in. What I love most about this recipe is how forgiving it is. Even if you’re new to baking, you’ll find this incredibly easy to follow. It’s definitely a step up from your average banana bread, offering a unique flavor profile that’s both familiar and exciting.
How do you make Zucchini bread?
Quick Overview
The process for making this incredible zucchini bread is surprisingly straightforward. We’ll combine our dry ingredients, whisk together our wet ingredients, and then gently bring them together. The key is not to overmix! Then, we’ll incorporate our beautifully shredded zucchini, perhaps swirl in some extra goodness like chocolate chips, and bake it until golden and fragrant. It’s a simple four-step dance: mix, combine, bake, and enjoy. Seriously, it’s that easy, and the results are so impressive, people will think you spent hours in the kitchen. It’s the perfect recipe for a busy weeknight or a relaxed weekend morning.
Ingredients
For the Main Batter:
This is where the magic starts! I always try to use fresh, firm zucchini for the best moisture content. You’ll need about 2 cups of finely shredded zucchini, which usually comes from 2-3 medium zucchini. Don’t bother peeling them; the skin adds extra nutrients and that lovely tender texture. I like to use all-purpose flour, but if you want to get fancy, a good quality unbleached all-purpose flour makes a difference. For the sweetness, granulated sugar is fine, but I sometimes use a mix of granulated and brown sugar for a deeper flavor – about 1.5 cups total sugar. The leavening comes from baking soda and baking powder, so make sure yours is fresh! About 1 teaspoon of baking soda and ½ teaspoon of baking powder will give us that perfect lift. And of course, the warm spices: 1 teaspoon of ground cinnamon and ¼ teaspoon of ground nutmeg are non-negotiable for me. A pinch of salt, about ½ teaspoon, always enhances all those sweet flavors.
For the Filling:
This is where you can really have fun! My absolute favorite addition is about 1 cup of semi-sweet chocolate chips. They melt into gooey pockets of deliciousness that are just divine. If you’re a fan of nuts, ½ cup of chopped walnuts or pecans adds a lovely crunch. For a more decadent version, you could even swirl in some sweetened condensed milk or a simple cinnamon-sugar mixture before baking. Sometimes, if I’m feeling extra adventurous, I’ll mix a couple of tablespoons of cocoa powder with a bit of sugar and swirl that in for a chocolate-zucchini bread. The possibilities are endless!
For the Glaze:
This glaze is optional, but oh-so-worth it. It’s my secret weapon for taking this bread from delicious to absolutely irresistible. You’ll need about 1 cup of powdered sugar. For the liquid, I usually use about 2 tablespoons of milk – whole milk makes it extra creamy, but any kind works. A splash of vanilla extract (about ½ teaspoon) adds a lovely fragrance and depth. If you like a tangier glaze, you can swap some of the milk for lemon juice. I’ve also found that using melted butter instead of milk for part of the liquid creates a richer, almost caramel-like glaze. It’s all about personal preference!
Step-by-Step Instructions
Step 1: Preheat & Prep Pan
Alright, first things first, let’s get our oven fired up to 350°F (175°C). This is a pretty standard temperature for most quick breads and ensures even baking. While the oven is doing its thing, grab a standard loaf pan – a 9×5 inch pan is perfect. You want to grease it really well. I usually use butter or cooking spray, and then I dust it with a little bit of flour. This helps prevent any sticking, and nobody wants their beautiful zucchini bread stuck to the pan! You can also line it with parchment paper, leaving a little overhang on the sides, which makes lifting it out a breeze. It’s these little steps that save you headaches later.
Step 2: Mix Dry Ingredients
In a large mixing bowl, whisk together your all-purpose flour, granulated sugar (and brown sugar, if using), baking soda, baking powder, cinnamon, nutmeg, and salt. Give it a good whisk until everything is evenly distributed. This is important because it ensures your leavening agents are spread throughout, so you don’t get weird pockets of baking soda. I like to sift my flour sometimes, especially if it’s been sitting in the pantry for a while, just to make sure there are no lumps and it’s nice and aerated. You should have a lovely, fragrant mixture of dry ingredients ready to go.
Step 3: Mix Wet Ingredients
In a separate medium bowl, whisk together your eggs. I like to use large eggs, and usually two are perfect for a standard loaf. Then, I stir in some melted butter or vegetable oil. About ½ cup of either works wonders. For that extra moistness, I also add about ½ cup of buttermilk or plain yogurt. I swear by buttermilk for its tang and tenderness, but Greek yogurt is an excellent substitute and makes it super rich. You can even use milk with a splash of vinegar or lemon juice mixed in – it acts just like buttermilk. A teaspoon of vanilla extract is a must for me here; it just rounds out all those flavors beautifully. Whisk it all together until it’s smooth and well combined.
Step 4: Combine
Now, for the crucial part: bringing it all together. Pour your wet ingredients into the bowl with the dry ingredients. Here’s where you need to be gentle. Mix everything with a spatula or wooden spoon *just* until there are no dry streaks of flour visible. Seriously, stop mixing as soon as you don’t see any dry bits. Overmixing is the enemy of tender quick breads; it develops the gluten too much and can lead to a tough loaf. A few little lumps are totally fine – actually, they’re preferable! Once it’s just combined, gently fold in your shredded zucchini and any add-ins like chocolate chips or nuts. Make sure the zucchini is distributed evenly, but again, don’t go crazy with the mixing.
Step 5: Prepare Filling
This step is technically part of Step 4, but if you’re doing something like a cinnamon-sugar swirl, this is where you’d prep that. For the cinnamon-sugar swirl, you’d typically mix about 2 tablespoons of sugar with 1 teaspoon of cinnamon. If you’re adding chocolate chips or nuts, just have them ready to fold in. If you want to get fancy with a cream cheese swirl, you’d mix softened cream cheese with a little sugar and vanilla and dollop it in layers. For this recipe, we’re keeping it simple with chocolate chips folded directly into the batter, but you *could* reserve some of the batter and swirl it with a bit of melted chocolate if you want to get artistic!
Step 6: Layer & Swirl
Spoon the batter evenly into your prepared loaf pan. If you’re doing a swirl, now’s the time to do it. For a cinnamon-sugar swirl, you’d dollop spoonfuls of the cinnamon-sugar mixture over the top of the batter and then use a knife or skewer to gently swirl it through. Don’t over-swirl, or you’ll muddy the flavors too much. If you’re just adding chocolate chips or nuts, simply ensure they are evenly distributed throughout the batter. Smooth the top of the batter gently with your spatula, so it’s relatively even, which will help it bake uniformly.
Step 7: Bake
Pop that beautiful pan into your preheated oven. Bake for about 50-65 minutes. The exact time can vary depending on your oven, so start checking around the 50-minute mark. You’ll know it’s done when a toothpick inserted into the center comes out clean, or with just a few moist crumbs attached. The top should be a beautiful golden brown. If the top starts browning too quickly before the inside is cooked, you can loosely tent it with aluminum foil for the last 15-20 minutes of baking. Resist the urge to open the oven door too often, as this can cause the bread to sink!
Step 8: Cool & Glaze
Once it’s done, take that glorious loaf out of the oven and let it cool in the pan for about 10-15 minutes. This allows it to set up a bit and makes it easier to remove. Then, carefully invert the pan onto a wire rack to release the bread. Let it cool completely on the wire rack before you even think about glazing it. If you try to glaze a warm loaf, the glaze will just melt and slide right off. For the glaze, whisk together the powdered sugar with your milk (or other liquid) and vanilla until smooth. You want a consistency that’s thick enough to coat the bread but thin enough to drizzle. If it’s too thick, add a tiny bit more liquid; if it’s too thin, add a bit more powdered sugar. Drizzle it generously over the completely cooled loaf. Let the glaze set for about 15-20 minutes before slicing.
Step 9: Slice & Serve
Once the glaze has set, it’s time for the best part! Use a serrated knife for clean slices. I like to serve this zucchini bread at room temperature. It’s perfect on its own, or with a nice cup of coffee or tea. The slices should be moist, tender, and absolutely bursting with flavor. It’s the kind of bread that makes a simple moment feel special. Enjoy every single crumb!
What to Serve It With
This zucchini bread is so incredibly versatile, it fits into pretty much any meal or craving you might have! For a classic breakfast, it’s just heavenly with a steaming mug of coffee. I love to have a slice while the coffee is brewing on a Saturday morning – pure bliss. It makes for an easy, yet impressive, addition to a brunch spread. I’ll often serve it alongside some fresh fruit salad, maybe some scrambled eggs or a light quiche. The sweetness of the bread is a lovely contrast to savory dishes. As a dessert, it’s surprisingly elegant. I sometimes warm up a slice slightly and serve it with a dollop of whipped cream or a small scoop of vanilla bean ice cream. The warm bread and cold cream are just divine! And for those cozy snack times, when you just need something comforting, it’s the absolute best. A glass of milk, a good book, and a slice of this zucchini bread are all you need. My family also loves it as an after-school treat. It’s a healthier-ish option than cookies and always a hit!
Top Tips for Perfecting Your Zucchini Bread
I’ve made this zucchini bread more times than I can count, and along the way, I’ve picked up a few tricks that I think really make a difference. First, about that zucchini prep: I always grate it on the large holes of a box grater, and I *don’t* squeeze out the moisture. That liquid is pure moisture gold for the bread! Some recipes call for squeezing, but I’ve found it makes the bread drier. Just shred it and toss it right into the batter. When it comes to mixing, remember my mantra: don’t overmix! Seriously, just combine the wet and dry ingredients until they’re *just* married. A few small lumps in the batter are your friends. Overmixing develops gluten, which is what makes cakes and muffins tough, and we want tender, fluffy zucchini bread here. For the swirl, if you decide to go that route, go easy. You want distinct swirls, not a muddy mess. I usually do just one or two passes with a knife. If you’re using chocolate chips, the mini ones distribute more evenly, but I love the big chunks from regular semi-sweet. For ingredient swaps, if you’re out of buttermilk, the milk-and-vinegar trick works like a charm. And for a dairy-free version, I’ve had great success using a good quality unsweetened plant-based milk and a neutral oil like canola or melted coconut oil. I’ve even tested this with almond milk and it actually made it even creamier! When it comes to baking, ovens can be so finicky. If yours tends to run hot, keep an eye on it and don’t be afraid to tent it with foil if the top is browning too fast. I always do a toothpick test; it’s the most reliable way to know it’s done. And for the glaze, don’t be afraid to play with the consistency. Some people prefer a thinner drizzle, others like a thicker, more frosting-like glaze. It’s totally up to you!
Storing and Reheating Tips
This zucchini bread is so good, it rarely lasts long in my house, but when it does, I’ve got a few go-to methods for keeping it fresh. At room temperature, it’s best stored in an airtight container or well-wrapped in plastic wrap. It stays wonderfully moist for about 2-3 days that way. If it’s really warm where you are, or if you want it to last a bit longer, the refrigerator is your friend. Wrap it tightly in plastic wrap, then in foil, or place it in a sealed container. It’ll keep well in the fridge for up to a week, though I find the texture is best within the first 4-5 days. For longer storage, freezing is your best bet. Wrap the completely cooled loaf (or individual slices) tightly in plastic wrap, then in a layer of aluminum foil, and finally place it in a freezer-safe bag. It can stay frozen for up to 3 months. To reheat, I usually just let a slice thaw at room temperature for a bit, or you can gently warm it in a toaster oven or microwave for just a few seconds – be careful not to overheat, or it can become tough. If you’ve glazed your bread, it’s best to add the glaze *after* reheating any leftover slices, as the glaze can get sticky and messy when frozen and reheated. So, if you plan to freeze, consider glazing smaller portions just before serving.
Frequently Asked Questions
Final Thoughts
This zucchini bread really is a labor of love, but in the best possible way. It’s the kind of recipe that brings comfort and joy, and it’s so rewarding to see people’s faces light up when they take their first bite. It’s more than just a recipe; it’s a memory, a tradition, and a little piece of my kitchen shared with yours. It’s proof that simple ingredients, treated with a little care, can create something truly special. If you loved this, you might also enjoy my other quick bread recipes, like my classic banana bread or my lemon blueberry loaf. They’re all made with the same philosophy of simple, delicious, and satisfying baking. I truly hope you give this zucchini bread a try. It’s perfect for any occasion, from a cozy morning treat to a delightful dessert. I can’t wait to hear how yours turns out! Please leave a comment below and tell me your favorite additions or any twists you put on it. Happy baking!
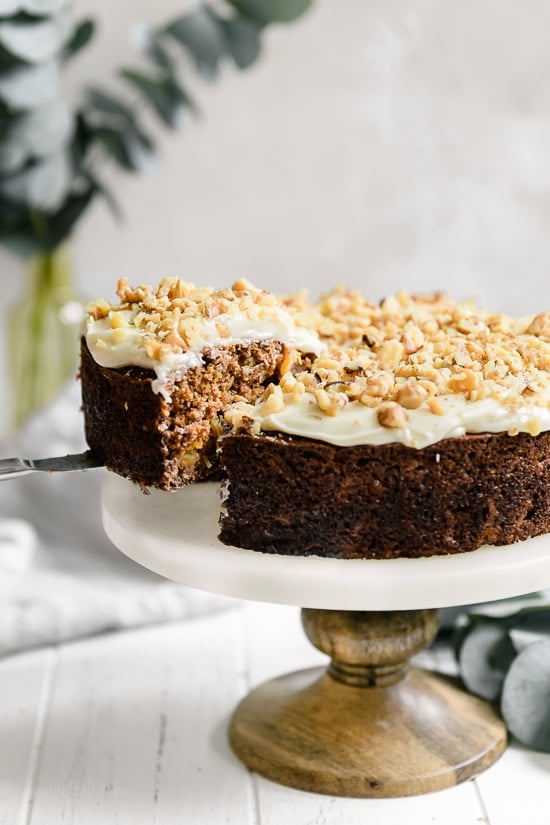
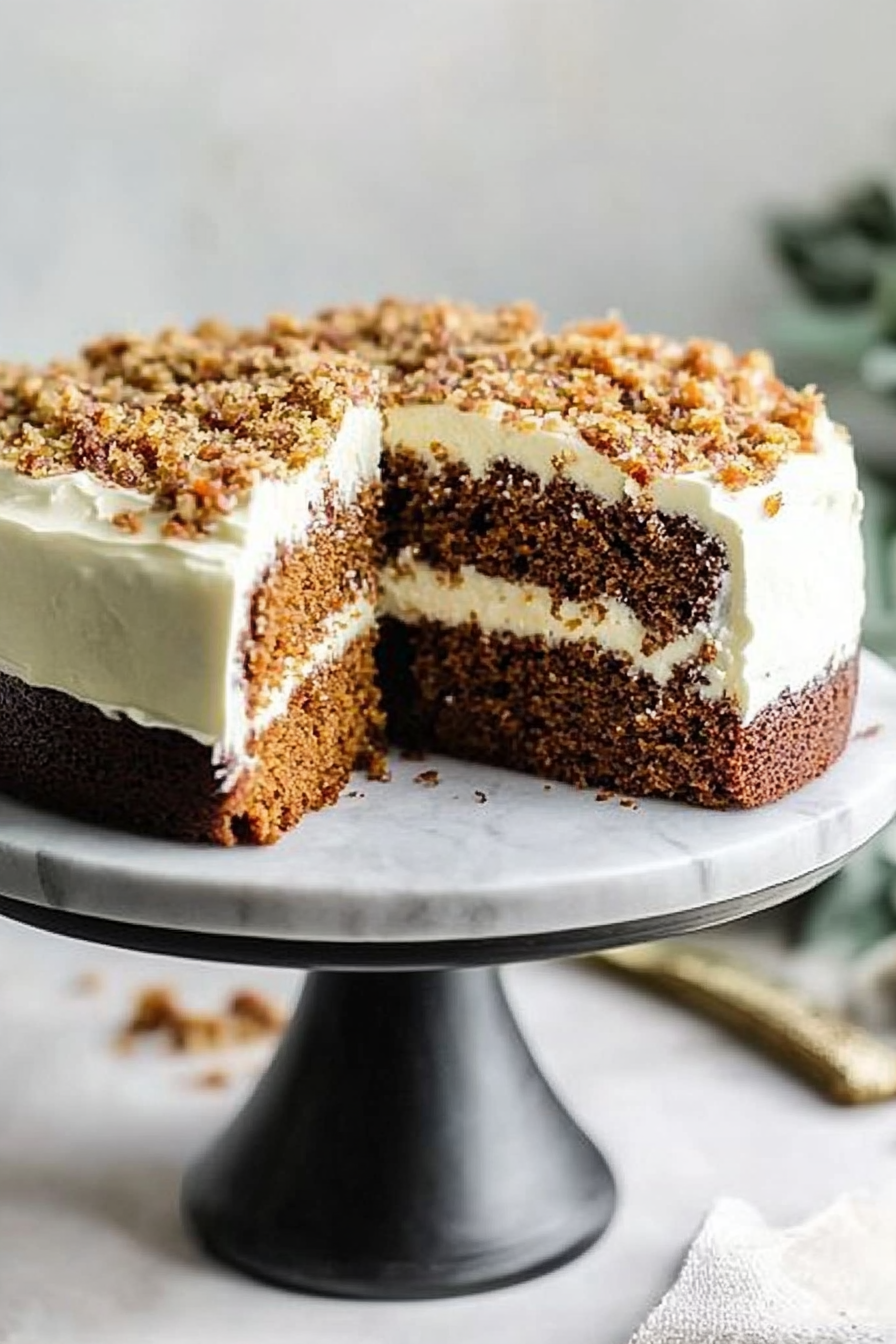
moist carrot cake
Ingredients
Method
- Preheat oven to 350F (175°C).
- In a large bowl, combine all-purpose flour, whole wheat flour, granulated sugar, coconut, baking soda, salt, and ground cinnamon; stir well with a whisk.
- In a medium bowl, combine canola oil, large eggs, and vanilla extract; stir well.
- Add grated carrots and drained crushed pineapple to the wet ingredients; mix well.
- Fold the wet ingredients into the dry ingredients. The batter will be stiff and dry at first, but continue folding until it comes together. Fold in 1/4 cup of the chopped walnuts.
- Spoon the batter into an 8" x 3" cake pan coated with cooking spray.
- Bake at 350°F (175°C) for about 40-50 minutes, or until a wooden toothpick inserted in the center comes out clean and the cake is pulling away from the sides of the pan. Cool cake completely on a wire rack.
- To prepare the frosting, beat together cream cheese, powdered sugar, and vanilla extract until smooth. Spread frosting over the top of the cooled cake.
- Garnish with the remaining chopped walnuts.