You know those recipes that just *feel* like home? The ones that smell amazing baking, taste even better, and have everyone asking for the secret? Well, I’ve got one of those for you today, and trust me, it’s a good one. This isn’t just any zucchini bread; it’s *my* zucchini bread. It’s the one that disappeared in minutes at my house, the one my kids bug me to make on a whim, and the one that’s a total lifesaver on busy nights when I need a little something sweet without a whole lot of fuss. It’s got this incredibly moist crumb, a hint of cinnamon and spice that’s just *perfect*, and a tender texture that’s almost cake-like. Honestly, if you’ve ever been intimidated by baking with zucchini, think of this as your friendly invitation to jump in. It’s even better than a classic banana bread, in my humble opinion, because it’s just so incredibly forgiving and always turns out beautifully.
What is Zucchini bread?
So, what exactly *is* zucchini bread? At its heart, it’s a quick bread, meaning it doesn’t rely on yeast for leavening. Instead, we use things like baking soda and baking powder to get that lovely rise. The “zucchini” part, well, that’s the star! Grated zucchini gets mixed into the batter, and here’s the magic: it practically disappears, adding incredible moisture and a tender crumb without imparting any strong veggie flavor. Seriously, you’d never guess there was zucchini in here unless I told you. It’s essentially a super moist, slightly sweet, spiced cake or quick bread that’s made even better with the addition of that humble squash. It’s one of those brilliant culinary inventions where a common vegetable adds something truly special, transforming a simple batter into something spectacular. Think of it as a dessert that’s secretly trying to be a little bit healthy, and I am totally here for that!
Why you’ll love this recipe?
Okay, let me tell you why this zucchini bread is going to become your new best friend in the kitchen. First off, the FLAVOR! It’s warm, comforting, and has just the right amount of sweetness. The cinnamon and nutmeg dance together beautifully, and if you’re feeling adventurous, a little pinch of cloves or ginger takes it to another level. But honestly, the classic combo is pure perfection. Then there’s the SIMPLICITY. This is a dump-and-mix kind of situation for the most part. No fancy techniques, no hours spent in the kitchen. You can have this mixed up and in the oven in about 15 minutes flat. It’s my go-to when I’ve got a surprise visitor or when that 3 pm craving hits. And let’s talk COST-EFFICIENCY. Zucchini is often super affordable, especially when it’s in season. This recipe uses basic pantry staples, so it won’t break the bank. But what I truly adore about this recipe is its VERSATILITY. It’s fantastic on its own, but a drizzle of cream cheese frosting? Oh my goodness. Or a simple dusting of powdered sugar? Divine. It’s a recipe that works for breakfast, a mid-morning snack, an afternoon pick-me-up, or even a light dessert. Compared to, say, a fussy layer cake, this is pure joy with minimal stress. It’s like the more approachable, incredibly delicious cousin of a pound cake that’s always happy to be served.
How do you make Zucchini bread?
Quick Overview
The process is wonderfully straightforward: we’ll combine our dry ingredients, whisk together the wet ingredients, then bring them together with the grated zucchini. A quick mix, pour into your prepared pan, and bake until golden and a toothpick comes out clean. The result is a deeply flavorful, incredibly moist loaf that smells like pure comfort. It’s honestly one of the easiest baked goods to get right, even if you’re new to baking.
Ingredients
For the Main Batter:
2 cups all-purpose flour: I usually just grab the regular kind from the grocery store. No need for anything fancy here, though I have tested it with a good quality 1:1 gluten-free flour blend and it turned out surprisingly well!
1 teaspoon baking soda: This is crucial for lift. Make sure yours isn’t expired!
1/2 teaspoon baking powder: Works with the baking soda to give us that perfect rise.
1/2 teaspoon salt: Balances out all the sweetness and brings out the flavors.
1 teaspoon ground cinnamon: This is my go-to, but feel free to bump it up to 1.5 teaspoons if you’re a big cinnamon lover!
1/4 teaspoon ground nutmeg: Just a hint to add that warm, cozy depth. Freshly grated is amazing if you have it!
2 cups grated zucchini: About 2-3 medium zucchini. I don’t bother peeling them; the skin adds a little extra color and nutrients. Just make sure to grate it fairly finely. Squeeze out as much liquid as you can!
3 large eggs: At room temperature is best for a more even batter.
1 cup granulated sugar: You can play with this a little. If your zucchini is particularly sweet, you might even get away with a bit less.
1/2 cup packed brown sugar: This is my secret for extra moisture and that lovely caramel note!
3/4 cup vegetable oil: Or any neutral-tasting oil like canola or grapeseed. You can also use melted and slightly cooled butter for a different flavor, but oil keeps it super moist.
1/4 cup milk (any kind!): I’ve used whole milk, almond milk, and even oat milk, and they all work. Almond milk actually made it surprisingly creamy!
1 teaspoon vanilla extract: The absolute essential for any good bake.
For the Filling (Optional, but highly recommended!):
1/2 cup chopped walnuts or pecans: Toasted for extra flavor!
1/2 cup chocolate chips (semi-sweet or dark): My kids are obsessed with these. I use them every time.
2 tablespoons granulated sugar mixed with 1 teaspoon cinnamon: For sprinkling between layers.
For the Glaze (Optional, but oh-so-good!):
1 cup powdered sugar: Sifted, if you’re feeling fancy.
2-3 tablespoons milk or cream: Start with 2 and add more until it’s the consistency you like.
1/2 teaspoon vanilla extract: Or any other flavor extract you fancy!
Step-by-Step Instructions
Step 1: Preheat & Prep Pan
First things first, get your oven preheated to 350 degrees F (175 degrees C). Then, grab a standard loaf pan (about 9×5 inches) and grease it really well. I like to use butter or cooking spray. For extra insurance against sticking and easy removal, I also like to line it with parchment paper, leaving a little overhang on the sides. This is a trick I learned after one too many loaves got stuck – never again!
Step 2: Mix Dry Ingredients
In a large bowl, whisk together your flour, baking soda, baking powder, salt, cinnamon, and nutmeg. Give it a good whisk to make sure everything is evenly distributed. This is important for an even rise. You want to make sure there are no clumps of baking soda or powder hanging out.
Step 3: Mix Wet Ingredients
In a separate medium bowl, crack in your eggs. Add the granulated sugar and brown sugar. Whisk these together until they’re well combined and slightly lighter in color. Then, pour in your vegetable oil, milk, and vanilla extract. Whisk again until everything is smooth and emulsified.
Step 4: Combine
Now for the exciting part! Pour the wet ingredients into the bowl with the dry ingredients. Add your well-squeezed grated zucchini. Using a spatula or a wooden spoon, gently fold everything together until *just* combined. Be careful not to overmix! A few streaks of flour are okay; they’ll disappear during baking. Overmixing can lead to a tough bread, and we want this to be wonderfully tender.
Step 5: Prepare Filling
If you’re using any additions like nuts or chocolate chips, now’s the time to gently fold them into the batter. For that extra layer of flavor and texture, I sometimes like to mix my chopped nuts and chocolate chips with a tablespoon of the dry ingredients before adding them. It helps them distribute more evenly and prevents them from sinking.
Step 6: Layer & Swirl
Pour about half of the batter into your prepared loaf pan. If you’re adding the cinnamon-sugar swirl, sprinkle half of that mixture over the batter. Then, add the rest of the batter, top with the remaining cinnamon-sugar if you used it. If you’re adding extra chocolate chips or nuts on top for decoration, do that now. For a pretty swirl effect, you can gently drag a knife or skewer through the batter.
Step 7: Bake
Pop that loaf pan into your preheated oven. Bake for 50-65 minutes. The exact time will depend on your oven, of course. You’ll know it’s done when the top is golden brown and a toothpick inserted into the center comes out clean (or with a few moist crumbs, but no wet batter).
Step 8: Cool & Glaze
Once it’s baked, take the loaf pan out of the oven and let it cool in the pan for about 10-15 minutes. This is important for letting it set up. Then, carefully lift it out using the parchment paper overhang and place it on a wire rack to cool completely. Patience is key here! You want it to cool down before you attempt to glaze it, otherwise, the glaze will just melt and run off.
Step 9: Slice & Serve
Once completely cool, whisk together your powdered sugar, milk, and vanilla until you have a smooth, pourable glaze. Drizzle it over the top of the loaf. Let the glaze set for a few minutes, then slice and enjoy! The best way to slice it is with a serrated knife for clean cuts. Serve it at room temperature for the perfect moist crumb.
What to Serve It With
This zucchini bread is so versatile, it’s practically its own food group! For a simple and delightful BREAKFAST, I love it toasted and slathered with a little butter. It pairs perfectly with a hot cup of coffee or a refreshing glass of orange juice. The warm spices are just the thing to wake you up. For a more elegant BRUNCH spread, I’ll serve slices with a dollop of Greek yogurt and some fresh berries. It looks so pretty on a platter and feels a little more special. If you’re serving it as a DESSERT, a drizzle of cream cheese frosting or a scoop of vanilla bean ice cream is pure bliss. It’s a wonderful lighter option after a heavy meal. And for those COZY SNACKS in the afternoon, a slice with a glass of milk is pure comfort. My family loves it with a mug of hot chocolate when it’s chilly outside. Honestly, it’s good with pretty much anything warm and comforting!
Top Tips for Perfecting Your Zucchini Bread
I’ve made this zucchini bread more times than I can count, and along the way, I’ve picked up a few tricks that I think you’ll find super helpful. First, **Zucchini Prep is key**. Don’t skip squeezing out the excess moisture from the grated zucchini! Use your hands, a clean kitchen towel, or a fine-mesh sieve. Too much liquid will make your bread soggy and dense, and we want that lovely moist-but-not-mushy texture. For the **Mixing Advice**, remember that “just combined” is your mantra. Overmixing gluten in flour develops it, leading to a tougher bread. So, fold gently until you don’t see large pockets of dry flour. The **Swirl Customization** is all about having fun! If you’re not using the cinnamon-sugar swirl, you can do the same with mini chocolate chips or chopped nuts between layers for pockets of deliciousness. For **Ingredient Swaps**, if you’re out of milk, a little bit of yogurt or sour cream can add extra tang and moisture. And if you don’t have brown sugar, you can use an extra 1/4 cup of granulated sugar and a tablespoon of molasses for a similar effect. When it comes to **Baking Tips**, always do the toothpick test! Ovens can be finicky. If the top is browning too quickly before the inside is cooked, you can loosely tent it with aluminum foil. And for **Glaze Variations**, if you prefer a thinner glaze, just add more milk. For a richer flavor, use heavy cream. You can also add a touch of lemon zest or a different extract, like almond, for a fun twist. Trust me, these little things make a big difference!
Storing and Reheating Tips
This zucchini bread is wonderfully forgiving when it comes to storage. If you’re planning to enjoy it within a day or two, **Room Temperature Storage** is perfectly fine. Just wrap the cooled loaf tightly in plastic wrap or place it in an airtight container. It usually stays fresh and moist for about 2-3 days like this. If you know you won’t get through the whole loaf that quickly, **Refrigerator Storage** is your best bet. Wrap it well in plastic wrap, then maybe in foil, or pop it into an airtight container. It’ll keep beautifully for up to a week, and the flavors often deepen even more. When you’re ready to enjoy a slice that’s been in the fridge, you can just eat it at room temperature, or pop it in the toaster for a few seconds to warm it up. For **Freezer Instructions**, this recipe freezes like a dream! Wrap the completely cooled loaf (or even individual slices) tightly in plastic wrap, then in aluminum foil, and place it in a freezer-safe bag. It can stay in the freezer for up to 3 months. To thaw, remove the wrapping and let it come to room temperature on the counter for a few hours. For a little extra warmth, you can reheat slices in a low oven (around 300°F or 150°C) for about 10-15 minutes. The **Glaze Timing Advice** is simple: If you’re planning to freeze the bread, it’s best to glaze it *after* thawing. Glaze applied before freezing can sometimes become sticky or discolored.
Frequently Asked Questions
Final Thoughts
So there you have it – my absolute favorite zucchini bread recipe. It’s more than just a recipe; it’s a little slice of comfort that always brings smiles to my table. It’s proof that simple ingredients can create something truly special, and that baking can be incredibly rewarding without being complicated. The moist crumb, the perfect spice notes, the sheer ease of it all… it just checks all the boxes for me. If you love this recipe, you might also enjoy my Easy Banana Bread or my incredibly popular Blueberry Muffin recipe – they have that same down-to-earth, delicious vibe! I really hope you give this zucchini bread a try. I can’t wait to hear how yours turns out, and if your family loves it as much as mine does! Don’t forget to leave a comment and let me know what you think, or share any of your own amazing additions!
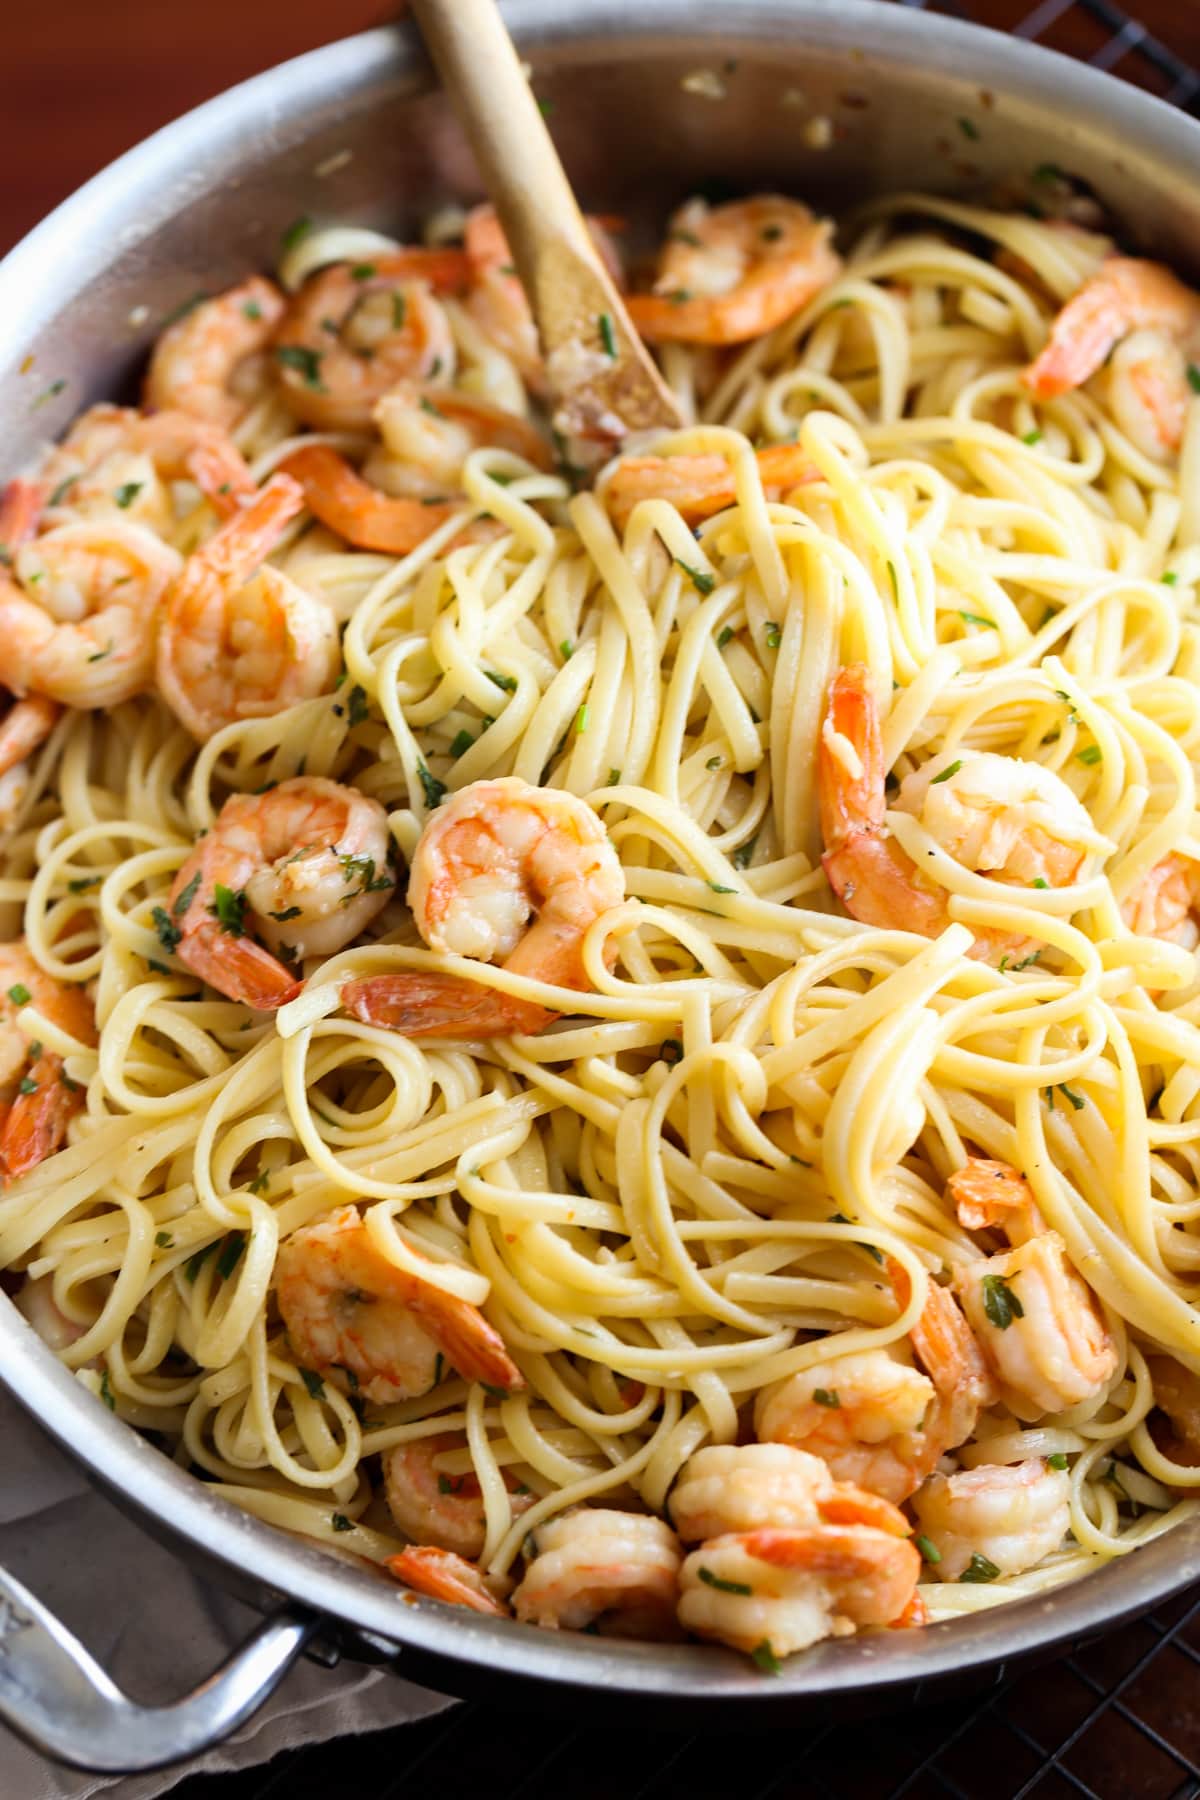
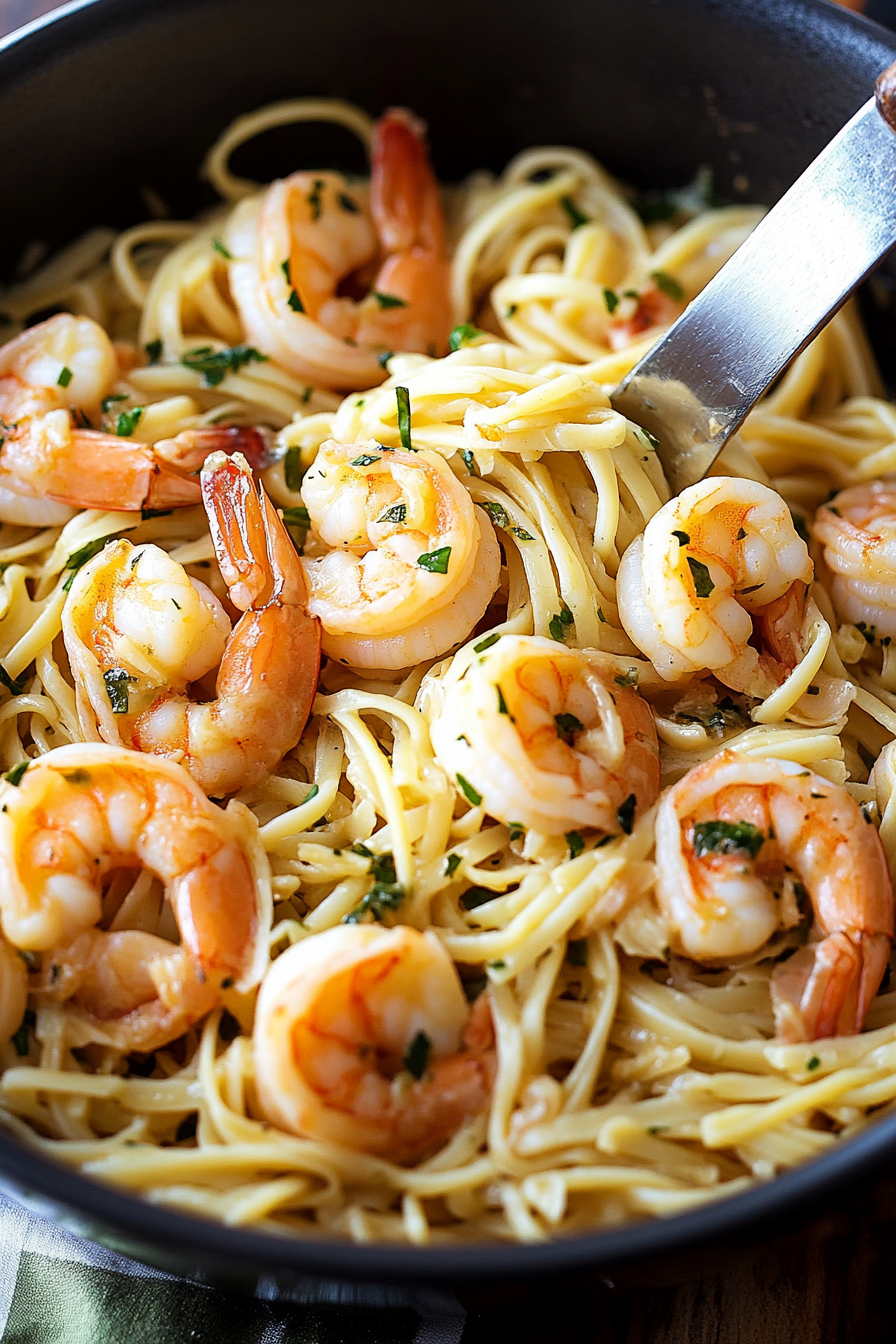
Shrimp Scampi Pasta
Ingredients
Method
- Cook the linguine according to package directions.
- While the pasta is cooking, heat 5 tablespoons of butter and olive oil in a large skillet on medium heat.
- Add in the onion and cook for 5 minutes, or until softened. Then stir in the garlic and cook for an additional minute.
- Add the shrimp into the pan, season with salt, black pepper, and crushed red pepper and cook for 4 – 6 minutes or until pink and cooked through.
- Stir in the lemon juice and chicken broth, bring to a boil and then reduce heat to low.
- Add the cooked pasta into the skillet along with the remaining 3 tablespoons of butter. Use tongs or a spoon to coat the pasta in the shrimp mixture.
- Garnish with fresh parsley, add more salt and pepper if desired and serve immediately.