You know those days when your garden is just overflowing with zucchini? Or you pop into the farmer’s market and suddenly have a surplus of the green stuff? Yeah, me too! For years, I’d stare at it, wondering what on earth to do with it all besides more zucchini noodles. Then, my Grandma Eleanor, bless her heart, shared her absolute favorite zucchini bread recipe with me. She called it her “secret weapon,” and honestly, it’s been a lifesaver for me ever since. This isn’t just any zucchini bread; it’s incredibly moist, perfectly spiced, and has this wonderful, comforting flavor that just makes you want to curl up with a cup of tea. It’s so good, in fact, that my own kids, who can be a bit picky, actually ask for this regularly. It’s a step above your average quick bread, and I honestly think it rivals some of the best coffee cakes I’ve ever had, but it’s so much simpler to whip up.
What is Grandma Eleanor’s Zucchini Bread?
So, what exactly makes Grandma Eleanor’s zucchini bread so special? Well, it’s a wonderfully moist and flavorful quick bread that heroically uses up that abundant summer zucchini. Think of it as your cozy, go-to treat that’s perfect for breakfast, a mid-afternoon snack, or even a simple dessert. It’s essentially a classic quick bread batter – flour, sugar, eggs, oil – but with finely grated zucchini mixed in. The zucchini might sound a bit unusual, but trust me, it’s the magic ingredient that keeps the bread unbelievably tender and moist without adding any overpowering vegetable flavor. You won’t even know it’s there, other than for that incredible texture and the fact that it uses up a whole heap of zucchini! It’s a testament to how simple, humble ingredients can create something truly spectacular.
Why you’ll love this recipe?
Okay, let’s talk about why this recipe is going to become your new best friend in the kitchen. First off, the flavor is just out of this world. It’s got that perfect balance of sweetness from the sugar and a warm, inviting spice blend – cinnamon, nutmeg, and a hint of cloves. It smells absolutely divine when it’s baking, and I swear, the aroma alone brings everyone in my house running to the kitchen! Secondly, and this is a huge one for me, it’s ridiculously simple to make. You don’t need any fancy equipment, just a bowl, a whisk, and a grater. Most of the time, I can have it mixed up and in the oven in about 15 minutes. It’s a lifesaver on busy mornings or when unexpected guests pop by. Financially, it’s incredibly budget-friendly too. Zucchini is usually pretty cheap, and the rest of the ingredients are pantry staples. Plus, it’s super versatile! You can add nuts, chocolate chips, or even a swirl of cream cheese. What I love most about this recipe is how it takes a simple ingredient like zucchini and transforms it into something so decadent and comforting. It’s a fantastic way to get some extra veggies into the family without them even realizing it, which is a win-win in my book! It’s a far cry from those dry, crumbly quick breads you sometimes encounter.
How do I make Zucchini bread?
Quick Overview
Making this zucchini bread is honestly a breeze. You’ll start by prepping your zucchini and pan, then mix your dry ingredients, followed by your wet ingredients. Combine them gently, stir in that grated zucchini, pour it into your prepared pan, and bake until golden and a toothpick comes out clean. The beauty of this recipe is its forgiving nature; it’s hard to mess up! That zucchini ensures you get a wonderfully moist crumb every single time. It’s perfect for when you’re craving something a little sweet but don’t want to commit to a whole cake-baking project.
Ingredients
For the Main Batter:
This is where the magic starts! I always opt for all-purpose flour, but I’ve heard from friends that a good gluten-free blend works too (more on that later!). Don’t skip the leavening agents; they’re crucial for that lovely lift. And the sugar? It’s not just for sweetness; it helps create that tender crumb. Using a neutral oil like vegetable or canola oil keeps it super moist. I’ve tried it with melted butter, and while it’s good, the oil truly takes the moistness to another level. For the eggs, just regular large eggs will do the trick. And of course, the star: fresh zucchini! You’ll need about two medium-sized ones, grated. I find that grating them on the large holes of a box grater works best. If you have access to really fresh zucchini, it makes a difference. Some people like to squeeze out the moisture, but Grandma Eleanor always said to leave it in – it’s what makes it so moist!
For the Filling (Optional, but highly recommended!):
This is where you can really customize it. My personal favorite is a simple mix of brown sugar, cinnamon, and chopped pecans. The brown sugar adds a caramel-like depth, and the pecans give a wonderful crunch. Some people swear by adding chocolate chips, which is also divine, or even a handful of walnuts. If you’re feeling adventurous, a swirl of cream cheese mixed with a little sugar and vanilla extract before baking is absolute heaven. The key is to not overfill it, so you get distinct layers of flavor.
For the Glaze (Again, optional, but SO good!):
This is a simple powdered sugar glaze, but it’s the perfect finishing touch. You want it to be thick enough to coat but not so thick that it’s hard to drizzle. A splash of milk or even lemon juice can thin it out if you go too heavy on the powdered sugar. Some folks like to add a little vanilla extract to the glaze, which is lovely. If you’re making a chocolate bread, a chocolate ganache is also a fantastic option!
Step-by-Step Instructions
Step 1: Preheat & Prep Pan
Alright, first things first! Preheat your oven to 350°F (175°C). This ensures it’s nice and hot when your batter is ready, so it bakes evenly from the get-go. Now, grab your loaf pan – a standard 9×5 inch one is perfect. Grease it really well with butter or cooking spray, and then dust it lightly with flour. This is your insurance policy against sticking! You can even line it with parchment paper if you’re really worried, leaving some overhang to help you lift it out later. I usually just stick to greasing and flouring, and it’s always come out like a dream.
Step 2: Mix Dry Ingredients
In a large mixing bowl, whisk together your all-purpose flour, baking soda, baking powder, salt, cinnamon, nutmeg, and a pinch of cloves if you’re using it. Give it a good whisk until everything is evenly distributed. This step is important because it ensures your leavening agents and spices are spread throughout the batter, so you don’t get pockets of just baking soda or a clump of cinnamon. You want that flavor to be consistent in every single bite!
Step 3: Mix Wet Ingredients
In a separate medium bowl, whisk together the granulated sugar, vegetable oil, and large eggs until well combined. Don’t worry about making it super fluffy; just get everything incorporated. If you’re adding any extracts like vanilla, now’s the time to stir them in. This is also where you’ll add your grated zucchini. Make sure you’ve grated it nice and fine – I usually do this while the oven preheats. Stir the zucchini into the wet ingredients. It might look a little watery, and that’s perfectly okay!
Step 4: Combine
Now for the fun part: bringing it all together! Pour the wet ingredients (including the zucchini) into the bowl with the dry ingredients. Using a spatula or wooden spoon, gently fold the ingredients together until *just* combined. Seriously, do not overmix! A few streaks of flour are fine; they’ll disappear as you fold. Overmixing develops the gluten in the flour, which can lead to a tough, dense bread, and we definitely don’t want that. We’re aiming for a tender, moist crumb, so gentle is the name of the game here.
Step 5: Prepare Filling
If you’re making a filling, now’s the time to get that ready. In a small bowl, combine your brown sugar, cinnamon, and chopped nuts or chocolate chips. Give it a quick stir. If you’re doing a cream cheese swirl, just mix your softened cream cheese with a tablespoon or two of sugar and a tiny splash of vanilla extract until smooth.
Step 6: Layer & Swirl
Pour about half of your batter into the prepared loaf pan. If you’re adding a filling, sprinkle about half of your filling mixture evenly over the batter. Then, spoon the remaining batter on top, spreading it gently to cover the filling. Sprinkle the rest of your filling over the top. If you’re doing a cream cheese swirl, dollop spoonfuls of the cream cheese mixture over the top layer of batter and then gently swirl it in with a knife or skewer, being careful not to mix it too much into the batter itself. You want visible swirls!
Step 7: Bake
Pop that pan into your preheated oven. Bake for about 50-65 minutes. The exact time will depend on your oven, so start checking around the 50-minute mark. How do you know it’s done? The top should be a beautiful golden brown, and when you insert a toothpick into the center (avoiding any pockets of filling), it should come out clean. If it’s still a little wet, give it another 5-10 minutes. I’ve learned that sometimes the center takes a little longer to bake through, especially if you’ve added a lot of zucchini or a rich filling.
Step 8: Cool & Glaze
Once it’s baked to perfection, carefully remove the loaf pan from the oven. Let it cool in the pan for about 10-15 minutes. This allows it to set up a bit before you try to remove it. Then, invert the pan onto a wire rack to release the bread. Let it cool completely on the wire rack before you even think about glazing it. If you glaze it while it’s warm, the glaze will just melt off! Once it’s completely cool, whisk together your powdered sugar, a splash of milk or lemon juice, and any flavorings until you get a smooth, drizzly consistency. Drizzle it over the top of the cooled bread. It looks so pretty!
Step 9: Slice & Serve
And there you have it! My Grandma Eleanor’s zucchini bread. Once the glaze has set a bit, slice it up and enjoy. I usually wait until the glaze is mostly set, but if I’m really impatient (which is often!), I’ll slice it even if it’s a little gooey. The best way to slice it is with a good serrated knife. Serve it at room temperature for the best texture. It’s absolutely delicious on its own, but a warm cup of coffee or tea is the perfect companion.
What to Serve It With
This zucchini bread is surprisingly versatile, which is another reason I love it so much! For a delightful breakfast, I love it toasted with a generous smear of butter. It’s also fantastic alongside a bowl of fresh fruit salad. If you’re making it for brunch, it’s a wonderful addition to a buffet spread. I often slice it a little thinner and arrange it on a platter with some other pastries. It pairs beautifully with a creamy yogurt dip or even a light fruit compote. As a dessert, it’s lovely warm, perhaps with a scoop of vanilla bean ice cream or a dollop of whipped cream. The warm bread and cold ice cream is just heavenly! And for those cozy snack times? It’s perfect just as it is, perhaps with a glass of milk for the kids or a robust cup of coffee for me. My family also loves it with a light dusting of powdered sugar if I’m not feeling the glaze. It’s such a comforting treat, and it always feels like a special occasion, even on a regular Tuesday.
Top Tips for Perfecting Your Zucchini Bread
After making this countless times, I’ve picked up a few tricks that I think really make a difference. First, zucchini prep is key. You don’t need to peel it; the skin adds color and nutrients. Just give it a good wash and grate it on the large holes of your box grater. Don’t wring out the excess moisture! Grandma Eleanor always said the moisture is what makes it so tender. If your zucchini is particularly watery, it might just bake a little faster. For mixing advice, remember that ‘gentle’ is the operative word. Overmixing is the number one culprit for tough quick breads. Fold until you just don’t see dry flour anymore. It’s better to have a few tiny streaks of flour than to overwork the batter. When it comes to the swirl customization, don’t be afraid to play! For a really defined swirl, try not to overmix the batter after adding the filling. For a more subtle blend, you can swirl a little more vigorously. If you’re feeling artsy, you can even use a toothpick to draw patterns. As for ingredient swaps, I’ve had great success with using half whole wheat flour and half all-purpose flour for a slightly heartier bread. If you’re going gluten-free, use a 1:1 gluten-free baking blend – it usually contains xanthan gum which helps mimic the texture. I tested this with almond milk instead of regular milk in the glaze, and it actually made it even creamier! For baking tips, always use the middle rack of your oven for even heat distribution. If you notice the top is browning too quickly before the inside is cooked, loosely tent a piece of foil over the top. And don’t be afraid to use that toothpick test – it’s your best friend for confirming doneness. For glaze variations, you can add a touch of lemon zest for a brighter flavor, or even a teaspoon of cocoa powder for a chocolate glaze. Just adjust the liquid to get the right consistency.
Storing and Reheating Tips
Proper storage is crucial to keep this delicious zucchini bread tasting fresh. At room temperature, it’s best stored in an airtight container or well-wrapped in plastic wrap. It will stay wonderfully moist for about 3-4 days. Honestly, though, it usually doesn’t last that long in my house! If you live in a warmer climate or your kitchen tends to be humid, it might be safer to store it in the refrigerator. Wrapped tightly, it can last for up to a week. The texture might be slightly firmer when cold, so I always recommend bringing it back to room temperature before serving, or giving it a quick toast. For freezer instructions, this bread freezes beautifully! Once completely cooled (and if you’ve glazed it, let the glaze set), wrap it tightly in a layer of plastic wrap, then a layer of aluminum foil, or pop it into a freezer-safe bag. It can stay frozen for up to 3 months. To thaw, just unwrap it and let it come to room temperature on the counter. If you froze it unglazed, you can glaze it once it’s thawed. If you froze it glazed, you can either thaw and enjoy as is, or carefully reheat it in a low oven (around 300°F/150°C) for about 10-15 minutes, uncovered, to refresh it. For glaze timing advice, it’s always best to glaze the bread *after* it has completely cooled. If you add the glaze to a warm loaf, it will melt and slide off. If you plan to freeze it, I usually recommend freezing it unglazed and adding the glaze after thawing for the best appearance.
Frequently Asked Questions
Final Thoughts
So, there you have it – Grandma Eleanor’s legendary zucchini bread. It’s more than just a recipe; it’s a little piece of my heart, a reminder of her love and her knack for making the simplest ingredients taste extraordinary. This recipe truly embodies what it means to cook with love and a bit of cleverness, transforming something you might otherwise have too much of into an absolute delight. It’s proof that baking doesn’t have to be complicated to be incredibly rewarding and delicious. It’s the perfect way to use up that garden abundance and share something truly special with your loved ones. If you’re a fan of moist, flavorful quick breads and want to try something that’s both comforting and surprisingly easy, you really must give this one a go. It’s genuinely one of my most treasured recipes, and I hope it becomes one of yours too! Give it a try, and I can’t wait to hear how yours turns out! And if you have any wonderful variations or tips of your own, please share them in the comments below – I’m always looking to learn more!
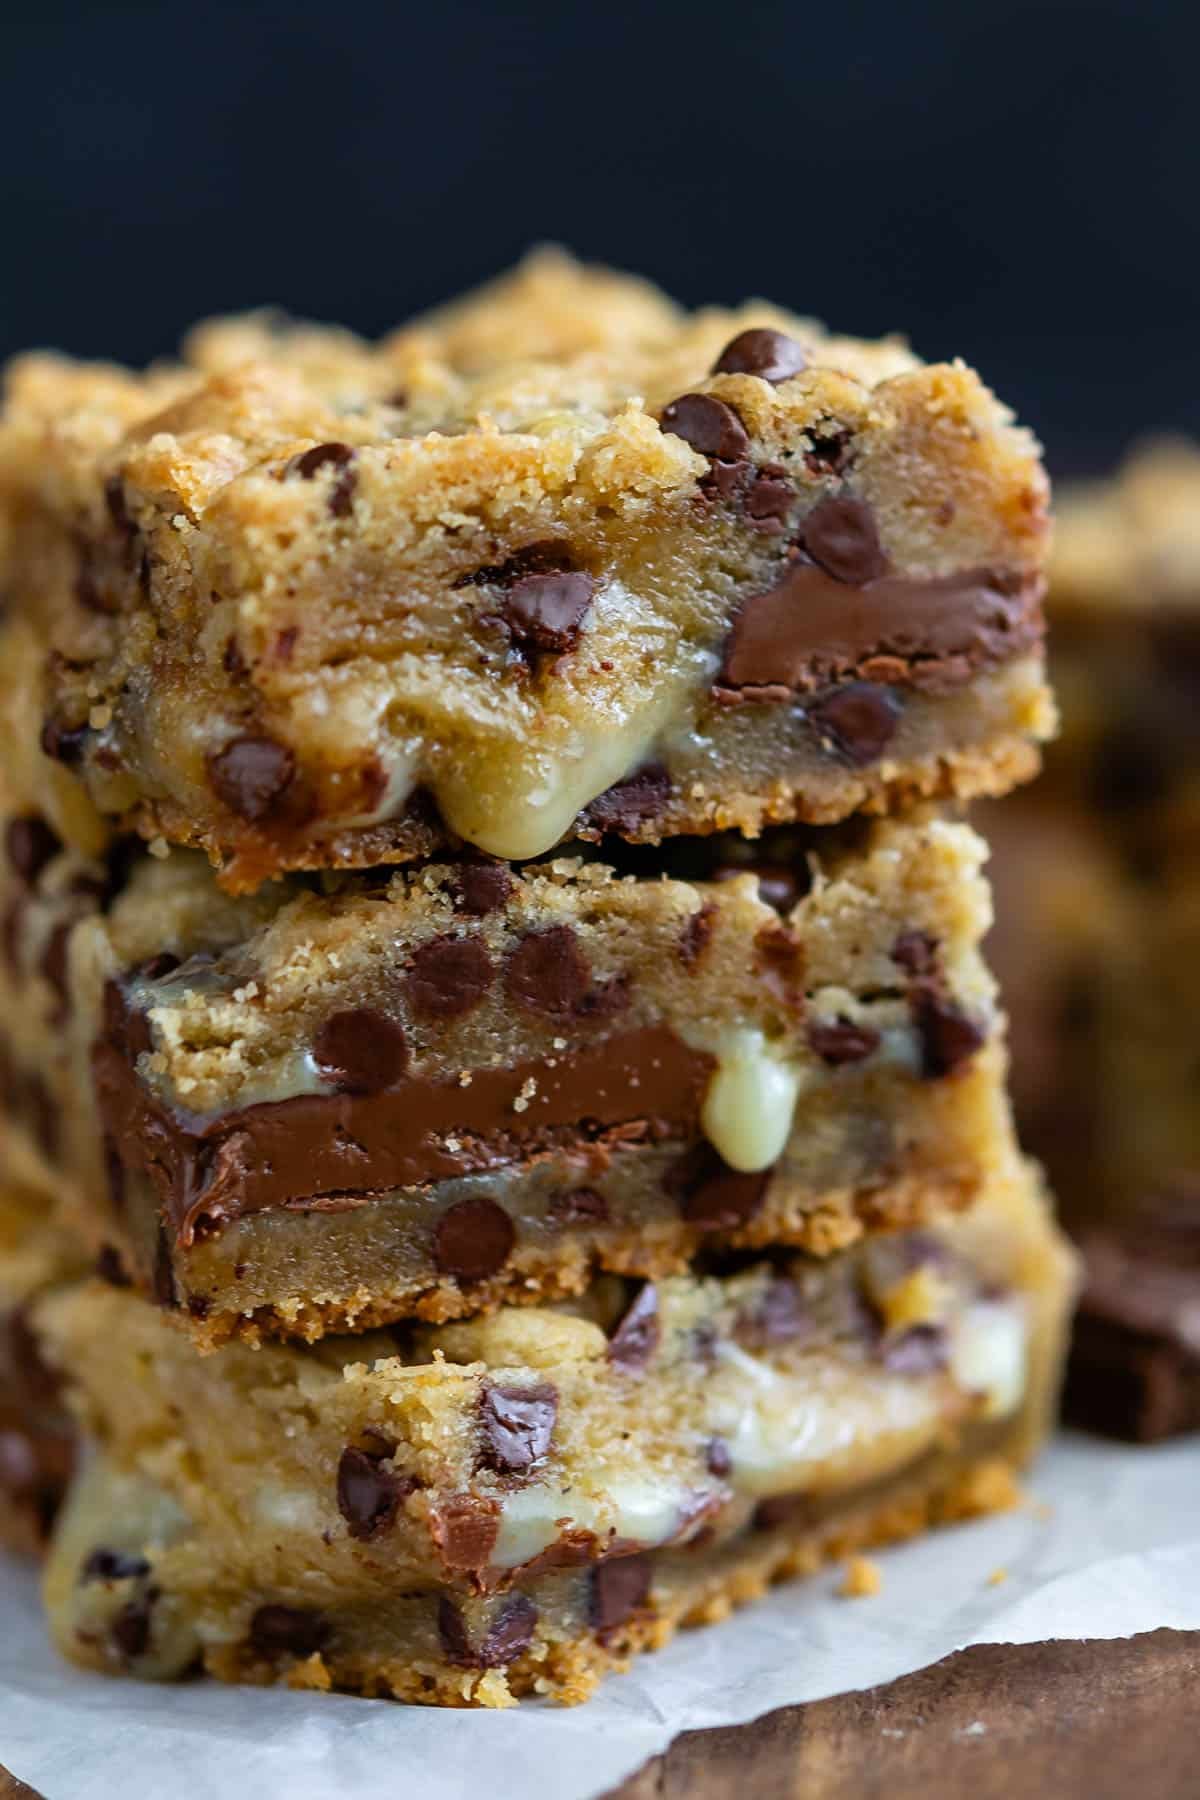
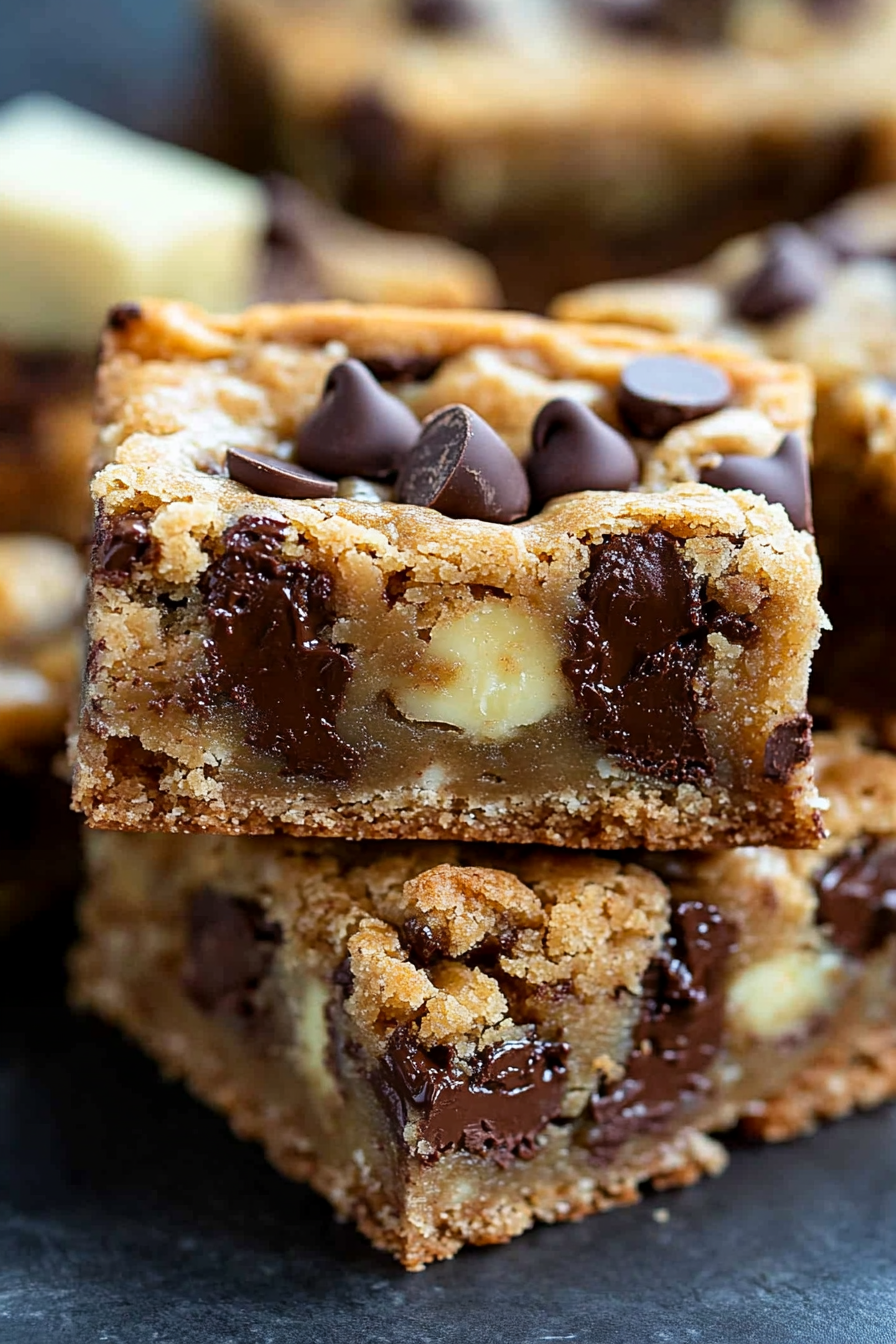
gooey chocolate chip cookie bars
Ingredients
Method
- Melt butter in a saucepan over medium heat. Cook, stirring often, about 6 minutes, until it becomes brown in color. It will foam, reduce, then foam again. Once it’s done cooking the foam is a light brown and it will dissipate after you remove it from the heat. Once it starts to brown, keep stirring so it doesn’t burn. Let sit for about 5 minutes to cool.
- Pour into an electric mixer fitted with paddle attachment. While still hot, add both sugars and mix on low until combined. Let sit to cool for a few minutes.
- While butter mixture is cooling, combine flour, baking soda, and salt in a medium bowl. Stir and set aside.
- Turn mixer (with butter mixture bowl attached) on low. Add eggs, one at a time, mixing completely. Mix in vanilla extract. Add flour mixture to the wet ingredients and mix until combined. Stir in chocolate chips.
- Line a 9x13” baking pan with foil and spray with cooking spray for easy removal.
- Press half the cookie dough in the prepared pan. Pour sweetened condensed milk over the top of the bottom layer (be careful to leave about 0.25” edge around the pan so the milk doesn’t touch the foil), then break up the chocolate bar and drop pieces over the top. Break up the remaining cookie dough and place on top of milk. Press with your hands to flatten. It will mostly cover but not completely cover the bottom layer.
- Preheat oven to 350°F. Bake for about 30-35 minutes until the tops of the bars start to get golden brown. Cool completely before slicing into bars.