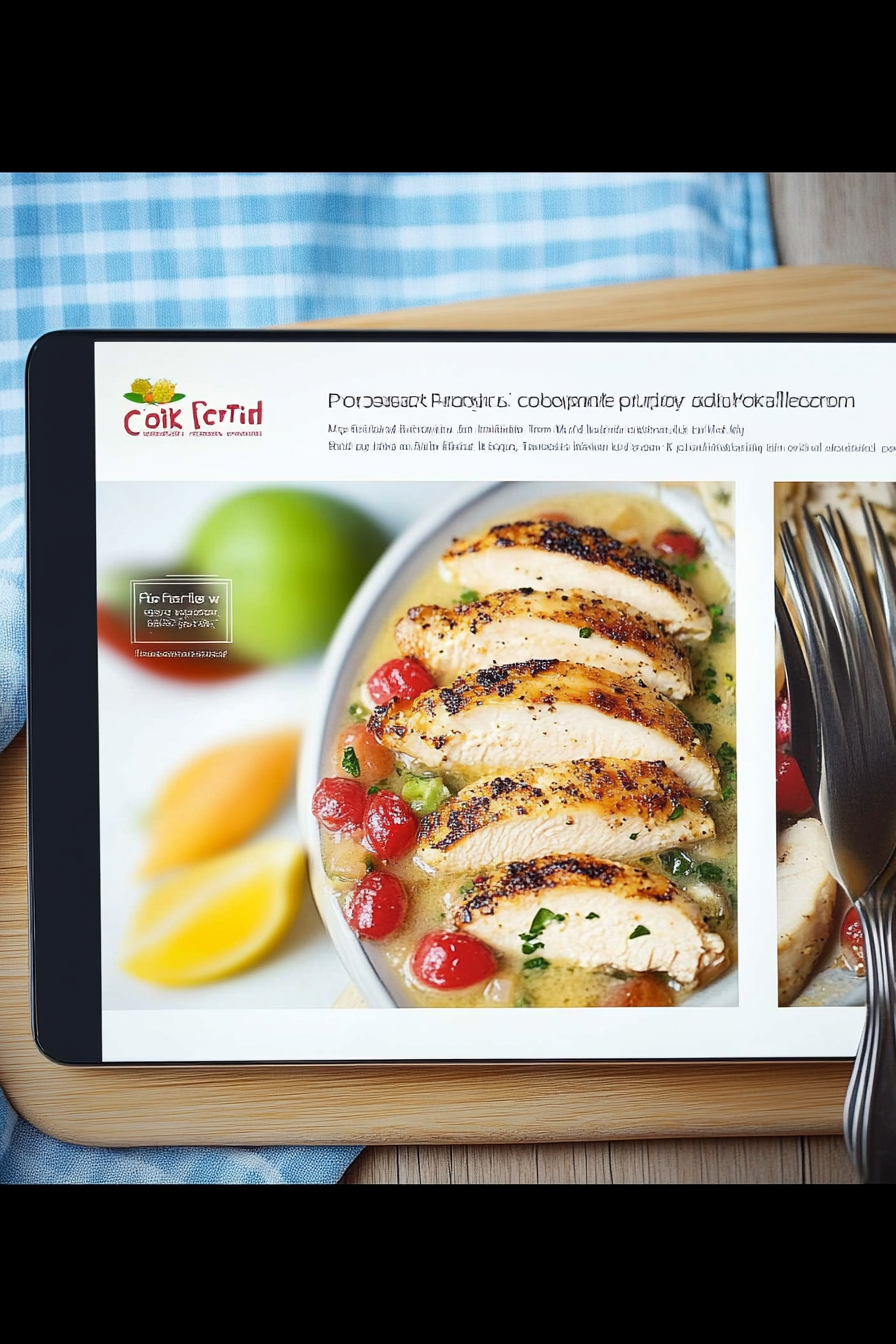
Light Chicken Piccata Recipe: Easy & Flavorful
There’s something about biting into a slice of warm coffee cake that instantly takes me back—like a cozy hug from the kitchen itself. I’ve always loved how it combines that tender, moist crumb with just the right amount of sweetness—and when you throw in zucchini, it’s like sneaking a veggie into dessert without anyone noticing! Honestly, this zucchini coffee cake with cinnamon swirl is my go-to when I need something comforting but still want to feel a little virtuous. It’s incredible how the zucchini keeps it so moist—my kids ask for this all the time, and honestly, I don’t mind sneaking in some extra veg for them. This recipe is one of those gems I’ve played around with for years; I’ve made dozens of batches, tweaking here and there, and it’s never failed me. The smell alone when this bakes could pull anyone out of a funk. Trust me on this one—if you love a good coffee cake, you’re gonna be obsessed with how simple and delicious this is, and it’s perfect for breakfast, brunch, or even an afternoon snack!
What is Zucchini Coffee Cake?
Think of zucchini coffee cake as a cozy, slightly tangy cake with that irresistible cinnamon swirl running through it. It’s essentially a cross between a classic crumb cake and a quick bread, but with a sneaky vegetable twist. The name probably makes you think of a fancy bakery treat, but honestly, it’s just a humble, homey bake that’s super easy to make. The idea is to take grated zucchini—usually a summer gift from the garden—and add it into a tender batter. The zucchini’s moisture keeps the cake incredibly soft and moist, and the cinnamon swirl adds that warm, comforting flavor you associate with mornings or lazy weekend brunches. It’s cake that feels special but is way more approachable than Laden with fuss. The best part? It’s adaptable—add nuts, replace the cinnamon with a dash of cardamom, or even swap out the glaze for cream cheese frosting if you’re feeling extra indulgent. Think of it as a versatile dish you can make your own, one slice at a time.
Why you’ll love this recipe?
What I love most about this zucchini coffee cake with cinnamon swirl is how it hits all the right notes—moist, crunchy, sweet but not over-the-top, with a hint of spice that makes it irresistible. The cinnamon swirl? Absolutely addictive. It’s like a treasure tucked inside every slice, swirling around in that tender crumb. Plus, this recipe is dead simple—no fancy equipment or long risings, just quick mixing, layering, and into the oven it goes. It’s a lifesaver on busy nights or lazy weekends when you want something homemade but don’t want to spend hours in the kitchen. I’ve made this with regular all-purpose flour, but I also tested it with almond flour for a gluten-free twist, and it turned out great—though a little denser, which I actually liked. The cost is super friendly, especially if you have zucchini growing in the backyard or bought in bulk at the farmers’ market. And the versatility? Oh man, you can dress it up with nuts, add topped streusel, or keep it simple with just a light dusting of powdered sugar. Honestly, it’s one of those recipes that gets better with age, and I find myself craving it when I need a little comfort—paired with a cup of coffee or tea, it’s pure heaven. My kids ask for it all the time, and I swear, baking this feels like sharing a little piece of my heart.
How do I make Zucchini Coffee Cake?
Quick Overview
This zucchini coffee cake is a straightforward bake that comes together faster than you’d think. The trick is to grate the zucchini really well and squeeze out excess moisture so it doesn’t make the batter too wet. The batter itself is just a simple mix of sugar, butter, eggs, and dry ingredients—no fancy techniques needed. The cinnamon swirl is just a mixture of cinnamon and sugar layered into the batter before baking, creating beautiful marbling and that punch of flavor in every bite. Baking at a moderate temperature ensures even cooking and that golden, slightly crunchy top. Once you pull it out of the oven, I recommend letting it cool for about 15 minutes before glazing or slicing—it helps everything set up nicely. Honestly, this is one of those recipes I do on autopilot now; I keep mental notes about minor tweaks, but it’s pretty much foolproof and a guaranteed crowd-pleaser.
Ingredients
For the Main Batter:
– 2 cups grated zucchini (about 2 medium zucchinis)
– 1 1/2 cups all-purpose flour (or almond flour for gluten-free)
– 3/4 cup granulated sugar
– 1/2 cup unsalted butter, softened
– 2 large eggs
– 1 teaspoon vanilla extract
– 1 teaspoon baking powder
– 1/2 teaspoon baking soda
– 1/4 teaspoon salt
For the Filling:
– 3 tablespoons cinnamon
– 1/2 cup brown sugar
– 2 tablespoons melted butter (optional, for richer flavor)
For the Glaze:
– 1 cup powdered sugar
– 1-2 tablespoons milk or cream
– 1/2 teaspoon vanilla extract
Step-by-Step Instructions
Step 1: Preheat & Prep Pan
Start by heating your oven to 350°F (175°C). Grease a 9-inch round or square baking pan with butter or non-stick spray. I like lining mine with parchment paper—makes removal a breeze and keeps things tidy. Set it aside while you prepare your batter. Remember, having everything ready makes the process smoother—mise en place is your friend.
Step 2: Mix Dry Ingredients
In a medium bowl, whisk together the flour, baking powder, baking soda, salt, and cinnamon (if you’re adding it to the batter). This ensures everything is evenly distributed, so you don’t get pockets of baking soda or salt. It’s an important step I’ve learned after a few too many dense spots in my baked goods!
Step 3: Mix Wet Ingredients
In a large bowl, cream the softened butter and sugar until light and fluffy—about 2-3 minutes. I always do this step first because it really helps the sugar dissolve, and the butter gets that lovely pale color. Add eggs one at a time, beating well after each. Then stir in the vanilla. Quick tip: make sure your eggs aren’t straight from the fridge or they’ll seize up the butter, so I usually warm them just a bit or take them out early.
Step 4: Combine
Add the dry ingredients to the wet in three additions, mixing gently just until combined—don’t overmix! Overmixing can make the cake dense, and we want it tender and soft. The grated zucchini gets folded in last—squeeze out as much moisture as you can before tossing it in to avoid sogginess.
Step 5: Prepare Filling
In a small bowl, mix the cinnamon with the brown sugar. If you like more richness, stir in the melted butter. This combo creates that irresistible cinnamon swirl that coats the batter beautifully. Set aside; we’ll layer it in next.
Step 6: Layer & Swirl
Pour half of the batter into your prepared pan, spreading evenly. Sprinkle half of the cinnamon-sugar mixture over it. Dollop the remaining batter on top, then sprinkle with the rest of the cinnamon. Use a knife or toothpick to swirl around gently—try to keep the pattern loose but visible. Seeing the marbling in the oven always excites me!
Step 7: Bake
Bake for about 40-45 minutes, or until a toothpick inserted in the center comes out clean. The top should turn a warm golden brown and feel slightly firm when touched. If you notice the edges browning too fast, tent it with foil and keep checking as you go. Oven temps can vary, so rely on that toothpick test rather than time alone.
Step 8: Cool & Glaze
Let the cake cool in the pan for about 15 minutes—this helps everything set and makes slicing easier. Meanwhile, whisk together your powdered sugar, vanilla, and milk to make a smooth glaze. Drizzle it generously over the warm cake—then, walk away for about 10 minutes. The glaze will set just enough to hold the slices together but still ooze slightly when cut.
Step 9: Slice & Serve
Use a serrated knife to cut clean slices, wiping the blade between cuts. Serve warm or at room temperature; I love it with a dollop of whipped cream or a scoop of vanilla ice cream if I’m feeling indulgent. Honestly, I’d say it’s best enjoyed fresh, but leftovers—if they last—still taste amazing the next day.
What to Serve It With
This coffee cake is a chameleon—it’s perfect at any time of day. For breakfast, pair it with a hot cup of coffee or a latte. I like to serve a slice alongside scrambled eggs for a brunch that feels indulgent yet cozy. When it’s dessert time, I’ll add a drizzle of caramel or a dusting of cocoa powder on top—definitely makes it feel fancy! My family loves it as an afternoon snack with apple cider or a cold glass of milk. For a relaxed weekend breakfast, I sometimes layer it with fresh berries and a dusting of powdered sugar—looks pretty and tastes heavenly. It’s one of those recipes that gets better the longer it sits, as the cinnamon swirls soak into the cake, becoming even more flavorful overnight. I always keep a stash in the fridge for those spontaneous sweet cravings—trust me, this disappears in minutes!
Top Tips for Perfecting Your Zucchini Coffee Cake
This is one of those recipes where small tweaks can make a big difference. Here are some lessons I’ve learned:
Zucchini Prep: Always grate zucchini finely and squeeze out as much liquid as possible—using a clean kitchen towel or cheesecloth works wonders. I’ve made the mistake of skipping this step, and let me tell you, soggy cake is no fun. If your zucchini is particularly watery, consider salting and letting it sit for 10 minutes, then squeezing again.
Mixing Advice: Overmixing the batter can lead to dense, heavy cake—so mix just until everything is incorporated. I also find it helpful to add the zucchini at the very end and gently fold it in with a spatula.
Swirl Customization: For more visual impact, try layering differently—like a middle layer of cinnamon or adding chopped nuts or dried fruit. Marble the batter with a toothpick, not a fork, for a more dramatic swirl.
Ingredient Swaps: Want a richer flavor? Swap the butter for browned butter or add a splash of maple syrup for a hint of depth. Gluten-free? Almond or oat flour works, but expect a slightly denser texture.
Baking Tips: Oven placement matters—baking in the middle rack ensures even heat. If your cake tips browner on top too quickly, cover loosely with foil and continue baking. Doneness is best judged by a toothpick test rather than time; every oven is different.
Glaze Variations: For a tangy twist, add a splash of lemon juice to the glaze. Or, stir in a spoonful of cream cheese before pouring for an extra creamy finish. I’ve also experimented with a drizzle of honey instead of milk—it’s incredible.
One personal trick I swear by: don’t rush the cooling process. If you slice into it too soon, it’s crumbly and messy. Let it cool fully for clean, perfect slices. Every batch teaches me something new—like how a pinch of nutmeg elevates the warmth, or how adding crushed cookies on top makes it more decadent. This recipe’s flexibility means it continues to evolve in my kitchen, and I love that it’s forgiving enough for beginners but impressive enough for guests.
Storing and Reheating Tips
This cake keeps surprisingly well—if you let it cool completely, store it properly, and it’ll stay moist and delicious for days. I usually keep slices in an airtight container at room temperature for up to two days, covered loosely with a towel to prevent drying out. After that, it’s best to refrigerate—just make sure to wrap it well or pop it in an airtight box. I find that the flavor actually deepens overnight, especially the cinnamon, so I recommend baking it a day in advance if you’re hosting.
For freezer dreams, slice the cake, wrap each piece tightly in plastic wrap, then stash in a freezer bag. It can last up to 3 months that way. When you’re ready to enjoy, thaw it overnight in the fridge or warm slices gently in the microwave—cover with a damp paper towel to keep it soft.
If you’re adding glaze—best to do so just before serving, as the glaze can soften if the cake is stored covered. I usually do a quick reheating in the microwave for 10-15 seconds, then add the finishing glaze or toppings. It’s still super delicious cold, but warming it just slightly reactivates all those cozy aromas and flavors.
Frequently Asked Questions
Final Thoughts
If there’s one reason I keep coming back to this zucchini coffee cake with cinnamon swirl, it’s because it’s comforting, forgiving, and endlessly customizable. I love how it transforms humble zucchini into a show-stopping dessert that everyone gobbles up. Whether it’s a lazy weekend morning, a quick snack after school, or a special brunch centerpiece, this cake never disappoints. Plus, it’s one of those recipes that gets better over time—so I usually make a batch on Sunday afternoon and enjoy slices all week long. The aroma alone as it bakes will make your whole house smell like a bakery. I encourage you to give it a try—play around with add-ins or toppings, make it your signature version. And honestly, I’d love to hear what tweaks you try! Baking is such a personal thing, and that’s what makes sharing recipes so fun. Happy baking, and I can’t wait to see what you create!

Ingredients
Method
- Pound the chicken breasts to an even thickness and season with salt and pepper.
- Dredge the chicken in flour, shaking off excess.
- Heat olive oil in a skillet over medium heat and cook the chicken until golden brown on both sides, about 4-5 minutes per side.
- Remove chicken and set aside. In the same skillet, add garlic and cook until fragrant, about 1 minute.
- Deglaze the pan with white wine, scraping up any browned bits.
- Add lemon juice, capers, and butter, stirring until sauce thickens slightly.
- Return chicken to the skillet and spoon sauce over top. Cook for another 2 minutes.
- Serve hot with your choice of sides.