Easy Samoa Cheesecake Without Baking
One of my fondest childhood memories is sneaking into my grandma’s kitchen, pestering her to let me help with whatever she was baking—usually her famous zucchini bread. I’d watch with wide eyes as she grated those big, green zucchinis, the smell of warm cinnamon filling the air, making my stomach rumble with excitement. Honestly, zucchini bread has always been one of those recipes that feels like a hug—moist, sweet, with just the right amount of spice. But what really gets me is how surprising it is—it’s essentially a sneaky vegetable disguised as dessert! Over the years, I’ve tweaked Grandma’s recipe to make it even easier and turned it into this beautiful cinnamon swirl bread that my family asks for all the time. It’s incredibly forgiving, smells divine as it bakes, and is just as good for breakfast as it is for an afternoon treat. Trust me on this one—once you try it, it’s going to become a regular in your house too.
What is Zucchini cinnamon swirl bread?
Think of this as a cozy, cinnamon-kissed quick bread that’s packed with shredded zucchini. It’s kind of like a muffin’s grown-up cousin—moist, tender, and with a hint of sweet spice. The name says it all: zucchini gives it moisture and helps keep the bread light, while the cinnamon swirl adds that beautiful marbled look and warming flavor. The best part? It’s super simple to make. You don’t need fancy equipment or hours to wait. This bread is essentially a magic trick—turning a humble veggie into a showstopper treat that’s perfect for mornings, teas, or even as a cozy snack on lazy weekends. I love calling it “secret veggie bread” because my kids never guess that some of their favorite flavors are hiding zucchini!
Why you’ll love this recipe?
What I love most about this zucchini cinnamon swirl bread is how it checks all the boxes for a busy, cozy home cook like me. First, the flavor—imagine warm cinnamon, a subtle hint of nutty zucchini, and just the right amount of sweetness. Every bite makes your kitchen smell like a bakery, which is totally my love language. It’s also ridiculously easy to pull together—no complicated techniques or fancy ingredients, just simple pantry staples. Plus, it’s budget-friendly! Zucchini is one of those versatile vegetables that’s often cheap, especially when you buy in bulk or grow your own (which I totally do). This bread also adapts well—try adding nuts, changing the type of sweetener, or even swapping flours. Honestly, I’ve tested this with almond milk, and it actually made it even creamier! It’s such a forgiving, forgiving recipe. And what’s better than a baked good that everyone in the family loves and asks for again and again? I’ve made this countless times, and each time it disappears in minutes at my house. It’s perfect when you’re craving something sweet at 10 pm but don’t want to bake an entire cake. Seriously, it’s that good.
How do you make Zucchini Swirl Bread?
Quick Overview
If you’re like me, you’ll love how straightforward this recipe is. Basically, you mix together your dry ingredients, then your wet ones, combine them gently, and pour half into your prepared loaf pan. Next comes the fun part—the cinnamon swirl—spread on top of this layer, add a little more batter, and swirl it around with a toothpick or skewer until you get those gorgeous marbling lines. Bake until golden, cool slightly, then drizzle with a simple glaze, or just dust with powdered sugar if you’re feeling casual. It’s seriously foolproof—perfect for busy mornings, lazy afternoons, or whenever you want a comforting treat that’s made with love.
Ingredients
For the Main Batter:
– 2 cups grated zucchini (about 2 large zucchinis, grated and excess water squeezed out)
– 1 1/2 cups all-purpose flour (or a gluten-free blend, see tips below)
– 1 cup sugar (or honey/maple syrup for natural sweetness)
– 1/2 cup melted unsalted butter or neutral oil
– 2 large eggs
– 1 teaspoon vanilla extract
– 1 teaspoon baking powder
– 1/2 teaspoon baking soda
– 1/2 teaspoon salt
– 1 teaspoon ground cinnamon (for batter)
For the Filling:
– 1/4 cup brown sugar
– 1 tablespoon ground cinnamon
– 1 tablespoon melted butter (optional but helps it stick and enhances flavor)
For the Glaze:
– 1 cup powdered sugar
– 1-2 tablespoons milk (dairy or plant-based)
– 1/2 teaspoon vanilla extract
– A pinch of cinnamon (for extra flavor)
Step-by-Step Instructions
Step 1: Preheat & Prep Pan
Set your oven to 350°F (175°C). Grease a standard 9×5-inch loaf pan with butter or line it with parchment paper. This step is simple but crucial—trust me, I’ve learned the hard way that sticking to this prevents a baking disaster. Also, grate your zucchini and squeeze out as much moisture as possible using a clean kitchen towel. Moisture is the enemy here because too much water will make your bread dense or soggy. Set aside.
Step 2: Mix Dry Ingredients
In a large bowl, whisk together the flour, sugar, baking powder, baking soda, salt, and cinnamon. This ensures everything’s evenly distributed and gives you a light, tender crumb in the final bread. Overmixing at this stage can lead to tough bread, so just stir until combined.
Step 3: Mix Wet Ingredients
In a separate bowl, beat the eggs, then add melted butter (or oil), vanilla, and the grated zucchini. Mix until smooth. The zucchini should be well incorporated, and the mixture will be a little moist—perfect for adding to the dry ingredients.
Step 4: Combine
Gently fold the wet mixture into the dry ingredients, just until everything is just combined. No need to overmix—this keeps the bread tender. It might look a little lumpy, which is totally fine. You want to avoid stirring until smooth, or your bread might turn out dense.
Step 5: Prepare Filling
Mix together your brown sugar, cinnamon, and melted butter in a small bowl. For a nutty twist, sprinkle some chopped walnuts or pecans on top before swirling. Set aside.
Step 6: Layer & Swirl
Pour half the batter into your loaf pan. Spread the cinnamon-sugar mixture over it evenly. Add the remaining batter on top, then delicately swirl a butter knife or skewer through the batter, creating beautiful marbled patterns. This swirl not only looks pretty but also distributes the cinnamon flavor throughout.
Step 7: Bake
Bake in the preheated oven for 50-60 minutes. Check doneness by inserting a toothpick in the center—if it comes out clean, you’re good! Oven times can vary, so start checking at 50 minutes. If the top gets too dark, tent it loosely with foil.
Step 8: Cool & Glaze
Allow the bread to cool in the pan for about 10 minutes, then transfer to a wire rack. Mix your glaze ingredients and drizzle generously over the cooled bread. The warmth helps it soak in a little, making each bite extra luscious.
Step 9: Slice & Serve
Slice with a serrated knife for neat cuts, and serve slightly warm or at room temperature. A cup of coffee or a dollop of whipped cream pairs beautifully. My kids ask for this as breakfast or an after-school snack—and honestly, it’s just as satisfying cold the next day.
What to Serve It With
This zucchini cinnamon swirl bread is versatile enough to shine in various settings:
- For Breakfast: Pair it with your favorite coffee or chai, and maybe a smear of good butter or cream cheese. It’s like a bakery in your own kitchen!
- For Brunch: Serve slices alongside fresh fruit and a yogurt parfait. Add a drizzle of honey or a dusting of powdered sugar for extra flair.
- As Dessert: Warmed slightly and topped with a scoop of vanilla ice cream or a dollop of whipped cream—oh my, it feels decadent and comforting.
- For Casual Snacks: Pack a slice in lunchboxes or grab a piece as an afternoon pick-me-up. Trust me, the kids love it, especially with a glass of milk or hot cocoa.
This bread has become a family favorite, especially when I have zucchini from the garden or extras piling up in the fridge. It’s a lovely way to sneak in some veggies and indulge at the same time—my kind of win-win.
Top Tips for Perfecting Your Zucchini Cinnamon Swirl Bread
Having made this dozens of times, I’ve picked up some tricks that guarantee a perfect loaf every time:
- Zucchini Prep: Always squeeze out as much moisture as you can. I sometimes press shredded zucchini with a paper towel or use a clean kitchen cloth. The drier, the better—the last thing you want is a soggy bread.
- Mixing: Overmixing the batter can make the bread dense. Use gentle folding and stop as soon as everything’s just combined. Look for a slightly lumpy, moist batter—not smooth and runny.
- Swirl Technique: To get nice, even marbling, spread the batter in layers. Use a skewer or butter knife to gently swirl from the center outward in zig-zag patterns. Avoid over-swirl—you want ribbons, not a completely marbled mess.
- Ingredient Substitutions: I tested this with coconut sugar, and it still turned out great, though slightly darker. For a dairy-free version, swap melted coconut oil or vegan butter. Whole wheat flour works too, but you might want to reduce the flour slightly or add a splash of extra liquid.
- Baking Tips: Keep an eye on the oven. If you notice the top browning too fast, tent with foil. Test doneness with a toothpick—nothing beats that clean, moist crumb!
- Glaze Variations: For a chocolate twist, mix in a tablespoon of cocoa powder into the glaze or sprinkle mini chocolate chips on top before baking for those chocolate lovers in your family.
Honestly, it took me a few tries to get that perfect swirl and moist crumb, but once I nailed it, I started making it weekly. Every batch feels like a little hug—warm and inviting, just like grandma’s kitchen. Take your time, and don’t rush the process. The smell alone is worth it!
Storing and Reheating Tips
This bread stays delicious for several days if stored properly. Wrap it tightly in plastic wrap or keep it in an airtight container. At room temperature, it’s good for about 2 days—be sure to keep it away from direct sunlight or heat, which can dry it out. If you want to save it longer, pop slices in a resealable bag and refrigerate—they’ll last up to a week, though I recommend warming slices in the microwave for 10-15 seconds to bring back that fresh-baked feeling. For even longer storage, freeze slices individually wrapped; they reheat beautifully in the oven or microwave. Just remember, freshly glazed slices are best enjoyed within 24 hours for that perfect glaze drip effect—if you add the glaze ahead of time, it might get a little sticky after a few days, but still tasty.
Frequently Asked Questions
Final Thoughts
This zucchini cinnamon swirl bread has a special place in my heart—and in my kitchen. It’s one of those recipes that feels homemade but impresses everyone who takes a bite. Moist, flavorful, with just enough spice and a stunning swirl, it’s a treat I love to share with friends, family, or just enjoy quietly over a cup of coffee. Over the years, I’ve experimented with substitutions and tweaks, but the core of this recipe remains my top pick whenever I want to bake something comforting and delicious. I hope you give it a try—trust me, your house will smell incredible, and your taste buds will thank you. Happy baking! And I’d love to hear how yours turns out or any fun variations you try—leave a comment below or share your photos!
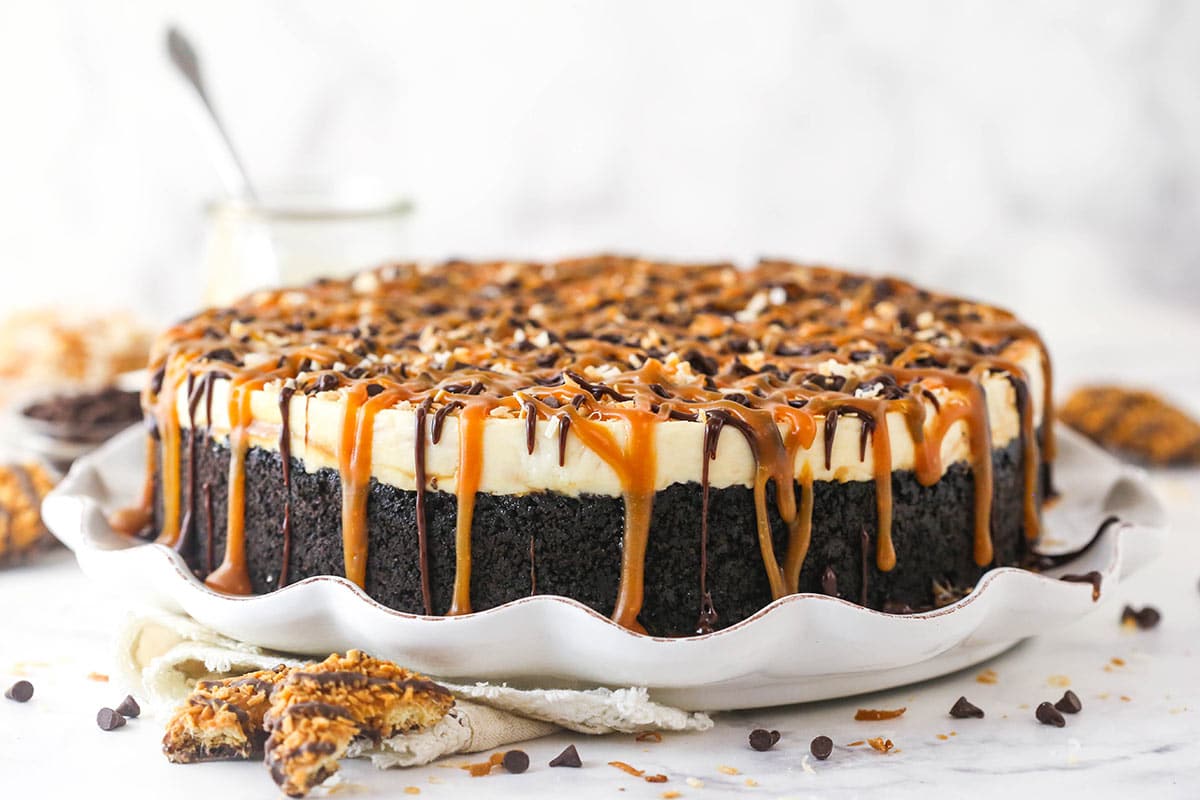
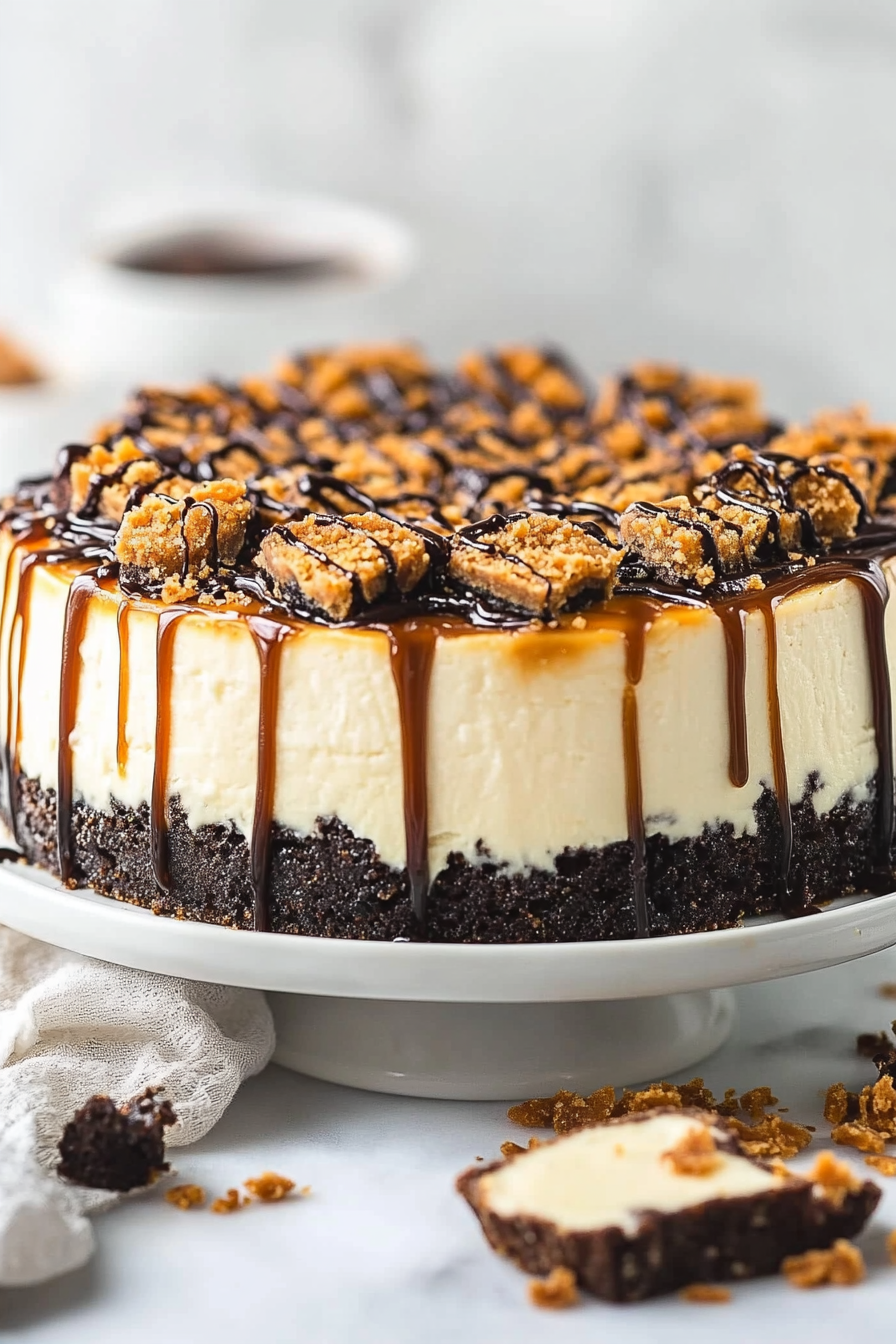
Samoa Cheesecake
Ingredients
Method
- Line a 9-inch springform pan with parchment paper in the bottom and grease the sides.
- Combine the crust ingredients in a small bowl. Press the mixture into the bottom and up the sides of the springform pan.
- Place the crust in the fridge while you make the filling.
- Spread coconut onto a baking sheet covered with parchment paper. Bake at 350 degrees F for 5-10 minutes, or until lightly toasted. Carefully toss with a spatula every 2-3 minutes so that it toasts evenly. Set aside to cool completely.
- In a large mixer bowl, beat the cream cheese and sugars together until well combined and smooth.
- Add the vanilla extract, coconut extract and 0.5 cup of caramel sauce and mix until well combined and smooth.
- Gently fold the cookies and toasted coconut into the cream cheese mixture. Set aside.
- In another large mixer bowl, add the heavy whipping cream and powdered sugar. Whip on high speed until stiff peaks form.
- Carefully fold the whipped cream into the cream cheese mixture, in two parts, until well combined.
- Add about 1/3 of the cheesecake filling to the crust and spread into an even layer. Drizzle with about 0.25 cup of the remaining caramel sauce. Use a knife to swirl caramel around. Be careful to not put the knife through the crust.
- Repeat another layer with 1/3 of the cheesecake filling and another 0.25 cup of caramel sauce. Swirl with a knife.
- Add the remaining cheesecake filling and spread into an even layer. Refrigerate until cold and firm, 4-5 hours.
- Remove your cheesecake from the springform pan and set it on a plate or serving platter. Top with mini chocolate chips and more toasted coconut flakes.
- To make the chocolate ganache for drizzling on top, put the semi-sweet chocolate chips in a heat proof bowl. Microwave the heavy whipping cream until it just begins to boil, then pour it over the chocolate chips. Allow it to sit for 2-3 minutes, then whisk until smooth.
- Drizzle chocolate and remaining caramel sauce over the top of the cheesecake, then serve.
- Store cheesecake in the fridge well-covered or in an air-tight cake carrier. Best if eaten within 4-5 days.