Creamy Banana Chocolate Chip Cookies Recipe
There’s something about baking that instantly pulls me back to childhood. Maybe it’s the warm smell of cinnamon or the way the batter feels sticky and comforting between your fingers. But honestly, what really makes this recipe special is its perfect balance — rich chocolate and tender zucchini harmonizing in every bite. I’ve made this countless times, and it always disappears in minutes at my house, especially when I serve it with a big dollop of whipped cream or a drizzle of caramel. It’s surprisingly easy — kind of like a little secret weapon for whenever I want to impress friends or just indulge without guilt. My kids ask for this all the time, and I love that they get their veggies in a sneaky way. Plus, this one’s a lifesaver on busy nights when I need to throw together something delicious that feels like a treat but doesn’t require hours in the kitchen.
What is Zucchini Chocolate Swirl Cake?
This cake is really more than just a dessert — it’s one of those sneaky, comforting treats that make you feel warm and cozy inside. Think of it as a moist, tender cake with flecks of bright green zucchini stirred right into the batter, but the real star here is the luxurious swirl of rich, gooey chocolate running through every slice. It’s basically like a healthy-ish chocolate loaf cake, but with a secret ingredient that keeps it super moist and flavorful. The name might sound fancy, but trust me, it’s straightforward enough that even a beginner baker can pull it off. The zucchini keeps the cake delicately light and adds just enough moisture, without overpowering the rich chocolate mood you’ve got going. It’s a joy to make, and even more fun to eat.
Why you’ll love this recipe?
Honestly, what I love most about this zucchini chocolate swirl cake is how it manages to be indulgent and wholesome at the same time. The flavor? Insanely good. The chocolate is decadent yet balanced by that tender zucchini taste that almost melts away — nobody will guess there’s a veggie sneaking in there. It’s also incredibly simple to make. You throw everything in a bowl, give it a quick mix, and pour. No fancy gadgets needed. And because it’s so budget-friendly — just basic pantry staples and a zucchini or two from the garden — it’s a real winner on busy weeknights or when you’re craving something sweet but don’t want to splurge on fancy ingredients. Plus, it’s versatile: You can serve it as a breakfast coffee cake, a casual snack, or a fancy dessert. I’ve tested this with mini chocolate chips, chopped nuts, and even a swirl of peanut butter — it’s the kind of recipe that invites creativity.
What’s really special about this cake is how it feels at home in so many settings. Your kids will love the streaks of melted chocolate and the moist crumb, and it’s just fancy enough that you can serve it after a dinner party. My friends always ask for the recipe once they try it — because let’s be honest, a dessert that’s delicious, easy, and secretly healthy? That’s a rare find. I always keep a zucchini in the fridge just for this cake. It’s become a little family tradition to bake it together every summer when the garden is bursting with veggies. And trust me on this one: once you try it, you’ll be making it over and over. It’s one of those recipes you keep in your back pocket for a lazy weekend or a last-minute sweet craving.
How do I make Zucchini Chocolate Swirl Cake?
Quick Overview
This cake is a one-bowl wonder, really. You shred the zucchini, mix up your basic batter with cocoa and chocolate chips, then gently swirl in melted chocolate to create that beautiful marbled look. It’s baked into a golden, tender loaf or cake, cooled just enough to cut, then topped with a glossy glaze or dusted with powdered sugar. What makes this special is how forgiving it is — if you overmix a little or forget to peel the zucchini, it’s still going to be delicious. I always say, the less fuss, the better. And because it’s so moist, you can even make it ahead — it keeps beautifully for days.
Ingredients
For the Main Batter:
– 2 cups all-purpose flour (or a gluten-free blend if you prefer)
– 1 teaspoon baking powder
– ½ teaspoon baking soda
– ¼ teaspoon salt
– ⅓ cup unsweetened cocoa powder
– 1 cup granulated sugar
– ½ cup vegetable oil (or melted coconut oil for extra flavor)
– 3 large eggs
– 1 teaspoon vanilla extract
– 1 ½ cups shredded zucchini (squeeze out excess moisture after shredding)
– ½ cup mini chocolate chips or chopped dark chocolate
For the Filling:
– ½ cup good-quality semi-sweet chocolate, melted
– 2 tablespoons butter (optional, for extra richness)
For the Glaze:
– ½ cup powdered sugar
– 1-2 tablespoons milk or cream
– Optional: a splash of vanilla or a teaspoon of cocoa powder for depth
Step-by-Step Instructions
Step 1: Preheat & Prep Pan
Start by preheating your oven to 350°F (175°C). Grease a loaf pan or cake tin with butter or non-stick spray. Line it with parchment paper if you want easy removal. I always do this — makes the cleanup so much easier.
Step 2: Mix Dry Ingredients
In a large bowl, whisk together the flour, baking powder, baking soda, salt, cocoa powder, and sugar. This helps everything blend evenly and prevents clumps of cocoa from getting stuck. It also develops a nice, uniform crumb — trust me, it makes a difference.
Step 3: Mix Wet Ingredients
In a separate bowl, beat the eggs, then mix in the oil and vanilla. Warm the eggs slightly if they’re straight from the fridge — it just helps everything combine better. I’ve tested this with almond milk and it actually made it even creamier, but I prefer eggs for richness. Stir in the shredded zucchini, making sure the moisture is mostly squeezed out so your batter doesn’t get too watery.
Step 4: Combine
Pour the wet ingredients into the dry, then gently fold until just combined. No overmixing — you want a tender crumb, not a dense brick. The batter will be thick and a little lumpy from the zucchini — that’s perfect.
Step 5: Prepare Filling
Melt the chocolate in the microwave or on the stovetop, stirring until smooth. If you want a richer swirl, stir in butter. Set aside.
Step 6: Layer & Swirl
Pour half of the batter into your prepared pan. Drizzle half of the melted chocolate over it, then add the remaining batter on top. Carefully swirl with a toothpick or a butter knife to create pretty marbled ribbons — don’t overdo it, just a few gentle zig-zags are enough for a lovely pattern.
Step 7: Bake
Pop it into your oven and bake for about 45-50 minutes. Start checking around the 45-minute mark with a toothpick — it should come out clean or with a few moist crumbs. If the top browns too quickly, tent with foil and keep baking. Every oven bakes a little differently, so trust your nose and toothpick.
Step 8: Cool & Glaze
Let the cake cool in the pan for about 15 minutes, then transfer to a wire rack. While still warm, make your glaze by mixing powdered sugar with milk until smooth. Drizzle over the top — it’ll set to a glossy finish. For a more rustic look, just dust with powdered sugar or serve plain.
Step 9: Slice & Serve
Use a sharp serrated knife for clean cuts. This cake tastes divine when served slightly warm or at room temperature. I love pairing it with a cup of coffee or a chilly glass of milk. It’s also beautiful on a plate with fresh berries or a spoonful of whipped cream for a more festive vibe.
What to Serve It With
This cake is so versatile, I honestly serve it in so many ways. For breakfast, it’s fabulous toasted with a smear of butter or cream cheese. My kids ask for it as a quick snack after school, especially when I’ve sneaked in some zucchini without them noticing. It’s also perfect after a dinner party — the leftover swirl looks so pretty on a platter, and it pairs beautifully with a hot cup of tea or a cold glass of milk. If I want to turn it into a dessert, I like to add a scoop of vanilla ice cream or a drizzle of caramel sauce. You can even keep it simple with just a dusting of powdered sugar for a more elegant look. Trust me, once you’ve baked this, it becomes a staple in your home — a recipe that everyone requests and no one can resist.
Top Tips for Perfecting Your Zucchini Chocolate Swirl Cake
Over the years, I’ve picked up quite a few tricks to making this cake even better. Here are my favorite tips:
- Zucchini Prep: Always squeeze out excess moisture after shredding. The wetter the zucchini, the denser your cake might turn out. I use a clean kitchen towel to wring out every last drop — it’s easy and makes a big difference.
- Mixing Advice: Resist the temptation to overmix once you add the wet to the dry ingredients. Overmixing develops gluten, which makes the cake tougher. Just fold until the ingredients are barely combined — that’s the secret to a tender crumb.
- Swirl Customization: For a more dramatic marble effect, add generous dollops of melted chocolate and swirl with a toothpick in big zigzag motions. For a more subtle look, just do gentle swirls on the surface.
- Ingredient Swaps: If you don’t have cocoa powder, try adding a splash of espresso powder to intensify the chocolate flavor. Or swap half the sugar for honey or maple syrup for a different sweetness level.
- Baking Tips: Always check for doneness early. My oven runs hot, so I start checking at 45 minutes. The toothpick test is crucial — if it comes out with wet batter, give it a few extra minutes, but don’t overbake or it’ll be dry.
- Glaze Variations: For a richer glaze, add a tablespoon of butter or cream. You can also sprinkle chopped nuts or shredded coconut on top for extra crunch and texture.
Based on my own baking adventures, I’ve learned that patience and gentle handling make all the difference. Don’t rush the cooling process, and remember that every oven is a little different. Once you nail the technique, you’ll get perfect marbling and a moist, flavorful crumb every time.
Storing and Reheating Tips
This cake keeps beautifully for a few days, which is great for making ahead or sharing. Store it in an airtight container at room temperature for up to 2 days. After that, pop it into the fridge — just make sure it’s covered to stay moist. I prefer eating it slightly warmed or at room temp, so I’ll microwave slices for about 10 seconds to revive the softness. If you want to freeze it, wrap slices tightly in plastic wrap and foil, then freeze for up to 3 months. Thaw at room temperature or in the fridge before serving. If you’re planning to add a glaze later, wait until it’s fully cooled to avoid it melting off.
Frequently Asked Questions
Final Thoughts
This zucchini chocolate swirl cake is one of those recipes I keep coming back to because it’s just so forgiving and cozy. It’s a reminder that baking doesn’t have to be complicated to be spectacular. Every time I bake this, I feel like I’m sharing a little piece of comfort with my family — and honestly, it’s one of those sweets that’s almost guilt-free with all that zucchini sneaking in. It’s moist, chocolatey, and irresistibly flaky in all the right places. If you try it, I’d love to hear your tweaks and favorite toppings — are you a fan of a dusting of powdered sugar, or do you go all out with a cream cheese frosting? Either way, happy baking, friends, and don’t forget: the best recipes are the ones made with love and a little bit of improvisation. I can’t wait to hear how yours turns out!
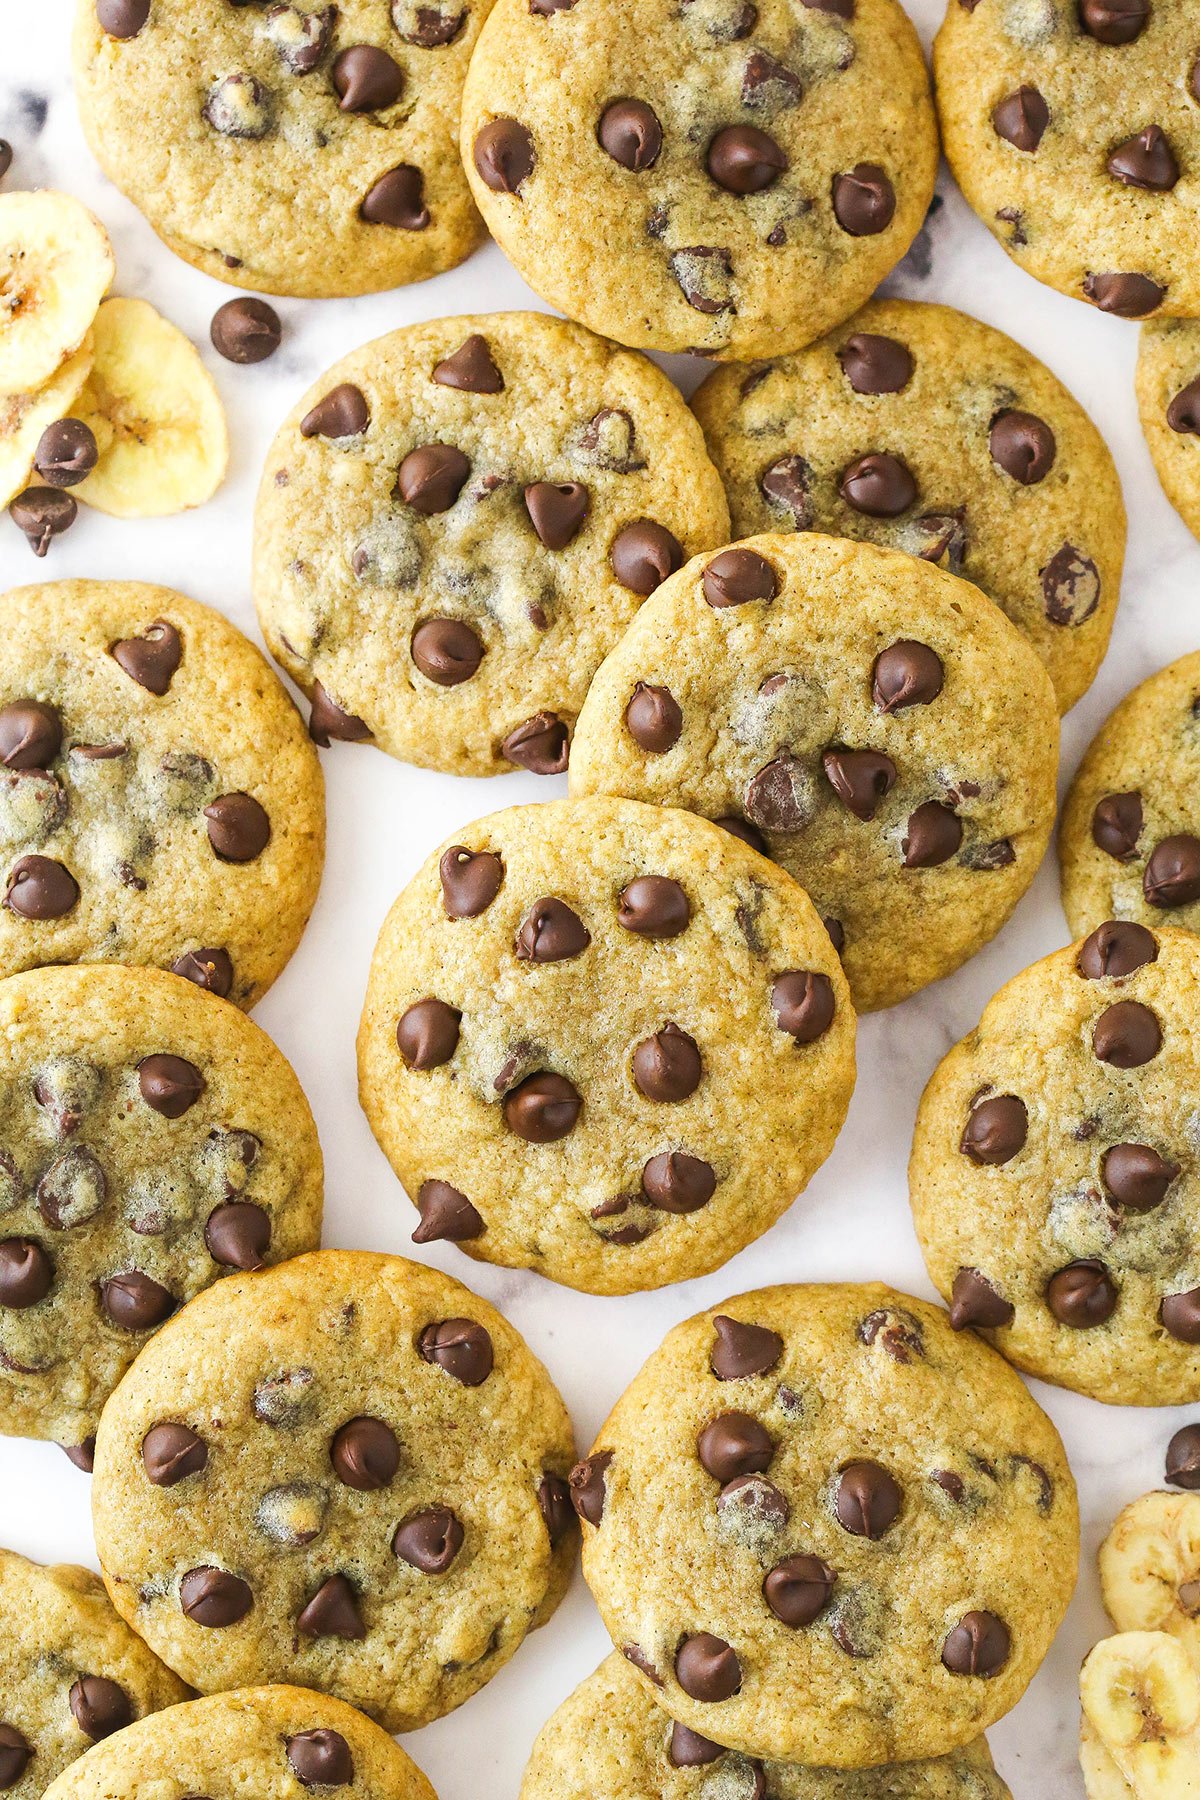
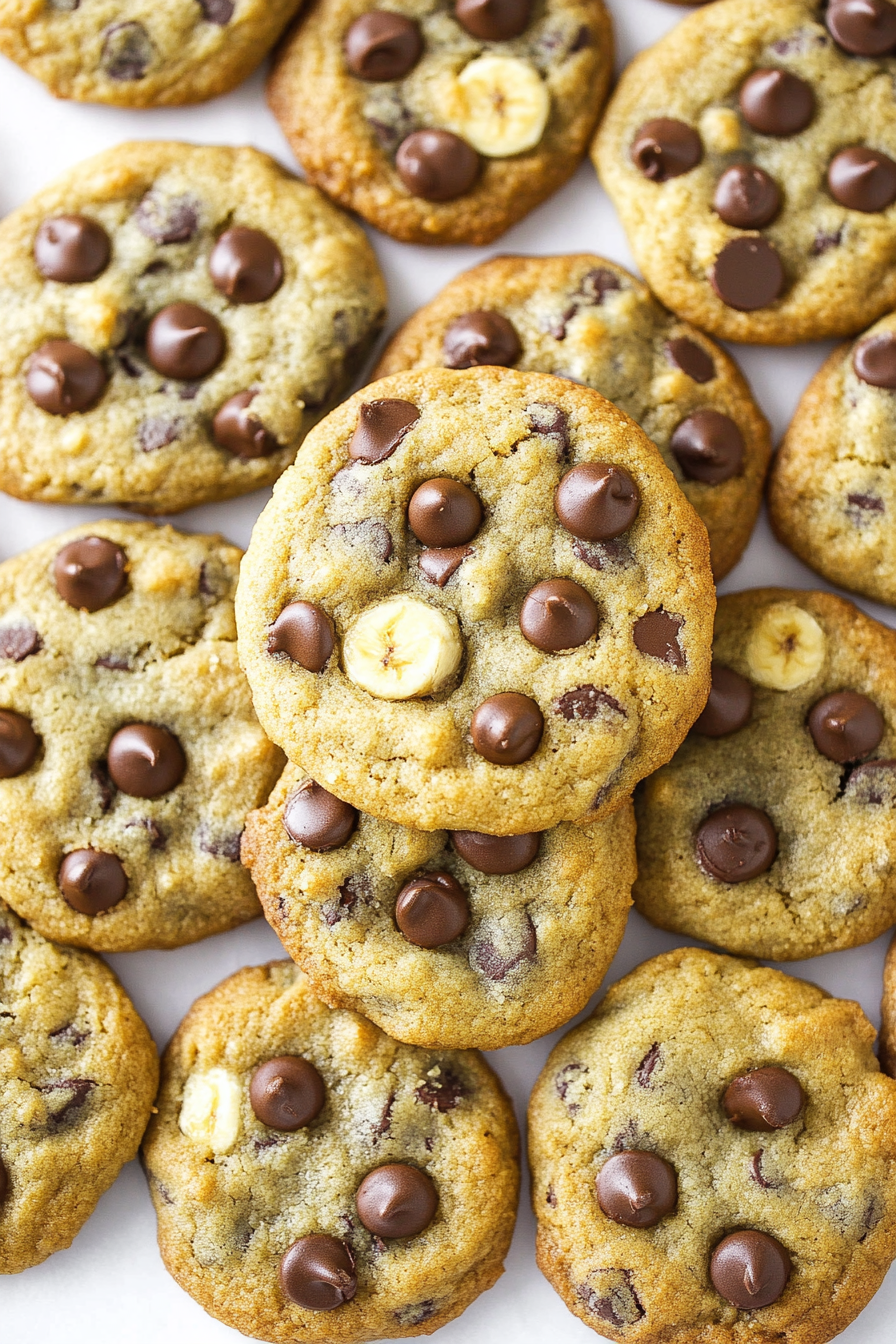
Banana Chocolate Chip Cookies
Ingredients
Method
- Add the flour, baking soda, cinnamon and salt to a medium sized bowl and whisk together. Set aside.
- Add the melted butter and sugars to a large bowl and whisk to combine.
- Add the egg and vanilla extract and whisk together until well combined. Add the mashed bananas and whisk together until well combined.
- Add the dry ingredients and fold together just until well combined.
- Add the chocolate chips and fold together until dispersed throughout the cookie dough.
- Cover the cookie dough and refrigerate for at least 2-3 hours. I recommend overnight. The flavor gets even better.
- When you’re ready to bake the cookies, preheat the oven to 350°F (176°C). Line a cookie sheet with a silicon baking mat or parchment paper.
- Use a cookie scoop to create cookie dough balls that are 2 tablespoons in size. Press some additional chocolate chips onto the top of the cookie dough balls, if you’d like. The cookie dough is pretty sticky, even when cold. As it warms up, it gets quite sticky, so try to work quickly and pop the cookie dough back in the fridge, if needed.
- Bake the cookies for 10-12 minutes or until they just look done in the center. The longer they bake, the more cakey they get. If you keep an eye on them and remove them from the oven in time, they stay dense but not undercooked. Time can vary by oven, so keep an eye on them.
- Allow the cookies to cool for about 5 minutes, then move to a cooling rack lined with parchment paper to cool completely. The cookies can stick to the parchment paper a little bit. I find that it helps them to release if you give them a little twist on the paper before lifting them up.
- Store cookies in an air-tight container with parchment paper between the stacks of cookies so they don’t stick to each other. Cookies are best if eaten within 4-5 days.