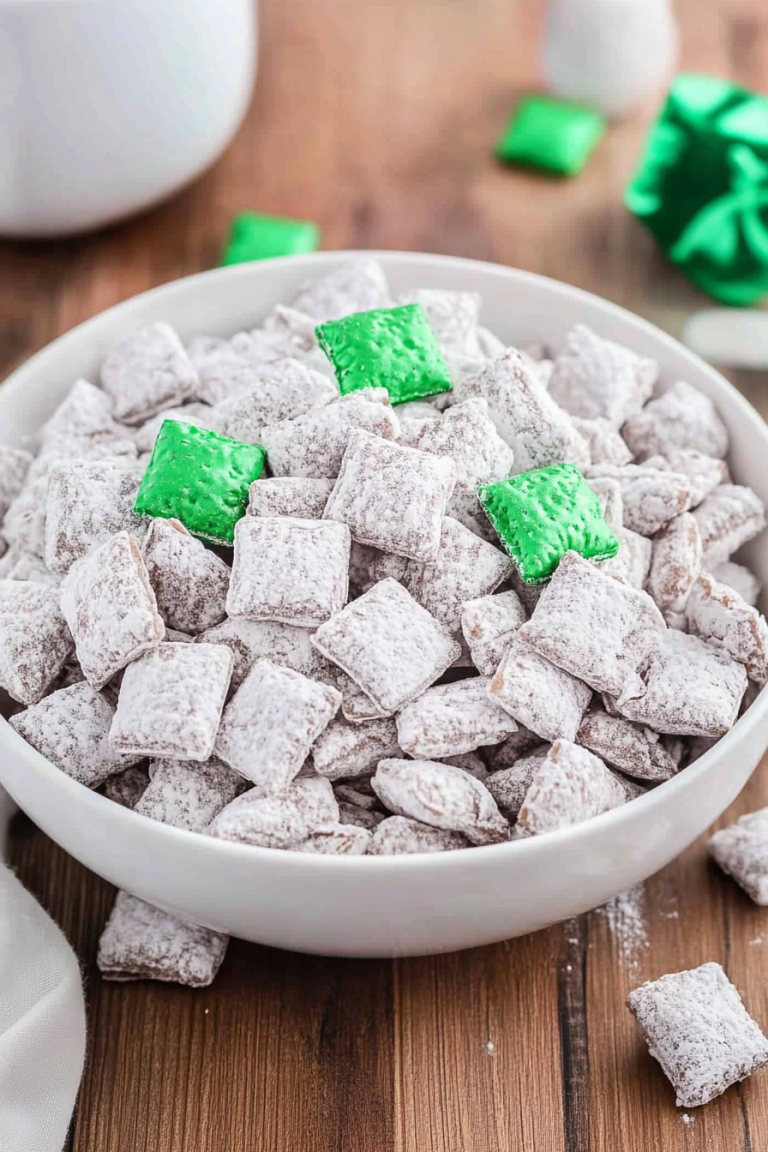
Easy Protein Sweet Treats You’ll Love
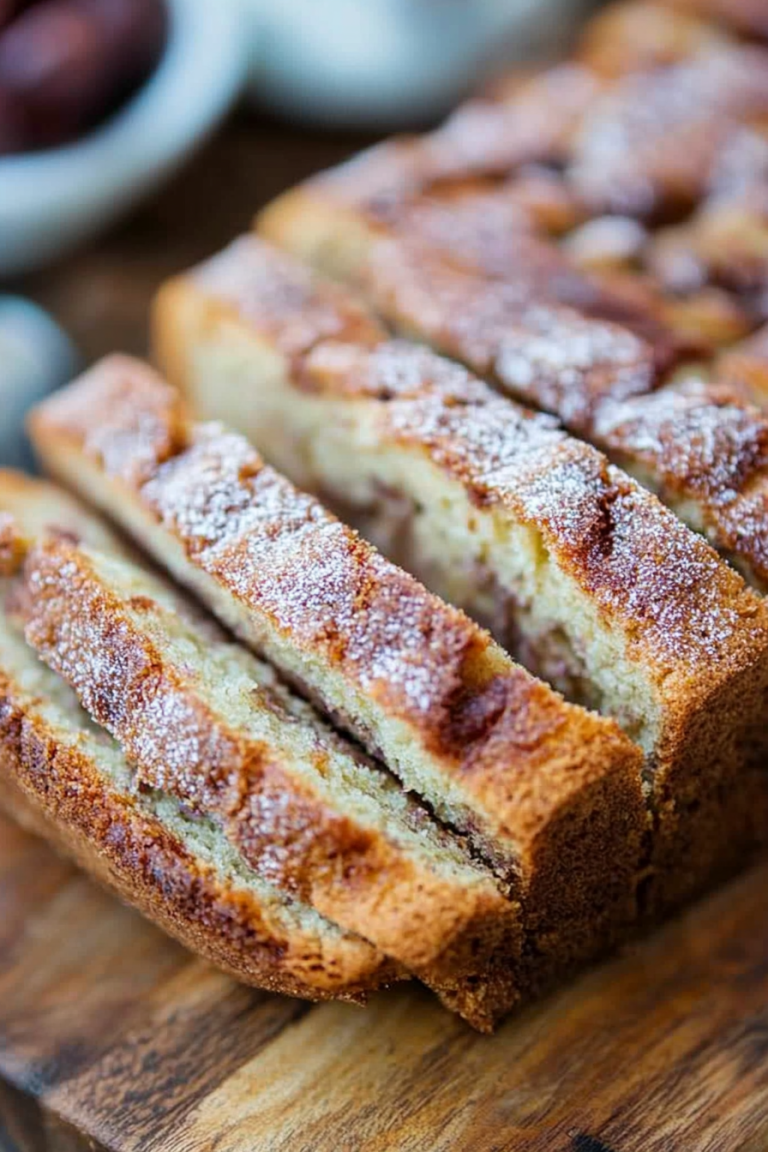
There’s something about the smell of baking bread that instantly makes my house feel cozy—like a gentle reminder that everything’s gonna be alright. I remember my grandma’s kitchen filled with the sweet aroma of cinnamon and ripe bananas, and it always felt like a hug from the inside out. Over the years, I’ve tinkered with her classic recipes, trying to find ways to make them a little lighter without losing that moist, tender crumb we all love. That’s how my favorite zucchini banana bread was born. It’s ridiculously good—moist, flavorful, and honestly, it tastes better than some fancy bakery versions I’ve bought for double the price. This one’s a lifesaver on busy nights when I want something comforting but don’t want to spend hours fussing in the kitchen. My kids ask for this all the time, and I always do this when I want to make a quick, wholesome treat that everyone will rave about. Trust me, once you try it, it becomes a recipe you’ll keep coming back to, especially when the bananas start over-ripening on your counter!
What is Zucchini Banana Bread?
Think of zucchini banana bread as a friendly twist on a classic comfort-food loaf. It’s essentially a moist, tender banana bread that gets a sneaky boost from shredded zucchini. The zucchini adds incredible moisture and a little extra veggie goodness—so you can feel a tiny bit better about indulging (not that you’d need to!). The name’s pretty straightforward: “zucchini” because we use that garden favorite, and “banana bread” because that’s the star of the show. The concept is simple—ripe bananas lend their natural sweetness, while zucchini keeps things lush without making it soggy or dense. It’s the kind of loaf that slices beautifully, smells divine when baking, and disappears in minutes (especially at my house). Whether I’m craving a breakfast treat, an afternoon snack, or a comforting dessert, this loaf always hits the spot. Plus, it’s perfect for sharing—because who doesn’t love a slice of homemade banana bread with a hidden veggie boost? That’s what I call sneaky nutrition with a side of nostalgia.
Why you’ll love this recipe?
Let me tell you, this zucchini banana bread is one of those recipes I keep in my back pocket for so many reasons. First off, the flavor? Oh my gosh, it’s incredible. Ripe bananas lend their natural sweetness, accented by a hint of cinnamon or vanilla if you like—plus, the zucchini keeps every bite extra moist and tender. What I love most about this is how ridiculously simple it is to make. You don’t need fancy ingredients or long prep times. I always do this when I want something quick but satisfying, and I swear, the smell alone brings everyone running to the kitchen. It’s budget-friendly, too—just use the overripe bananas you’ve got lying around, and if you’ve got zucchini sitting in the fridge, even better. You can customize it with nuts, chocolate chips, or even a handful of oats if you like a heartier loaf. And the best part? It stays incredibly moist for days—perfect for breakfast, snacks, or even as a quick dessert. Honestly, what I love most is how adaptable this is. When I’m rushing, I throw everything in one bowl and fold in my fillings. No fuss, just delicious. Trust me, once you make this, you’ll see—it’s one of those recipes that genuinely feels like a warm hug—something you’ll want to keep in your repertoire forever.
How do you make Zucchini Banana Bread?
Quick Overview
This zucchini banana bread comes together in about an hour, thanks to its straightforward process. You start by preheating your oven, then whisk together your moist ingredients—ripe bananas, grated zucchini, eggs, and melted butter or oil. In a separate bowl, you blend your dry ingredients—flour, baking soda, spices, and a touch of salt. Then, gently fold everything together, adding any extras like chocolate chips or nuts before pouring into your loaf pan. The secret is not overmixing—just until the ingredients are combined. After a quick bake, you get a loaf that’s beautifully golden, moist inside, and fragrant with cinnamon and banana goodness. Once cooled, a drizzle of glaze or a dusting of powdered sugar takes it over the top. The magic lies in its simplicity—no complicated steps, just honest, delicious baking magic that always delights.
Ingredients
For the Main Batter:
– 3 ripe bananas, mashed (the more brown spots, the sweeter and more flavorful!)
– 1 cup grated zucchini (squeeze out excess moisture)
– 1/2 cup melted butter or neutral oil
– 2 eggs, room temp
– 1 teaspoon vanilla extract
– 1 3/4 cups all-purpose flour (use whole wheat or gluten-free flour if needed)
– 1 teaspoon baking soda
– 1 teaspoon ground cinnamon (optional but highly recommended)
– 1/4 teaspoon salt
– 1/2 cup sugar or honey (adjust based on sweetness preference)
For the Filling (optional):
– A handful of chocolate chips or chopped nuts
– A sprinkle of shredded coconut or dried fruit for variety
For the Glaze:
– 1/2 cup powdered sugar
– 1-2 tablespoons milk or lemon juice
– A dash of vanilla or almond extract (if you want more flavor)
Step-by-Step Instructions
Step 1: Preheat & Prep Pan
Set your oven to 350°F (175°C). Grease a loaf pan with butter or line it with parchment paper—trust me, this makes removal easy peasy. If you want a crusty top, sprinkle a little flour or sugar on the bottom of the pan before pouring in the batter.
Step 2: Mix Dry Ingredients
In a medium bowl, whisk together your flour, baking soda, cinnamon, and salt. This step ensures everything is evenly distributed and helps your bread rise perfectly. I like to do this first so I don’t forget any key dry ingredient when I add it to the wet mixture.
Step 3: Mix Wet Ingredients
In a large bowl, mash your bananas until smooth—this is my kids’ favorite part because they love to mash! Add the eggs, melted butter, vanilla, and sugar. Mix until everything looks well combined and slightly frothy. I learned to do this step first because it helps to dissolve the sugar and distribute the bananas evenly.
Step 4: Combine
Gradually add your dry ingredients to the wet, gently folding with a spatula. Do NOT overmix, or the loaf can turn dense. The batter should be just combined—no streaks of flour. If it feels a little thick, don’t worry; that’s normal because of the banana and zucchini moisture.
Step 5: Prepare Filling
If you’re adding chocolate chips, nuts, or dried fruit, fold them gently into the batter now. I love tossing in a handful of mini chocolate chips—they melt slightly during baking and make every slice irresistibly gooey.
Step 6: Layer & Swirl
Pour about half the batter into your prepared pan. Add the filling layer—more chocolate chips, sliced nuts, or even a swirl of peanut butter. Top with the rest of the batter and use a knife or skewer to swirl gently, creating pretty marbled patterns. This step is my favorite because it makes each slice look like a little masterpiece.
Step 7: Bake
Pop it in the oven and bake for 50-60 minutes. Check doneness by inserting a toothpick into the center; if it comes out clean, you’re golden. Ovens vary, so start checking around 50 minutes. My trick? I bake until the top is golden and a little cracked—just like grandma’s.
Step 8: Cool & Glaze
Let the bread cool in the pan for about 10 minutes, then transfer to a wire rack. Once fully cooled, drizzle with your glaze or dust with powdered sugar. I’ve learned that glazing while slightly warm helps it spread evenly and sets beautifully.
Step 9: Slice & Serve
Slice with a serrated knife, wiping the blade between slices for neat cuts. Serve it slightly warm or at room temp. I love pairing it with a glass of cold milk, a steaming cup of coffee, or a dollop of yogurt. It’s perfect for breakfast, snack time, or even a casual dinner with friends. Honestly, this bread always disappears fast—my family devours it!
What to Serve It With
This zucchini banana bread is so versatile, it goes with almost anything. In the morning, I love serving slices with a good cup of coffee or espresso, maybe topped with a smear of peanut butter or a dollop of yogurt. It’s fantastic toasted too, especially with a pat of butter melting on top. For brunch, serve it alongside a fruit salad and a side of scrambled eggs—makes the meal feel fancy but super easy. At dinner parties, I love presenting neat slices topped with fresh berries and whipped cream, turning it into a lovely dessert. Or, on cozy nights, I slice thick pieces and warm them in the microwave until they’re just heated through—so comforting! My kids ask for this all the time, and I swear it’s the one recipe that makes everyone happy, no matter the occasion. Plus, it’s great for packing into lunchboxes or freezing for easy snacks later in the week—that’s a real win in my book.
Top Tips for Perfecting Your Zucchini Banana Bread
After making this countless times, I’ve learned a few tricks that make it turn out just right every time. Here are my top tips:
- Zucchini Prep: Always squeeze out excess moisture from the grated zucchini. You don’t want a soggy loaf, so trust me, a clean kitchen towel or paper towel works wonders. I test a small piece before adding it in because too much moisture can make your bread dense rather than tender.
- Mixing Advice: When combining wet and dry, fold gently and just until the batter is combined. Overmixing causes gluten development, and then your bread can turn dense or tough. Think of it as gently folding—like giving it a little hug—until just combined.
- Swirl Customization: For a really stunning marbled look, alternate layers of batter and fillings and swirl in one direction. Use a skewer or toothpick in a figure-eight motion for beautiful, natural patterns. Trust me, it’s worth the extra minute.
- Ingredient Swaps: You can swap out whole wheat flour or gluten-free blends—just remember to adjust the liquids slightly. I tested with almond milk once, and it made it even creamier, which my kids loved. Also, if you prefer less sweetness, reduce the sugar or replace it with natural sweeteners like maple syrup or honey.
- Baking Tips: Always check for doneness around the 50-minute mark. Ovens vary, and you don’t want an underbaked center or overbaked crust. Use a toothpick test: inserted in the middle, it should come out with just a few moist crumbs, not wet batter.
- Glaze Variations: For a tangy twist, add a splash of lemon juice or zest to your glaze. Or, sprinkle some flaky sea salt on top for a sweet-savory vibe that’s incredible.
- Room Temperature: Up to 2 days. Keep it in a cool, dry spot—don’t leave it in direct sunlight or near heat sources, or it might dry out.
- Refrigerator Storage: Up to a week. Wrap the slices individually with foil or store in a container with a lid. I prefer this option if the weather’s hot or humid, as it keeps the bread soft and fresh.
- Freezer Instructions: Wrap slices tightly in plastic wrap, then place in a freezer-safe bag. It’s good for up to 3 months. To reheat, thaw at room temp or warm slices briefly in the microwave. It tastes almost as good as fresh, especially with a quick toast or a drizzle of honey.
- Glaze Timing: If you want the glaze to set nicely, add it once the bread is completely cooled. For a quicker fix, you can brush warm slices with the glaze for an instant sticky, sweet crust.
Over the years, I’ve played around with different tweaks—adding a touch of nutmeg, swapping bananas for applesauce, or tossing in dried cranberries. Honestly, each change brings a new dimension, and I love experimenting. But the core recipe remains a family favorite—moist, flavorful, and always reliable. Just remember, baking is an art as much as it’s science, so don’t be afraid to make it your own. The best recipes are the ones you tweak to fit your taste and pantry!
Storing and Reheating Tips
This bread stays fresh longer than you’d think—thanks to all that zucchini and banana moisture. Store it in an airtight container or wrapped tightly in plastic wrap.
Each method keeps that fluffy, moist texture intact, ensuring every slice is as delightful as the first.
Frequently Asked Questions
Final Thoughts
If I could wrap up my love for this zucchini banana bread in a word, it would be “cozy.” It’s the kind of recipe that gets better every time, especially with a splash of creativity—adding nuts, swapping in different spices, or experimenting with toppings. I always keep a batch in the freezer because one slice is never enough, especially when I want a quick treat that tastes like a warm hug from childhood. This bread reminds me of lazy weekend mornings, family brunches, and the simple beauty of homemade baking. Honestly, you’re going to love how forgiving and forgiving it is—whether you’re a seasoned baker or a total newbie. Give it a try, and I bet it’ll quickly become one of your go-to comfort recipes too. Can’t wait to hear how yours turns out—happy baking, friends!

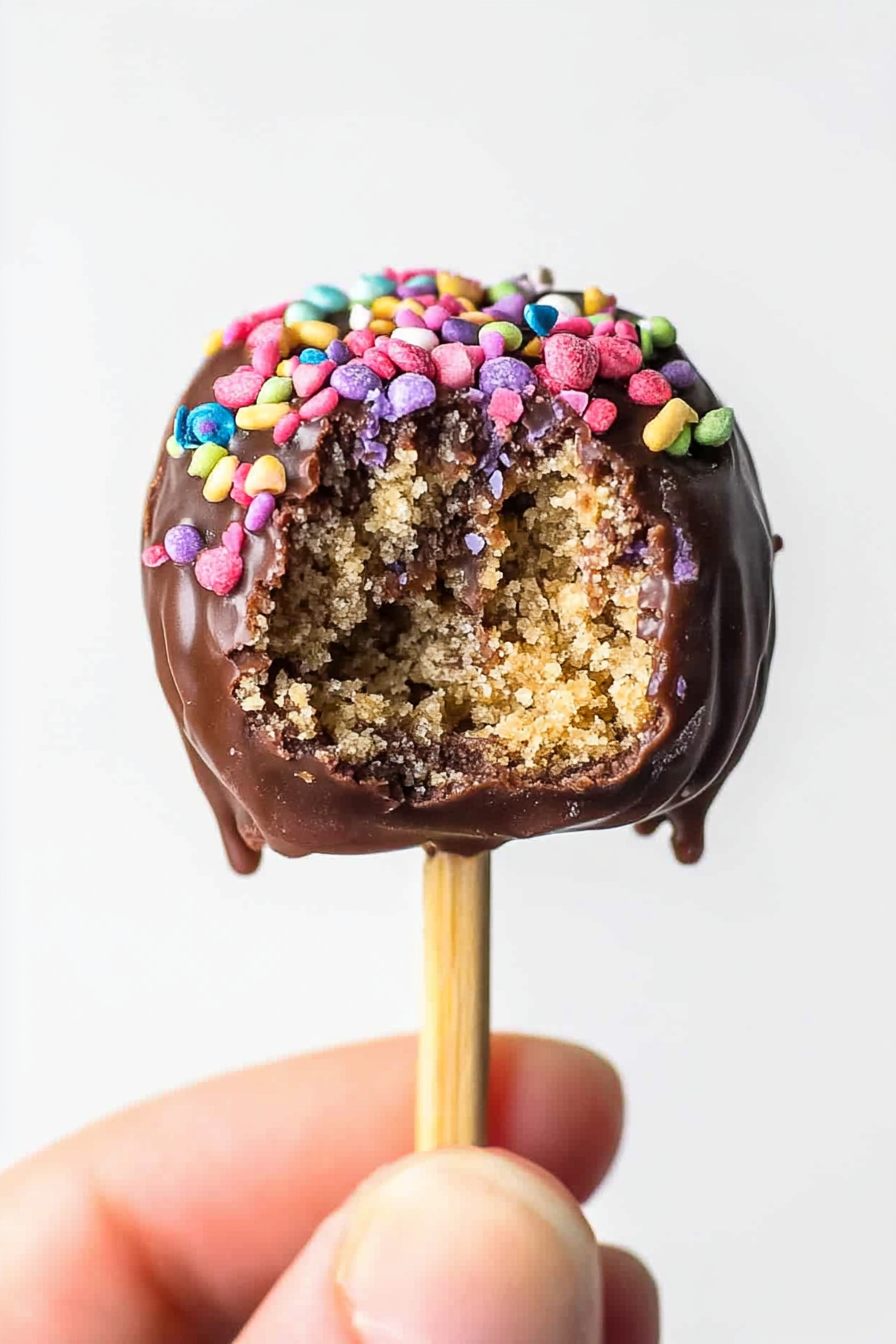
Protein Cake Pops
Ingredients
Method
- Add the ingredients for the balls into a medium bowl.
- Use a wooden utensil to mix until combined. Eventually, it may be easier to knead the dough with your hands. The dough should be malleable and a little bit oily. If it is not, add more water by the teaspoon until it turns into a cookie dough-like dough.
- Use a 1-tablespoon cookie scoop and roll balls between your palms. Place the balls on a parchment-lined plate. Once the balls are rolled, transfer the plate to the freezer to allow the balls to firm up.
- Add the chocolate chips to a microwave-safe bowl and microwave on high for 30-second intervals, stirring every time. Repeat until the chocolate is smooth.
- Add the heavy cream to a microwave-safe bowl and microwave for 30-50 seconds or until the cream is warm, not boiling.
- Slowly pour the cream into the chocolate, mixing the ingredients until combined and glossy.
- Line a baking sheet with parchment paper and place a metal rack on top of the parchment paper.
- Remove the balls from the freezer. Use a fork to dip balls into the chocolate, coating it completely.
- Tap the fork on the side of the bowl so that you can remove as much excess chocolate as possible. Use a wooden skewer or toothpick to slide the protein ball off of the fork and back onto a metal rack. Sprinkle the protein pops with sprinkles and salt. Repeat until you've coated all the balls.
- Place the sheet back into the freezer for at least 30 minutes to firm up.
- Remove the cake pops from the freezer and stick a lollipop stick into the bottom of each cake pop. Eat immediately or store in the freezer until ready to enjoy.