Coconut Almond Cake How to Bake Bliss
There’s something about a slice of homemade cake that instantly warms my soul—maybe it’s the smell drifting through the house or the way my kids ask for seconds before I even finish the first piece. I remember my grandma’s kitchen when she’d pull out her secret zucchini bread, and the aroma would make everyone gather ‘round. This zucchini swirl cake is a modern twist on that cozy nostalgia—packed with fresh, tender zucchini and a sweet, creamy filling, all swirled in a tender, moist cake that’s just perfect for any occasion. Honestly, I make this one when I need a little comfort or want to impress friends without spending hours fussing over complicated desserts. It’s incredible how a simple veggie can turn into something so irresistibly delicious, and the best part? It’s a total lifesaver on busy nights—the kind of recipe that makes you feel like a baking hero with minimal effort. I’ve tested this with different fillings, alt-milks, and even added a dash of cinnamon just for fun—and trust me, it never fails to make my house smell like vanilla and sweet childhood memories.
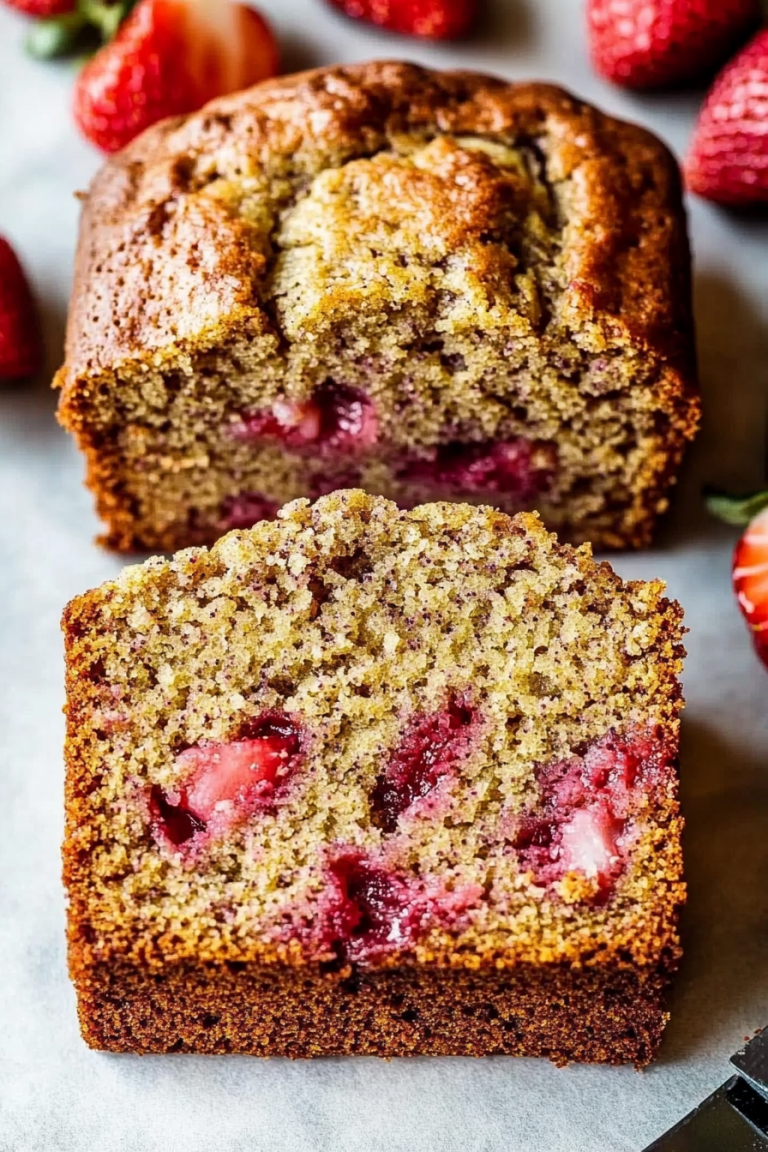
What is Zucchini Swirl Cake?
Think of this as a beautiful, layered dessert that combines the freshness of summertime zucchinis with the indulgence of a bakery-style cake. Its name, “zucchini swirl cake,” is pretty literal—you’re mixing shredded zucchini into a soft, buttery cake batter, then swirling in a luscious filling before baking. It’s essentially a marriage between a quick bread and a delicate layered cake, but with a little extra flair thanks to that gorgeous marbling effect. The swirl of the filling—whether it’s cream cheese, lemon curd, or even chocolate—adds not just flavor but a lovely visual pop. This cake is super forgiving, making it perfect for bakers of all levels. Plus, it’s a sneaky way to get kids (and adults!) to eat their veggies without a fuss. You get a tender crumb, a burst of moistness from the zucchini, and that addictive swirled interior that makes each slice a little piece of heaven. It’s become a staple at my house—my kids ask for it all the time, especially when we’re looking for a cozy, sweet treat that feels a little special.
Why you’ll love this recipe?
What I love most about this zucchini swirl cake is how genuinely versatile and forgiving it is. The flavor—I swear, that hint of zucchini keeps the cake moist and tender—paired with whatever filling you choose, creates this playfully delicious combo. I’ve made it countless times, swapping out fillings and adding my favorite spices, and it always turns out beautifully. The smell alone is enough to bring everyone running—warm vanilla, a touch of cinnamon, and that subtle earthy aroma from the zucchini. Plus, it’s impressively simple. You just mix, layer, swirl, and bake—no fancy techniques needed. Budget-wise, it’s a winner because those zucchinis are in season for a few bucks, and the rest of the ingredients are pantry staples. I find it’s perfect for breakfast, brunch, or a cozy weekend dessert. What’s more, this cake is adaptable—gluten-free, vegan, or even kid-friendly, depending on what swaps you make. Once you get the hang of it, you’ll see how this humble vegetable transforms into something spectacular—moist, flavorful, and downright addictive. Trust me, once you try it, it’ll be in your rotation forever!
How do I make Zucchini Swirl Cake?
Quick Overview
This cake comes together in just a few simple steps—first, grate and prep the zucchini to keep it nice and moist. Then, mix up your batter and pour it into your prepared pan. The filling gets layered or spread on top, then you swirl a skewer or knife through the batter to create a marbled effect. A quick bake later, and you’re rewarded with a tempting, golden masterpiece that’s as beautiful as it is delectable. What makes this method special is how effortlessly the swirl forms—no fancy piping or layering skills required. It’s a one-bowl wonder with fantastic flavor and a texture that’s both light and moist—perfect for sharing with family or friends on a lazy Sunday afternoon.
Ingredients
For the Main Batter:
– 2 cups all-purpose flour (or gluten-free blend if you like)
– 1 cup granulated sugar (raw sugar works beautifully too)
– 1 teaspoon baking powder
– ½ teaspoon baking soda
– ½ teaspoon salt
– 1 teaspoon ground cinnamon (optional but highly recommended)
– 1 cup vegetable oil (or melted butter for richer flavor)
– 3 large eggs
– 1 teaspoon vanilla extract
– 1½ cups grated zucchini (squeeze out excess moisture gently)
For the Filling:
– 8 oz cream cheese, softened (or dairy-free alternative)
– ½ cup powdered sugar or honey
– 1 teaspoon vanilla extract
– Zest of 1 lemon (optional but brightens the flavor)
For the Glaze:
– ½ cup powdered sugar
– 1-2 teaspoons milk or lemon juice
– Extra lemon zest or pure vanilla for flavor options
Step-by-Step Instructions
Step 1: Preheat & Prep Pan
Set your oven to 350°F (175°C). Line a 9-inch round cake pan with parchment paper or grease it well. I always do this early because nothing’s worse than a stuck cake—trust me, I’ve learned this lesson the hard way. If you want a crusty edge, use butter or cooking spray. Have your zucchini grated and squeezed dry, so the cake isn’t soggy—moisture control is key here!
Step 2: Mix Dry Ingredients
In a large bowl, whisk together the flour, sugar, baking powder, baking soda, salt, and cinnamon. Getting these dry ingredients evenly combined ensures your cake rises uniformly and has a consistent crumb. I usually sift mine, just to keep everything nice and airy.
Step 3: Mix Wet Ingredients
In a separate bowl, beat the eggs, then stir in the oil, vanilla, and zucchini. The zucchini might look a little watery—don’t worry—that’s normal. I tested this with almond milk once, and it actually made the cake even creamier. Mix until just combined—you don’t want to overwork the batter, or it could get dense.
Step 4: Combine
Pour the wet mixture into the dry bowl, gently fold everything together until just blended. The batter should be thick but pourable. If it’s too stiff, add a splash of milk, but don’t go overboard.
Step 5: Prepare Filling
In a small bowl, beat the softened cream cheese, powdered sugar, vanilla, and lemon zest until smooth. It’s wonderfully creamy and tangy—my secret weapon for that wonderful swirl effect. Feel free to swap in ricotta or mascarpone if you like a richer filling.
Step 6: Layer & Swirl
Spread half the batter in your prepared pan. Drop spoonfuls of the cream cheese mixture over it, then dollop the rest of the batter on top. Using a toothpick or a butter knife, swirl through the batter to create beautiful ribbons. Don’t overdo it—just enough to get a good marbled pattern. This part is fun—and kind of Zen.
Step 7: Bake
Pop it in the oven and bake for about 40-45 minutes, or until a toothpick inserted in the center comes out clean. Oven times can vary, so start checking around the 38-minute mark—if the top is golden and a toothpick comes out tidy, it’s done. My trick? Let it cool in the pan for 15 minutes before transferring to a wire rack—you’ll avoid cracks and sogginess.
Step 8: Cool & Glaze
Once cooled, mix your glaze ingredients and drizzle over the top. The warmth helps the glaze seep into the cracks, making each bite that much more delicious. If I want a glossier finish, I double the glaze recipe, but honestly, a simple dusting of powdered sugar works too if I’m in a hurry.
Step 9: Slice & Serve
Use a sharp serrated knife for clean slices—cut when fully cooled for the neatest look. Serve at room temperature, maybe with a dollop of whipped cream or a fresh fruit salad. This cake keeps beautifully in the fridge for a day or two—if it lasts that long!
What to Serve It With
This cake is so flexible—here are some ideas for different settings:
- For breakfast: A light dusting of powdered sugar with a hot cup of coffee or tea. It’s almost like a veggie-infused muffin in disguise.
- For brunch: Serve slices with fresh berries, a drizzle of honey, and sparkling water with lemon. Adds a fresh, summery vibe.
- As dessert: Pair with a scoop of vanilla ice cream or a dollop of Greek yogurt. The tangy sweetness of the filling pairs so well with cream—and it’s beautiful served with a sprig of mint.
- For cozy snacks: Cut thick slices and spread with a bit of butter or cream cheese. Perfect when you want something sweet but comforting. My family loves it warm with a cup of tea on a chilly day—super nostalgic.
This cake is a household favorite because it’s just so adaptable. I’ve added chopped walnuts for crunch, used lemon zest instead of vanilla, or even folded in some blueberries for extra fruitiness. It’s one of those recipes I can throw together in a pinch and feel proud about. Every time I serve it, someone asks for the recipe, and I love sharing it. That’s the magic of a good homemade treat—made with love, it’s always a hit.
Top Tips for Perfecting Your Zucchini Swirl Cake
I’ve made this cake more times than I can count, and I’ve learned a few tips that really help it turn out perfectly every single time:
- Zucchini Prep: Always squeeze out as much moisture as possible after grating. I keep a clean kitchen towel nearby and give it a good squeeze—moisture is the enemy here because it can make your cake soggy. Also, using fresh zucchini makes a difference in flavor and tenderness.
- Mixing Advice: Don’t overmix once you combine your wet and dry ingredients; that’s how gluten develops and ultimately makes your cake dense. Mix just until you see no streaks of flour and everything looks combined.
- Swirl Techniques: Think of swirling as art—you want gentle, broad strokes. Use a skewer or butter knife, zig-zagging through the batter without overmixing. If you’re feeling adventurous, try creating a spiral pattern or layered stripes for a more dramatic look.
- Ingredient Swaps: For dairy-free options, almond or coconut cream cheese work really well, and maple syrup can replace sugar for a natural sweetness. I’ve also tested zucchini-coconut combinations that are surprisingly fabulous and super moist.
- Baking Tips: If your oven runs hot, consider lowering the temperature slightly or keeping an eye on the progress. Use the toothpick test—if it comes out clean, it’s ready. The top should be golden but not burnt.
- Glaze Variations: For a richer flavor, add a splash of vanilla or a teaspoon of matcha powder. You can also sprinkle chopped nuts on top before baking for extra crunch or finish with a drizzle of honey instead of glaze for a more rustic charm.
Honestly, I’ve learned a lot from the little mistakes along the way—like accidentally over-swirl or under-baking. But that’s part of the fun, right? Every attempt gets better. The key is to keep it simple, use fresh ingredients, and enjoy the process. If you’re patient, it turns out stunningly every time. Just trust your senses—look for that beautiful golden crust, smell that inviting aroma, and taste-test for perfect sweetness and moistness.
Storing and Reheating Tips
This cake keeps surprisingly well. If you have leftovers (ha!), store it tightly wrapped in foil or an airtight container at room temperature for up to two days. I find that covering it with a clean tea towel helps keep it from drying out. For longer storage, pop it in the fridge—just make sure it’s wrapped well because it can soak up fridge smells. It’s best eaten within three days, but I’ve reheated slices briefly in the microwave for about 20 seconds—deliciously warm and just as moist. If you want that fresh-baked feel, you can also warm individual slices in the oven at 350°F for 5-8 minutes. When it comes to the glaze, I recommend adding it just before serving unless you want the cake to stay extra moist and shiny. It can turn a little dull in the fridge, so a quick re-glaze adds that lovely finishing touch.
One tip—if you’re freezing, wrap slices tightly in plastic wrap and then foil, and store for up to a month. Thaw overnight in the fridge or at room temperature before serving. That way, you get to enjoy that homemade goodness anytime, even when zucchinis aren’t in season.
Frequently Asked Questions
Final Thoughts
If you’re looking for a baking project that’s cozy, crowd-pleasing, and sneaky healthy (thanks, zucchini!), this swirl cake is your new best friend. I love how each slice feels like a little celebration—moist, flavorful, with that gorgeous marbled effect that makes everyone do a double-take. Whether I’m serving it at a weekend brunch, a casual family dinner, or tucked into a lunchbox for later, it’s always met with ooohs and ahhhs. I’ve made this so many times that I’ve lost count, but what never changes is how much my family loves it. The smell alone brings everyone to the kitchen, and I love watching their faces light up with that first bite. Don’t be shy about experimenting—add nuts, swap fillings, or dust with cocoa powder—this isn’t just a recipe, it’s your canvas! Can’t wait to hear how yours turns out—feel free to share your tweaks and ideas. Happy baking, friends!
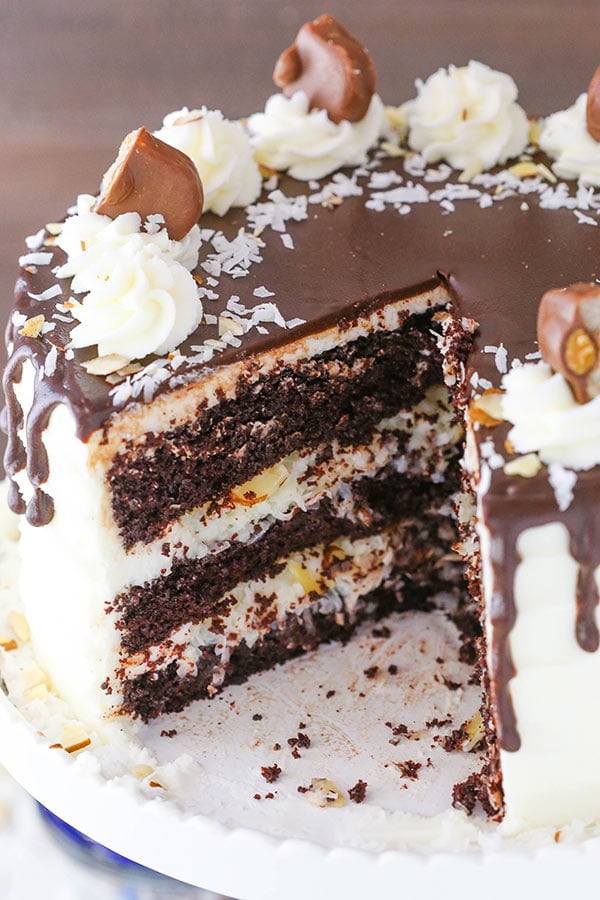
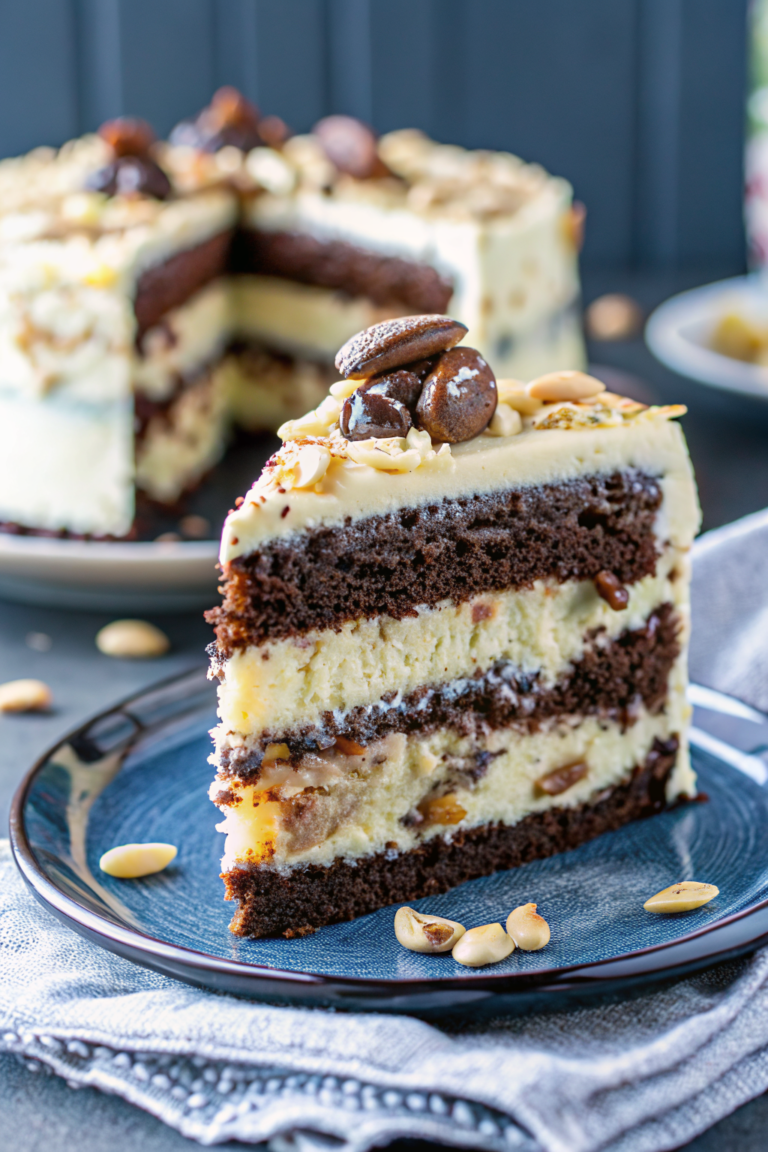
almond joy
Ingredients
Method
- Preheat oven to 350°F and prepare three 8 inch cake pans with non-stick spray and parchment.
- Mix dry ingredients: flour, sugar, cocoa, baking soda, baking powder, and salt in a large bowl.
- Combine wet ingredients: milk, vegetable oil, vanilla, and eggs in a medium bowl.
- Add wet to dry ingredients and beat until smooth. Mix hot water in gradually.
- Divide batter among pans and bake for 22-25 minutes. Cool completely.
- Prepare coconut filling by mixing shredded coconut with condensed milk.
- Make frosting by beating butter and shortening, then add powdered sugar, coconut extract, and water until smooth.
- Level cakes. Spread a layer of frosting on each layer, add coconut filling, and sprinkle almonds.
- Stack the cake layers, crumb coat, and refrigerate to set.
- Prepare ganache by heating cream and pouring over chocolate chips. Whisk until smooth.
- Decorate the cake with ganache, remaining frosting, coconut, almonds, and optional candy bars.