Rich Butterscotch Cheesecake Recipe
There’s just something about a warm slice of zucchini swirl cake that brings back all the cozy, nostalgic feelings. I remember my grandmother baking this in her old, carbon-copy kitchen when I was a kid—her apron dusted in flour, the smell of cinnamon wafting through the house as she swirled the batter with such love. Now, I make it often in my own kitchen, especially on busy weekends when I want something that tastes like a hug but is quick enough to whip up after school runs. Honestly, this is my go-to sweet treat when I need a little comfort, but I don’t want to spend hours fussing over a complicated dessert. It’s kind of magical how a simple handful of ingredients—some grated zucchini, cinnamon, and sugar—can turn into a stunning, flavorful cake that disappears in minutes at my house. My kids actually ask for seconds, and I love knowing I’m sneaking in some veggies in the process! Trust me on this one: if you’re looking for a moist, tender cake with an irresistible swirl of cinnamon-sugar goodness, you’re going to fall in love with this recipe.
What is Zucchini Swirl Cake?
This zucchini swirl cake is more than just a pretty dessert—it’s a casual, cozy treat that feels like childhood wrapped in a slice. Think of it as a cross between a humble loaf and a decadent coffee cake, all rolled into one. The name comes from the way I layer and swirl the cinnamon-sugar mixture through the batter before baking, creating lovely ribbons of flavor and texture. It’s essentially a moist, tender cake with a hidden veggie boost—nothing overly fancy, just good old comfort food that happens to be health-smart too. The grated zucchini adds moisture like magic; it keeps the cake insanely soft and almost melts in your mouth. It’s perfect for breakfast, brunch, or a sneaky afternoon snack with tea. And bonus: it’s pretty flexible. You can make it a little sweeter or less sweet, add nuts or chocolate chips, or swap the glaze—whatever makes it feel like your own special treat.
Why you’ll love this recipe?
What I love most about this zucchini swirl cake is how it hits all the right notes—moist, flavorful, and irresistibly cozy. The smell alone brings everyone running to the kitchen—think warm cinnamon, sweet zucchini, and that hint of vanilla. It’s surprisingly easy to make, even on a busy weeknight, because most of the work is just grating zucchini and mixing the batter. No fancy equipment needed, just a bowl, a spoon, and a baking pan. Plus, it’s such a cost-effective way to sneak some veggies into dessert—my little ones actually think I’m sneaking extra treats into their snacks! The versatility is another big win. I’ve experimented with swapping out ingredients like almond milk or adding a handful of chopped nuts, and it’s always fabulous. This cake is forgiving, forgiving, forgiving—trust me, I’ve overmixed, underbaked, and still loved the results. And honestly, it’s one of those recipes that tastes even better the next day, once the flavors meld and settle into that perfect, tender crumb. It’s a crowd-pleaser that always earns smiles, whether I’m serving it at a casual family gathering or slicing a piece for myself on a quiet Sunday morning.
How do I make Zucchini Swirl Cake?
Quick Overview
This cake is all about simplicity. Combine freshly grated zucchini with a moist batter, pour half into your pan, sprinkle with cinnamon-sugar, swirl it through, then layer with the remaining batter. Bake until golden, cool just enough to handle, and then drizzle with a glaze or dust with powdered sugar. It’s basically foolproof—no fancy techniques, just good, honest baking. What makes this method special is how the swirl creates beautiful ribbons of cinnamon flavor throughout each slice, giving the cake a rustic yet elegant look. Plus, it’s surprisingly quick to put together, so it’s perfect when you’re craving something sweet but don’t want to spend hours in the kitchen.
Ingredients
For the Main Batter:
– 2 cups grated zucchini (about 2 medium zucchinis; I always do this after giving them a good squeeze to remove excess moisture)
– 1 1/2 cups all-purpose flour (or gluten-free blend if you prefer)
– 1 teaspoon baking powder
– 1/2 teaspoon baking soda
– 1/2 teaspoon salt
– 1 teaspoon ground cinnamon
– 1/2 cup sugar
– 1/4 cup packed brown sugar
– 1/2 cup vegetable oil or melted butter
– 2 large eggs
– 1 teaspoon vanilla extract
For the Filling:
– 1/4 cup sugar
– 1 teaspoon ground cinnamon
– Optional: chopped nuts or chocolate chips
For the Glaze:
– 1 cup powdered sugar
– 2-3 tablespoons milk (or almond milk for a dairy-free option)
– A splash of vanilla or lemon juice for extra flavor
Step-by-Step Instructions
Step 1: Preheat & Prep Pan
I always start by preheating my oven to 350°F (175°C). Then, I line my 9×9-inch baking dish with parchment paper or a bit of butter and flour—this cake sticks if you’re not careful! Make sure your zucchini is grated finely, then give it a good squeeze with a clean towel to remove excess moisture. That step is key—if you skip it, your cake might turn out a little dense or soggy.
Step 2: Mix Dry Ingredients
In a big bowl, whisk together the flour, baking powder, baking soda, salt, and cinnamon. I find that mixing dry ingredients first helps prevent clumps and ensures everything is evenly distributed. Plus, it makes the whole process quicker and smoother.
Step 3: Mix Wet Ingredients
In another bowl, beat together the eggs, sugar, brown sugar, oil, and vanilla until well combined and slightly frothy—that’s when I know the mixture is nice and smooth. I’ve tested this with plant-based milks, like almond milk, and it actually made the batter even creamier, which I loved. Just make sure everything’s at room temperature for the best results.
Step 4: Combine
Bring the two bowls together—pour the wet into the dry, then gently fold until just combined. Don’t overmix, or the cake could end up a little tough. A few lumps are totally fine; that’s what keeps it tender.
Step 5: Prepare Filling
Mix the cinnamon and sugar for the filling in a small bowl. If you’re feeling decadent, chop up some nuts or toss in mini chocolate chips—they add nice texture and flavor.
Step 6: Layer & Swirl
Spread half the batter into your prepared pan. Then sprinkle the cinnamon-sugar mixture evenly over it. Drop spoonfuls of the remaining batter on top, then use a toothpick or knife to swirl gently through the layers—think of it as creating little chocolate or cinnamon ribbons. This is the fun part that makes the cake look so charming and rustic.
Step 7: Bake
Pop it into your preheated oven and bake for about 35-40 minutes. Check for doneness with a toothpick; it should come out clean or with just a few moist crumbs. If the top darkens too quickly, tent it with foil. Every oven is different, so I always start checking around the 30-minute mark.
Step 8: Cool & Glaze
Let the cake cool in the pan for about 15 minutes—this helps it set and makes slicing easier. Meanwhile, whisk together your glaze ingredients until smooth. Pour it over the slightly warm cake—it soaks in just enough to add sweetness and shine. I love adding a dash of lemon juice to the glaze; it brightens the whole thing up.
Step 9: Slice & Serve
Use a sharp knife to cut through the layers cleanly—warm, moist, and beautifully marbled. Serve it slightly warm or at room temperature. A dollop of whipped cream, a sprinkle of extra cinnamon, or even a scoop of vanilla ice cream makes it even more special. My family often asks for leftovers, and honestly, it reheats beautifully in the microwave, keeping that tender crumb intact.
What to Serve It With
This zucchini swirl cake is super versatile. For breakfast, I love slicing it and serving it with fresh fruit and a good cup of coffee—nothing fancy, just homey and nourishing. It smells so good that my husband always asks me to make it on weekend mornings. If you’re hosting brunch, pair it with a fruit salad or a nice yogurt parfait—crisp apples, berries, and maybe some toasted nuts on the side make everything taste even better. As a dessert, it’s no-fuss and totally crowd-pleasing—serve it with a shot of espresso or a glass of cold milk for the kids. But honestly, I think my favorite way is just a warm slice straight from the oven, with a smear of butter or a drizzle of honey—simple and perfect. It’s also great for a cozy snack on cool afternoons, especially when paired with tea or a glass of milk. This cake always reminds me of lazy weekend mornings and my kids asking for “just one more piece” before bedtime—I guess it’s a keeper!
Top Tips for Perfecting Your Zucchini Swirl Cake
Getting this cake just right is all about minor details that make a big difference. First, I can’t stress enough how important it is to squeeze out as much moisture from the zucchini as you can—extra water makes the batter runny and can cause the cake to collapse a little in the middle. I’ve tested shredding zucchinis with a box grater, then wrapping them in a clean towel and squeezing all the juice out, and it’s a game changer. Trust me on this one. When mixing your wet ingredients, I’ve learned to use room-temperature eggs and butter (or oil)—it blends better and gives the cake a tender crumb. Overmixing the batter is a mistake I’ve made more times than I can count, but now I gently fold everything together until just combined—your patience pays off. For the swirl, I like to sprinkle the cinnamon-sugar mixture generously—more is better! But if you’re feeling adventurous, try adding chopped nuts, mini chocolate chips, or even dried fruit in the swirl for a new twist. My oven’s hot spots once made me adjust baking time slightly, so I always check the cake at around the 35-minute mark to prevent overbaking. When making frosting or glaze, I prefer a slightly runny consistency so it thickly coats but doesn’t pool too much, and I often add a splash of lemon or vanilla for extra flavor. I’ve learned that the secret to a beautiful, marbled swirl is patience—gently swirling the batter, not stirring too hard, lets those ribbons of cinnamon really shine through. These little tricks keep me coming back for more every time!
Storing and Reheating Tips
When I have leftover slices (which is rare, because they disappear fast!), I store them carefully to keep that moistness. If I plan to enjoy the cake within a day or two, I just cover it with a clean kitchen towel at room temperature—no need for plastic, which can make the top soggy. For longer storage, I wrap slices tightly in plastic wrap and keep them in the refrigerator for up to 4 days. The flavor actually tastes even better after a day or two because the cinnamon and zucchini have time to meld together. When reheating, I toss a slice in the microwave for about 20 seconds—it warms up perfectly, staying soft and moist. If you want it to taste freshly baked, pop it back in the oven at 350°F for about 10 minutes—trust me, it’s like magic. Freezers are your friend, especially if you bake a batch ahead of the holidays. Wrap individual slices or the whole cake tightly in foil and then place it in an airtight container. Thaw in the fridge or at room temp for a few hours, then reheat if desired. I usually skip glazing on stored cake if I want to keep it simple, but you can add more glaze after reheating for the perfect shiny finish. Just remember, this cake is best enjoyed fresh, but it holds up beautifully—bonus points for making ahead!
Frequently Asked Questions
Final Thoughts
This zucchini swirl cake is one of those recipes I keep returning to because it’s so forgiving and comforting. It’s a true testament to how simple ingredients—some shredded zucchini, a handful of pantry staples—can create something that feels like a warm hug. Over the years, I’ve tweaked it here and there, but the essence remains unchanged: a moist, cinnamon-swirled treat that everyone in the family asks for. When you make this, I promise the aroma will fill your house, and you’ll hear happy “mmm”s from everyone at the table. It’s perfect for lazy weekends, quick get-togethers, or when you need a little sweetness but don’t want to fuss too much. I hope you give it a try and find your own variations—maybe add a handful of walnuts or swap out the glaze for a dusting of powdered sugar. Happy baking, and I’d love to hear how yours turns out—drop a comment or share your tips below! Remember, this cake tastes even better the next day, so don’t hesitate to make it ahead. Enjoy every bite like it’s a little piece of home!
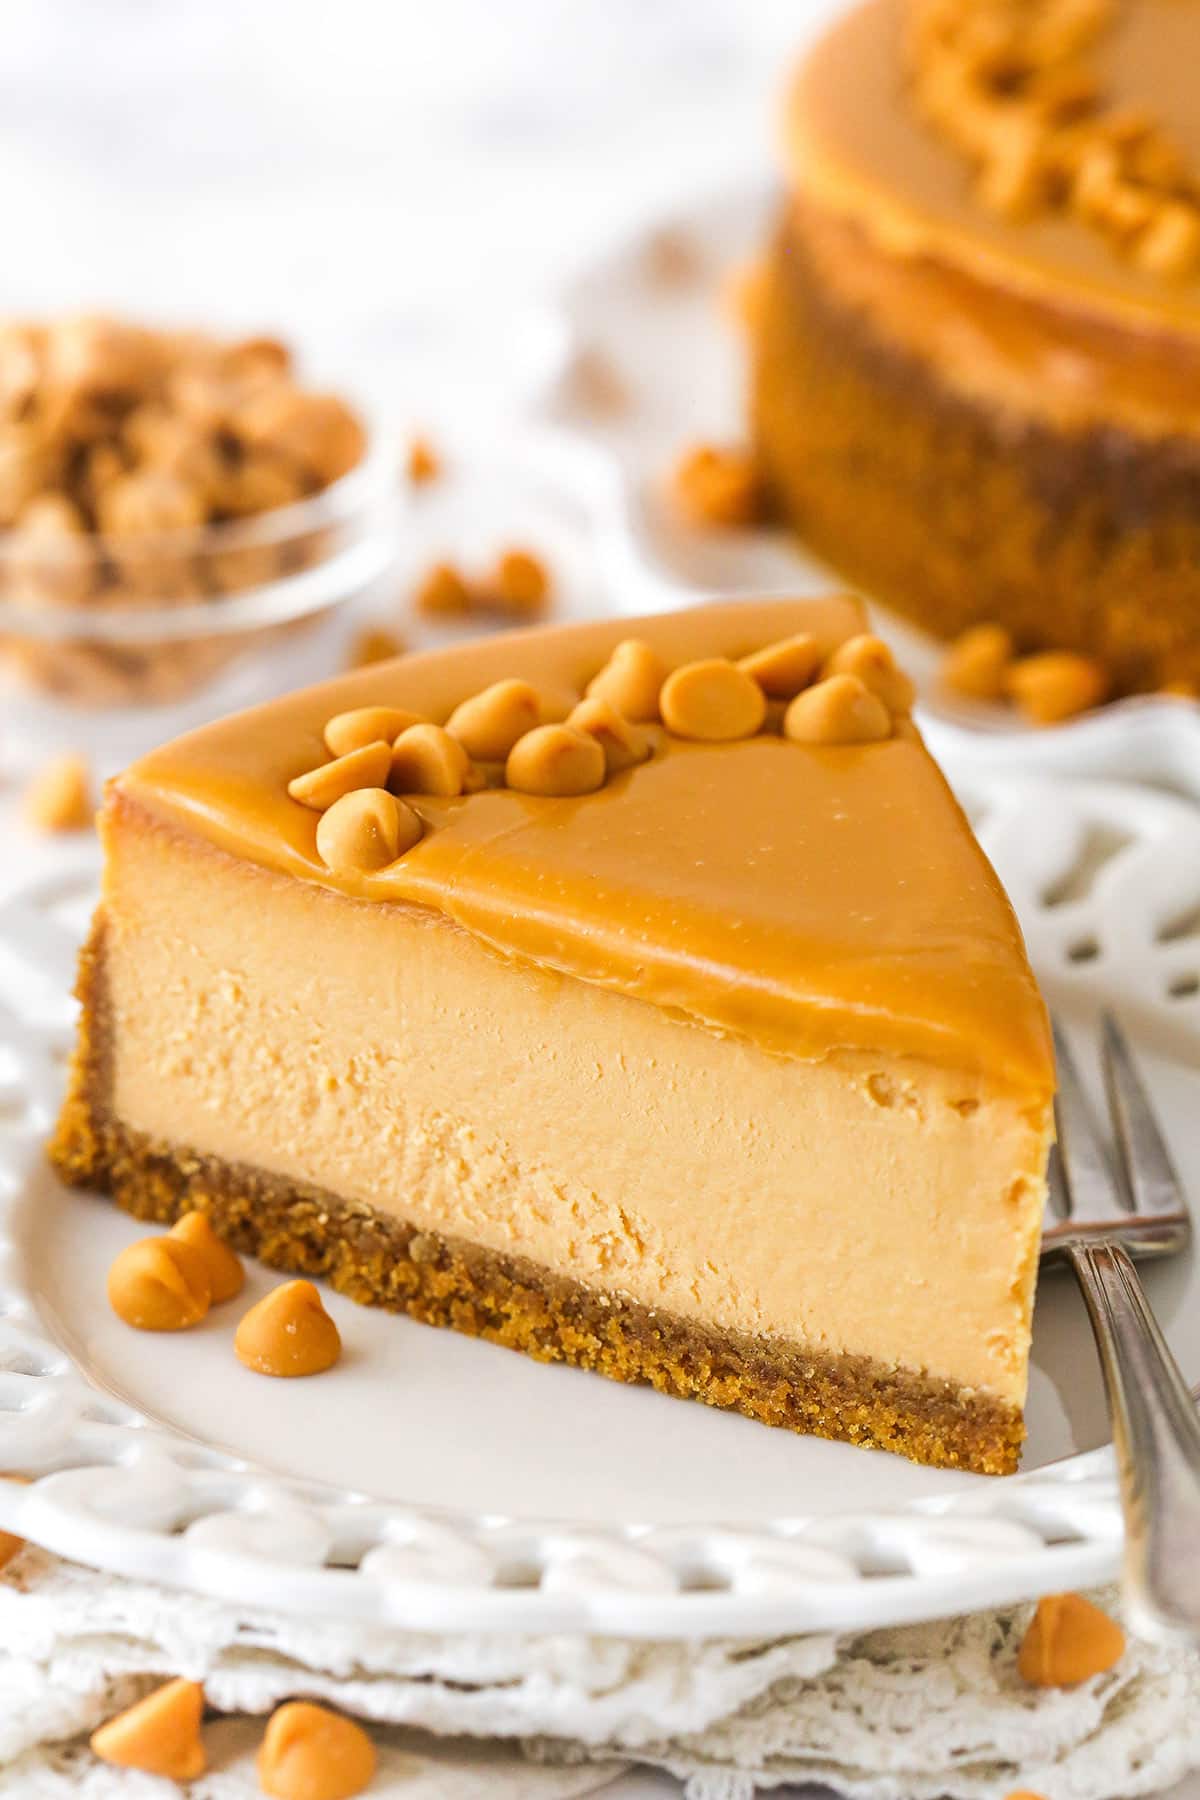
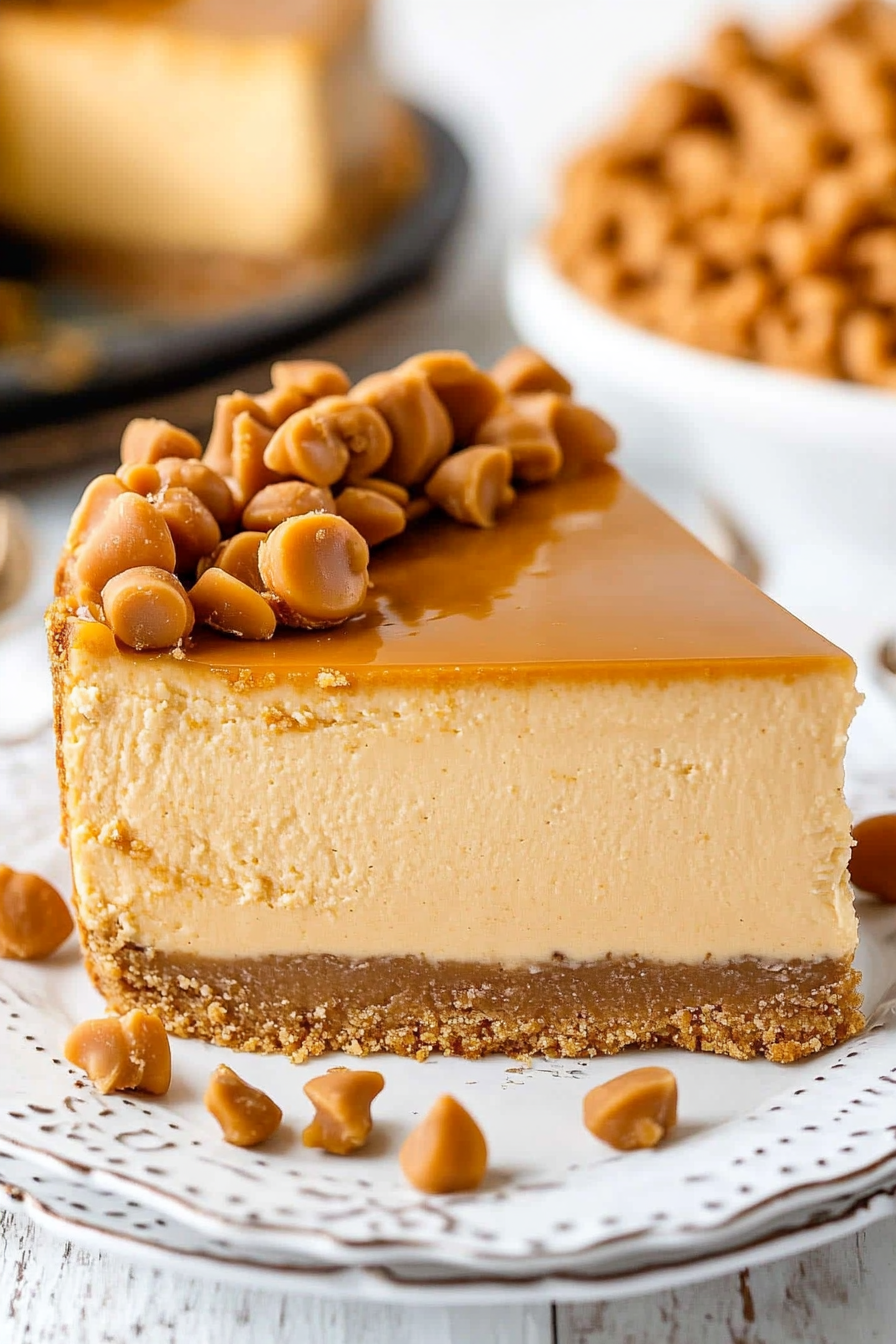
Butterscotch Cheesecake
Ingredients
Method
- Preheat oven to 325°F (163°C). Line a 9-inch springform pan with parchment paper in the bottom and grease the sides.
- Combine the crust ingredients in a small bowl. Press the mixture into the bottom and up the sides of the springform pan.
- Bake the crust for 8-10 minutes, then set aside to cool.
- Cover the outsides of the pan with aluminum foil so that water from the water bath cannot get in. Set prepared pan aside.
- Reduce oven temperature to 300°F (148°C).
- In a large mixer bowl, blend the cream cheese, sugar and flour with an electric mixer until combined. Scrape down the sides of the bowl.
- Add the vanilla extract and sour cream. Beat on low speed until well combined. Set aside.
- Add the heavy cream and butterscotch chips to a medium sized microwave-safe bowl. Heat in 15-30 second increments, stirring well between each until the butterscotch chips are melted.
- Add the butterscotch chip mixture to cheesecake filling in two parts and mix until well combined after each, scraping bowl the sides of the bowl as needed.
- Add the dry pudding mix and mix until well combined, scraping bowl the sides of the bowl as needed.
- Add the eggs one at a time, mixing until combined after each addition and scraping the sides of the bowl after each addition.
- Pour the filling into the crust. Place the springform pan inside another larger pan. Fill the outside pan with enough warm water to go about halfway up the sides of the springform pan. The water should not go above the top edge of the aluminum foil on the springform pan.
- Bake for 1 hour and 30-35 minutes. The center should be set, but still jiggly.
- Turn off heat and leave cheesecake in oven with door closed for 30 minutes.
- Crack oven door and leave the cheesecake in the oven for another 10 minutes. This cooling process helps the cheesecake cool slowly to prevent cracks.
- Remove cheesecake from oven and set on a cooling rack until it reaches room temperature, then chill until cold and firm, 5-6 hours or overnight.
- Once cold and firm, remove cheesecake from springform pan and place on serving plate.
- To make the butterscotch topping, put the butterscotch chips in a heat proof bowl.
- Microwave the heavy whipping cream until it just begins to boil, then pour it over the butterscotch chips. Allow it to sit for 2-3 minutes, then whisk until smooth.
- Allow the ganache to cool a bit (about 5 minutes, until thickened but still pourable and spreadable), then pour the topping onto the top of the cheesecake and spread evenly. Top cheesecake with additional butterscotch chips, if desired.
- Refrigerate well-covered or in a cake carrier until ready to serve. Cheesecake is best if eaten within 4-5 days.