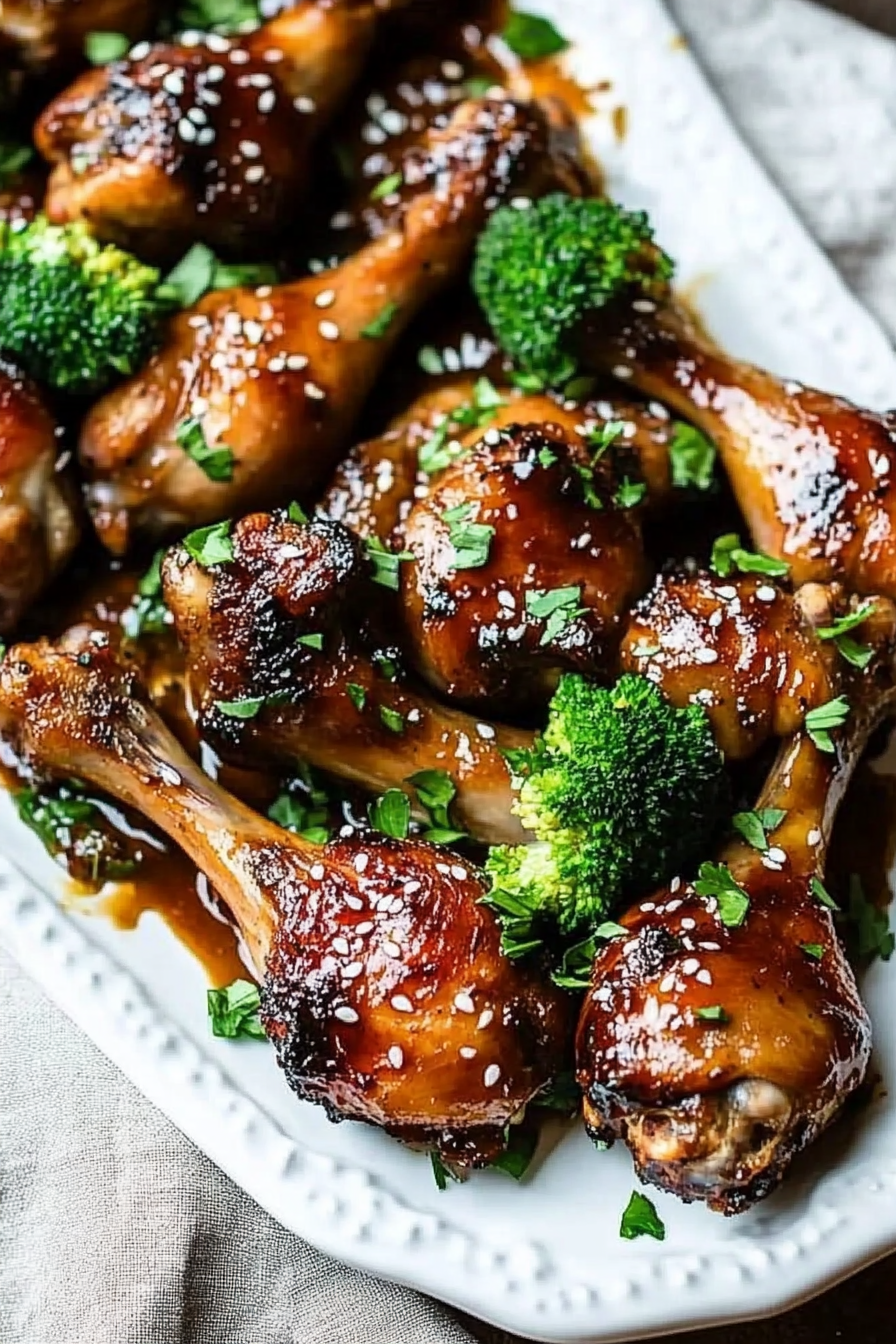
Easy Asian Glazed Chicken Drumsticks
I vividly remember the first time I made this zucchini snack cake — it was one of those days when I needed a little sweet something, but I didn’t want to fuss over intricate baking. The aroma filling my kitchen as it baked was nothing short of magic; it reminded me of lazy summer afternoons at my grandma’s house, where she’d bake zucchini bread and her house would smell like pure comfort. Now, this isn’t your typical loaf — think of it as a moist, tender cake packed full of hidden vegetables, yet irresistible enough for everyone to ask for seconds. Honestly, I’ve tested this recipe with different types of zucchini, and I swear, the sugar-to-zucchini ratio makes all the difference. My kids ask for this all the time — it’s become a family favorite for those times I want a quick, wholesome dessert that hits sweet without feeling sinful. Perfect for mornings, snacks, or even a casual tea with friends. Trust me, once you make this, it’ll be on your regular rotation too.
What is Zucchini Snack Cake?
Think of this zucchini snack cake as a little slice of homey goodness — it’s essentially a moist, tender cake infused with fresh zucchini, topped with a swirling layer of cinnamon-spiced filling, and finished with a shiny glaze. Its name is pretty straightforward: it’s a cake, not a bread, because it’s taller, springier, and a little sweeter. The “snack” part comes from how adaptable it is; it’s rich enough to serve as a dessert, but light enough to enjoy for breakfast, especially when paired with a steaming cup of coffee or tea. The idea behind this cake is to sneak some greens into a dessert, which I always do when I want my kids to eat more veggies without fussing — they see the zucchini, they think it’s just a treat! It’s an old family recipe I’ve tweaked over the years, adding that luscious glaze and swirling in a cinnamon filling for that wow factor. Think of it as comfort, nostalgia, and a touch of health all rolled into one.
Why you’ll love this recipe?
What I love most about this zucchini snack cake is how it checks all the boxes — maximum flavor with minimum fuss. The moment it comes out of the oven, the smell alone is enough to make everyone stop what they’re doing. It’s sweet, with just a hint of cinnamon, and that moist, tender crumb makes every bite feel like sweet balance. Plus, it’s super easy — I’ve made this with no fancy equipment, just a whisk, a bowl, and a trusty spatula. The ingredients are budget-friendly, often stuff I already have stocked — eggs, flour, sugar, zucchini, and a few pantry staples. And the best part? It’s so versatile. You can swap the filling flavor — maybe add some nutmeg or a splash of vanilla — or switch up the glaze with lemon or orange zest for a citrusy twist. This recipe is also forgiving, so even if you’re a beginner, you’ll nail it. I’ve tested making mini muffins with this batter, and it’s just as delightful — ideal for grab-and-go mornings or school lunches. Honestly, what I love most is how everyone’s eyes light up when I serve it — it’s a little bit of magic in every bite.
How do I make Zucchini Snack Cake?
Quick Overview
This cake comes together quickly — start by grating your zucchini, then combine the dry ingredients in one bowl and the wet in another. Mix them until just combined to keep the cake light. While it bakes, prepare your cinnamon filling and glaze. Pour the batter into a prepared pan, add dollops of filling, swirl for a marbled look, and bake until a toothpick comes out clean. Once out of the oven, let it cool slightly before glazing. It’s honestly foolproof, and what I love is how the swirl of cinnamon spreading through the batter creates beautiful ribbons that everyone admires. This one’s a lifesaver on busy nights when you want something comforting and homemade, yet ready in under an hour.
Ingredients
For the Main Batter:
– 2 cups grated zucchini (about 2 medium zucchinis, rinsed and thoroughly squeezed to reduce moisture)
– 1/2 cup vegetable oil or melted butter (I tested both and loved the richness of butter)
– 1 cup granulated sugar (or coconut sugar for a more natural touch)
– 3 large eggs
– 1 1/2 cups all-purpose flour (or spelt flour for a healthier twist)
– 1 teaspoon baking powder
– 1/2 teaspoon baking soda
– 1/2 teaspoon salt
– 1 teaspoon ground cinnamon
For the Filling:
– 1/4 cup brown sugar
– 1 teaspoon ground cinnamon
– 2 tablespoons softened butter
For the Glaze:
– 1 cup powdered sugar
– 1-2 tablespoons milk (try almond milk or coconut milk, both work beautifully)
– 1/2 teaspoon vanilla extract (or lemon zest for a citrusy punch)
Step-by-Step Instructions
Step 1: Preheat & Prep Pan
Start by heating your oven to 350°F (175°C). Grease a 9-inch square baking dish or line it with parchment paper. I do this every time, so nothing sticks or crumbles later — trust me, cleaning is much easier this way. If you’re making muffins, line your muffin tin with liners or spray it well. While the oven warms, grate the zucchini and give it a good squeeze with a clean towel to remove excess moisture. The drier the zucchini, the better the cake holds together and doesn’t turn soggy.
Step 2: Mix Dry Ingredients
In a large bowl, whisk together the flour, baking powder, baking soda, salt, and cinnamon. This step keeps everything evenly distributed, which is especially important when you’re baking with zucchini — it’s got so much moisture, you want the dry ingredients to be ready to absorb it. Take a moment to get everything combined; it’ll pay off when you mix the wet ingredients in.
Step 3: Mix Wet Ingredients
In another bowl, beat the eggs, sugar, and oil (or melted butter) until smooth and slightly frothy. I usually do this with a whisk or a hand mixer — depends on my mood! Add the grated zucchini and vanilla or citrus zest here. Stir well; the batter will look a little thick, but that’s exactly what you want. If the zucchini still feels moist, just let it sit for a few minutes to settle, then give it one more squeeze to make sure it doesn’t droop in the batter.
Step 4: Combine
Gently fold the wet ingredients into the dry, just until no streaks remain. Be careful not to overmix — you want a tender crumb, not a tough one from overworking the batter. It’s okay if the batter’s a little lumpy; that’s what keeps the cake moist and fluffy. If you notice your batter is a bit thick, a splash of milk can help loosen it up a touch.
Step 5: Prepare Filling
Mix the brown sugar, cinnamon, and softened butter until crumbly. This will create a soft cinnamon-sugar swirl that gives the cake its signature look and flavor. Feel free to tweak the cinnamon quantity if you like it more or less spicy. I’ve also tried adding chopped nuts or chocolate chips in the filling — so good! This step is optional, but it really elevates the cake to something special.
Step 6: Layer & Swirl
Pour half of the batter into your prepared pan, then dollop spoonfuls of the cinnamon filling over the top. Use a toothpick or a skewer to swirl the filling into the batter for a beautiful marbled effect. Repeat with the remaining batter and filling, creating an eye-catching pattern that not only tastes fantastic but also makes for a pretty presentation.
Step 7: Bake
Pop it into your preheated oven and bake for about 40-45 minutes. The top should turn a golden brown, and a toothpick inserted into the center should come out clean. If it’s browning too quickly on top but still raw inside, loosely cover with foil and continue baking. Let it cool for at least 15 minutes before glazing — this helps the center set and prevents your glaze from sliding off.
Step 8: Cool & Glaze
Mix the powdered sugar with milk and vanilla until smooth. The consistency should be pourable but not too runny — add a splash more milk or sugar if needed. Pour the glaze over the slightly warm cake, letting it drip down the sides. This little glossy layer makes it irresistibly beautiful and adds just a touch of sweetness.
Step 9: Slice & Serve
Once the glaze firms up a bit, slice into squares or rectangles. Serve warm or at room temperature. I love this cake with a dollop of whipped cream or a scoop of vanilla ice cream on the side — absolutely glorious. The contrast between the tender crumb, cinnamon swirl, and the sweet glaze is pure magic. And if you want to get fancy, sprinkle a little extra cinnamon or toasted nuts on top before serving. It’s perfect when you’re craving something sweet at 10pm but don’t want to turn on the oven for a full cake — just slice, serve, and savor.
What to Serve It With
This cake is endlessly versatile. For breakfast, pair it with a steaming mug of coffee or a cold glass of milk. The moist crumb and gentle sweetness make it a lovely start to the day, especially if you’re rushing out the door. During brunch, I love serving slices with fresh berries and a drizzle of honey — it’s “fancy” enough to impress but still totally doable. As a dessert, it’s fantastic on its own, but a scoop of vanilla or cinnamon ice cream makes it next-level. My family’s favorite way? Warmed up slightly with a splash of milk and a sprinkle of chopped nuts on top. It’s a humble yet comforting treat that makes any occasion feel special. And because it’s so quick, I often whip this up when unexpected guests arrive — everyone always leaves asking for the recipe.
Top Tips for Perfecting Your Zucchini Snack Cake
Over the years, I’ve learned a few tricks to make this cake truly shine. First, don’t skip pressing the zucchini — it holds extra moisture and keeps the cake from becoming overly soggy. I always do this with a clean kitchen towel, giving it a good squeeze. For mixing, I stay gentle with the batter — overmixing can toughen it, and no one wants that. The swirl pattern is a fun freestyle part, but I recommend starting in the center and working outward for nice, even ribbons. If you’d like to experiment, adding a handful of chopped walnuts or mini chocolate chips in the filling or batter adds extra texture and flavor. When it comes to baking, I’m a fan of checking on the cake around the 40-minute mark — every oven is different, and you want it moist but cooked through. And on glazing, I’ve found that adding a little lemon zest gives it that bright, fresh punch. Trust me, these small tweaks add up to the perfect slice every time. The biggest lesson I’ve learned? Patience — letting the cake cool before glazing or slicing keeps everything intact and makes for an easier, cleaner serve.
Storing and Reheating Tips
This cake stays fresh for 2-3 days at room temperature if covered tightly with foil or a cake dome. I prefer wrapping it fully in plastic wrap or storing in an airtight container in the refrigerator — it keeps surprisingly moist, and the flavors meld beautifully overnight. To reheat, just give a slice a quick microwave zap for about 20 seconds — it’ll taste just as fresh. If you’re planning to freeze it, wrap it well with aluminum foil and store for up to three months. To thaw, leave it at room temperature for a couple of hours or give it a short microwave blast. The glaze can be added before serving or kept separate — I actually like adding it fresh to keep that glossy, just-baked look. Trust me, a little prep makes all the difference, and this cake responds well to gentle reheating, ensuring you get that warm, cozy feeling every time.
Frequently Asked Questions
Final Thoughts
This zucchini snack cake has become a regular in my kitchen, partly because it’s so forgiving and partly because everyone loves that secret veggie boost hidden inside a soft, sweet crumb. It’s one of those recipes that gets better over time, with the flavors melding and the glaze adding just enough shine. I promise, once you try it, it’ll find a permanent spot in your rotation — it’s perfect for everything from lazy mornings to unexpectedly sweet afternoons. And don’t forget, it’s so easy to customize! Feel free to experiment with different fillings or add-ins like nuts or chocolate chips. I’d love to hear how yours turns out — leave a comment or snap a picture and share your variations! Happy baking, and may your kitchen always smell as warm and welcoming as mine when I make this. Enjoy every bite!
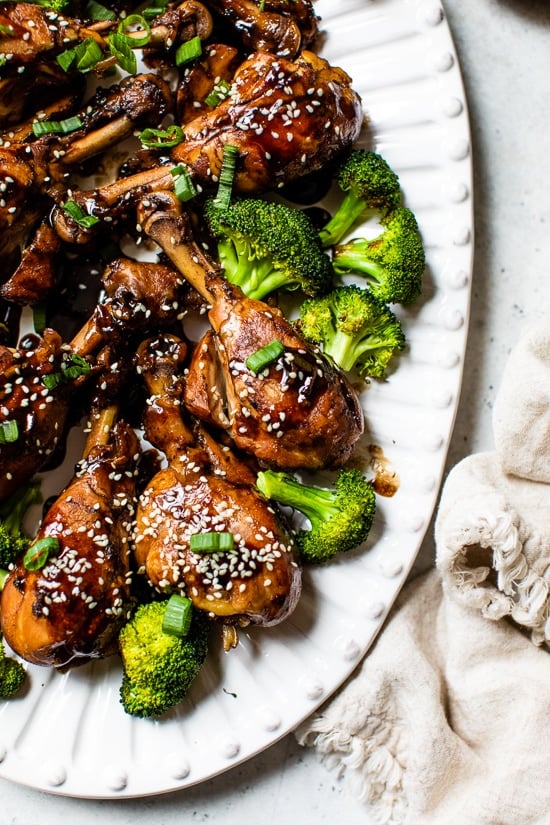
Asian Glazed Drumsticks
Ingredients
Method
- In a heavy large saucepan, brown chicken on high for 3-4 minutes with a little spray oil.
- Add water, balsamic, soy sauce, honey, garlic, ginger, hot sauce and cook on high until liquid comes to a boil.
- Reduce heat to low and simmer, covered for about 20 minutes.
- Remove cover and bring heat to high, allowing sauce to reduce down, about 8-10 minutes, until it becomes thick, turning chicken occasionally. (Keep an eye on glaze, you don't want it to burn when it start becoming thick).
- Transfer chicken to a platter and pour sauce on top.
- Top with chives and sesame seeds and serve.