How to Make Fizzy Pepper Soda
If I’m honest, there’s something about baking with zucchini that just feels like bringing a little piece of summer into the home, even in the dead of winter. I remember helping my grandma in her tiny kitchen, dusted with flour, the smell of fresh zucchini filling the air. This zucchini cake—what I like to call “Zucchini Bliss Cake”—has become a family favorite, especially on those busy weeknights when I need something quick but comforting. It’s surprisingly simple to make, and the first time I made it, my kids literally asked for thirds. It’s a lot like a fluffy, moist bread but with that slight sweetness and healthy twist that keeps everyone coming back for more. Honestly, it’s a bit like magic—craving something sweet but don’t want to turn on the oven for hours? This is your answer. The best part? It’s almost impossible to mess up, and I always do this when I want a wholesome, satisfying treat that makes my kitchen smell incredible.
What is Zucchini Bliss Cake?
Think of Zucchini Bliss Cake as a sneaky little upgrade to your classic quick bread or coffee cake—soft, moist, and loaded with hidden veggies. It’s basically a cake that’s been turned into a healthy-ish indulgence, thanks to fresh zucchini tucked inside. The name is pretty straightforward: it’s a “bliss” because every bite feels cozy, comforting, and a little nostalgic—like a warm hug from grandma. It’s essentially a cross between a fluffy muffin and a tender cake, with an added crunch from a sprinkle of nuts if you want. And no, you don’t need fancy ingredients—just some grated zucchini, basic pantry staples, and a little love. I swear, once you taste it, you’ll see why I’ve made this countless times and why my kids ask for it on every breakfast, snack, and even as a wake-up treat!
Why you’ll love this recipe?
What I love most about this zucchini cake is how adaptable it is—honestly, it’s a bit of a kitchen chameleon. The flavor is sweet enough to satisfy a dessert craving but wholesome enough to serve for breakfast or a quick snack. The smell alone, as it bakes, will bring everyone running—trust me on that one. Plus, it’s ridiculously easy—no fancy equipment, just a bowl, a spoon, and a muffin tin or loaf pan. Budget-wise, it’s super friendly, because those zucchinis are often leftovers from the garden or local farmers’ markets, and the rest of the ingredients are pantry staples. This cake is versatile, too: I’ve swapped out the oil for applesauce, added a handful of berries, or sprinkled some coconut flakes on top when I wanted a tropical twist. What I love most is how it’s a flexible, no-fuss recipe that’s become part of our family tradition. It’s perfect when the kids ask for something sweet, but I don’t want to turn the oven on for a whole layer cake. It’s also one of those recipes where every time I make it, I learn a little more—like how testing different sugar levels affects the moistness or how a dash of cinnamon can totally elevate the flavor.
How do I make Zucchini Bliss Cake?
Quick Overview
This cake comes together in just a few simple steps. First, grate the zucchini—you want it moist but not soggy. Then, mix the dry ingredients, followed by the wet ingredients—think oil, eggs, vanilla, and a splash of milk. Combine everything gently, fold in the zucchini, pour it into your prepared pan, and bake until a toothpick comes out clean. While it’s baking, I love making a quick glaze that adds just the right touch of sweetness—like a little finishing hug. The entire process is straightforward, and honestly, once you get the hang of it, you can whip this up in under an hour. It’s a lifesaver on busy nights or when friends drop by unexpectedly. Plus, it’s one of those recipes that tastes better the next day—if you can resist it straight from the oven!
Ingredients
For the Main Batter:
- 2 cups grated zucchini (about 2 small zucchinis)
- 1 1/2 cups all-purpose flour (or whole wheat if you’re feeling hearty)
- 1 teaspoon baking powder
- 1/2 teaspoon baking soda
- 1/2 teaspoon salt
- 1 teaspoon cinnamon (optional but highly recommended)
- 1/2 cup granulated sugar (or coconut sugar for a mildly caramel flavor)
- 1/4 cup oil (vegetable, canola, or even melted coconut oil)
- 2 large eggs
- 1 teaspoon vanilla extract
- 1/2 cup milk (dairy or almond milk works beautifully)
For the Filling (Optional but Delicious):
- 1/2 cup cream cheese or ricotta (for a richer, creamier swirl)
- 1/4 cup honey or maple syrup
- A handful of chopped nuts or berries (for added texture and flavor)
For the Glaze:
- 1 cup powdered sugar (sifted to avoid lumps)
- 2-3 tablespoons milk or lemon juice (for flavor and consistency)
- A splash of vanilla extract (optional)
Step-by-Step Instructions
Step 1: Preheat & Prep Pan
Set your oven to 350°F (175°C). Grease your baking pan—whether it’s a loaf or a round cake pan—and lightly dust it with flour. I always do this to make sure nothing sticks. If you’re making muffins, line your muffin tin with paper liners or grease it well—trust me, this is the trick that saves frustration later!
Step 2: Mix Dry Ingredients
In a large bowl, whisk together your flour, baking powder, baking soda, salt, and cinnamon if you’re using it. Mixing these dry ingredients first helps ensure everything is evenly distributed, which makes for a better, fluffier cake. Plus, it prevents clumping and dry pockets—nothing worse than a dense bite!
Step 3: Mix Wet Ingredients
In a separate bowl, beat your eggs, then add the sugar, oil, vanilla, and milk. Whisk until smooth. The mixture should look slightly frothy, and that’s when you know everything’s well incorporated. I’ve tested this with almond milk, and honestly, it made the cake even creamier—so feel free to experiment!
Step 4: Combine
Pour the wet mixture into the dry ingredients, gently folding everything together with a spatula. Don’t overmix—just until you see no more streaks of flour. Overmixing can make the cake dense, and nobody wants that—trust me, I’ve learned this the hard way!
Step 5: Prepare Filling
If you’re adding the creamy filling, mix the cream cheese or ricotta with honey or maple syrup in a small bowl. Keep it smooth and spreadable. You can also fold in some chopped nuts or berries if you want pops of texture—makes it a little more special.
Step 6: Layer & Swirl
Pour half of the batter into your prepared pan, spread the filling evenly over the top, then pour the rest of the batter over. Use a knife or skewer to swirl slightly—don’t overdo it, but a gentle swirl makes a pretty marbled effect and adds a surprise flavor combo.
Step 7: Bake
Pop it into the oven on the middle rack. Bake for about 45-50 minutes for a loaf, or until a toothpick inserted in the center comes out clean. Ovens vary, so keep a close eye after 40 minutes. If your cake starts browning too quickly, cover loosely with foil for the remaining baking time. It’s all about patience and watching for that perfect toothpick test.
Step 8: Cool & Glaze
Let the cake cool in the pan for about 10-15 minutes before transferring to a wire rack. Cool completely before glazing—otherwise, the glaze will melt right off! Mix your powdered sugar with milk or lemon juice until it’s smooth and pourable. Drizzle the glaze over the top in a zig-zag pattern or smooth it out for a more refined look. My kids love a little extra sprinkle of nuts or grated coconut on top, so get creative!
Step 9: Slice & Serve
Use a sharp knife to slice gentle, neat pieces—especially if it’s a layered cake. Serve slightly warm or at room temperature. I usually like mine with a dollop of whipped cream or a scoop of vanilla ice cream. Honestly, it’s lovely all by itself—moist, flavorful, and just a little bit indulgent without feeling too heavy.
What to Serve It With
This cake is super versatile, so here’s how I usually enjoy it:
For Breakfast: Paired with a hot cup of coffee or tea, it makes a fantastic start to the day. I love slicing a piece to serve alongside scrambled eggs or Greek yogurt for added protein. It’s sweet enough to feel like a treat but wholesome enough that I don’t feel guilty.
For Brunch: Layered with fresh berries and a drizzle of honey, maybe even a side of crisp bacon or sausage. It looks pretty on the table, and everyone digs into it with a smile. I’ve also topped it with whipped cream and a sprinkle of cinnamon—delicious for those lazy weekend mornings.
As Dessert: Warm slices with a splash of vanilla ice cream or a dusting of powdered sugar are pure comfort. When my friends visit, I often cut thick slices, serve with a drizzle of caramel, and that’s pretty much my go-to crowd-pleaser. It’s especially nice after dinner if you’re craving something sweet that’s not overly indulgent.
For Cozy Snacks: It’s my kids’ favorite when they come in from playing outside—perfect with a glass of milk or a cup of hot cocoa. I’ve even made mini muffins for school lunches—these are a lifesaver on busy mornings. I’ve found that reheating them in the microwave for about 15 seconds makes them taste just as fresh.
Top Tips for Perfecting Your Zucchini Bliss Cake
Having made this dish countless times, I’ve gathered a few tricks to make it even better:
Zucchini Prep: Always squeeze out excess moisture after grating—it prevents the batter from becoming too watery. I usually wrap the grated zucchini in a clean kitchen towel and give it a good squeeze. This simple step makes a huge difference in the final texture.
Mixing Advice: When combining wet and dry, fold gently. Overmixing develops gluten, which leads to a dense cake. Aim for a few light strokes until just combined. The batter should be lumpy but evenly mixed.
Swirl Customization: If you want more visual impact, layer the filling in the center and swirl with a toothpick, creating a marble effect. I’ve seen friends make fun, rainbow-colored swirls with food coloring—trust me, it’s adorable and delightful for kids.
Ingredient Swaps: I’ve experimented with applesauce instead of oil and almond flour for a nuttier flavor. The texture is slightly different but still wonderful. Using natural sweeteners like honey or maple syrup instead of refined sugar gives it a more caramel-like richness.
Baking Tips: For even baking, try to position your rack in the middle of the oven. If your cake browns too fast on top, tent it with foil after 30 minutes. Every oven is different, so keep an eye on it and test with a toothpick for doneness.
Glaze Variations: For a citrus twist, add lemon zest or a splash of orange liqueur. For a more decadent finish, melt a handful of dark chocolate and drizzle—seriously, heaven. Keep the glaze on the thicker side if you want a more defined drip or loosen it for a smooth pour.
Honestly, I’ve learned to adapt this recipe based on what I have on hand, and each variation is a hit. The key is having fun and trusting your instincts—this cake is forgiving and forgivingly delicious.
Storing and Reheating Tips
This cake keeps well, which makes it even better for leftovers or for prepping ahead:
Room Temperature: Wrap tightly with foil or store in an airtight container. It stays fresh for about 2 days—if it lasts that long! The smell alone will draw everyone back into the kitchen.
Refrigerator Storage: Keep in an airtight container for up to 4 days. Just let it come to room temp before slicing—cold cakes can become a little crumbly.
Freezer Instructions: Double-wrap in plastic wrap and foil, then freeze for up to 3 months. To thaw, leave it in the fridge overnight or warm slices in the microwave for 15-20 seconds. It’s just as good, and the freeze preserves its moistness beautifully.
Glaze Timing Advice: Add the glaze after the cake has cooled completely. If you’re freezing, wait to glaze until just before serving to keep it looking fresh and shiny.
Frequently Asked Questions
Final Thoughts
This zucchini Bliss Cake isn’t just a recipe; it’s a little piece of my heart. It’s cozy, forgiving, and endlessly adaptable—perfect for sharing with loved ones or enjoying alone with a cup of tea. I’ve made it so many times that I’ve lost count, and every time I do, I’m reminded how simple ingredients can come together to create such a comforting treat. Whether you’re looking for something quick, nutritious, or just want to bake a little happiness into your day, give this a try. I promise, your kitchen will smell like a warm hug, and your family will thank you with happy smiles and second slices. Happy baking, friends! And don’t forget—share your creations and tell me how yours turned out. I love hearing from you!
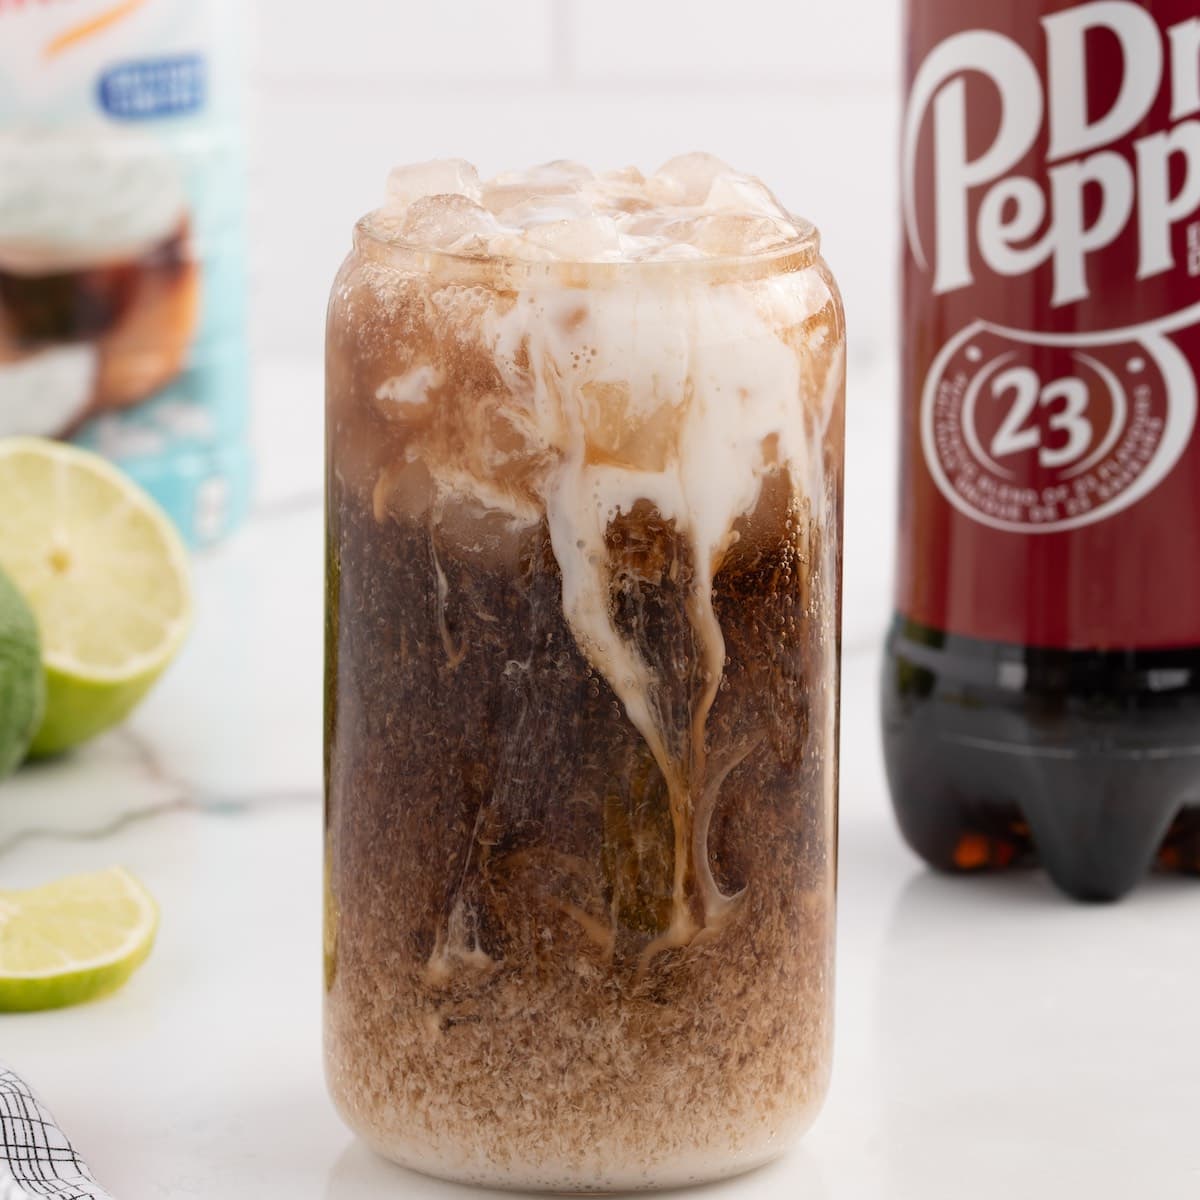
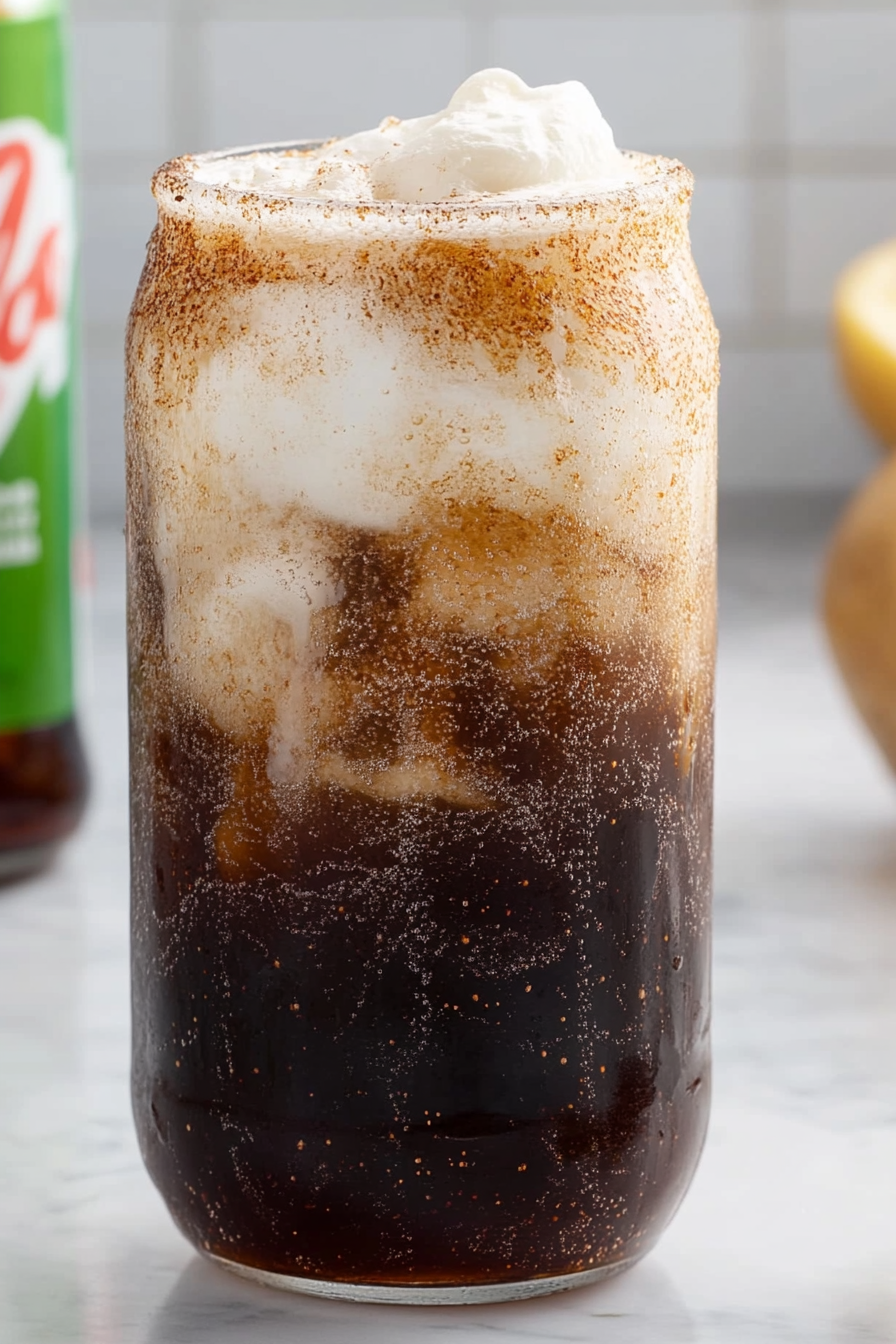
Dirty Dr Pepper
Ingredients
Method
- Fill a 16 ounce glass with ice and top with the fresh squeezed lime juice.
- Slowly pour in the chilled Dr Pepper soda into the glass, tilting slightly to reduce foam, then bring the glass upright.
- Pour the coconut creme non-dairy coffee creamer into the glass and stir gently to combine.
- Garnish the rim with a lime circle if desired and serve with a straw.