How to Make Delicious Marzipan Toffee Bites
Oh, friend, let me tell you about a recipe that’s practically changed my life – or at least, my snack game! I remember the very first time I stumbled upon the idea of combining the humble zucchini with a creamy, dreamy swirl, and my mind was absolutely blown. It wasn’t just another zucchini bread; this was something magical. The smell alone, a warm hug of cinnamon and nutmeg mixed with a hint of sweetness, still takes me straight back to my grandma’s kitchen on a lazy Sunday afternoon. This Marbled Zucchini Swirl Bread isn’t just a recipe; it’s a feeling, a comforting embrace that reminds you of home. It’s got all the cozy vibes of your favorite banana bread, but with an unexpected twist that makes it feel extra special, yet incredibly simple. If you’re looking for that perfect slice of pure joy with your morning coffee or an afternoon pick-me-up, trust me, you’ve found it. This one’s a keeper, a real treasure.
What is a marbled Zucchini Swirl Bread?
So, what exactly are we talking about here? Think of this Marbled Zucchini Swirl Bread as the sophisticated, fun cousin to your classic zucchini bread. At its heart, it’s a beautifully moist, lightly spiced quick bread, packed with that surprising goodness of fresh zucchini – which, by the way, you can barely taste, only appreciate for the incredible texture it brings! But here’s where it gets exciting: we swirl a luscious, tangy cream cheese mixture right through the batter before baking. This creates gorgeous ribbons of creamy white against the warm, golden-brown zucchini bread, not just making it look stunning, but adding a delightful contrast in flavor and texture. It’s essentially a zucchini bread cross-bred with a coffee cake, giving you that rich, sweet cream cheese layer in every bite. It’s definitely a showstopper that’s secretly super easy to pull off.
Why you’ll love this recipe?
Honestly, where do I even begin? There are so many reasons this Marbled Zucchini Swirl Bread has earned its permanent spot in my recipe rotation. What I love most about this is just how utterly delicious it is. The flavor profile is incredible: you get that comforting warmth from cinnamon and a whisper of nutmeg, perfectly balanced by the natural sweetness and moisture from the zucchini. Then, BAM! You hit that creamy, slightly tangy cream cheese swirl, which just elevates the whole experience. It’s not too sweet, not too rich – it’s just right.
Beyond the taste, the simplicity of it is a lifesaver. You don’t need any fancy equipment or advanced baking skills. It’s a quick bread, which means no yeast, no kneading, just mixing and baking. I’ve made this countless times on busy weeknights, and it never fails to impress. Plus, the ingredients are incredibly cost-efficient; you’re likely to have most of them in your pantry already, especially if you’ve got a garden overflowing with zucchini like I often do! This bread is also amazingly versatile. It’s fantastic for breakfast with a cup of coffee, an elegant addition to any brunch spread, a comforting afternoon snack, or even a light dessert after dinner. My kids, who usually eye anything green with suspicion, actually ask for seconds when this is around. It’s got the moist, tender crumb of a great carrot cake but with its own unique charm, making it stand out from all the other quick breads out there. It’s truly a recipe that gives so much for so little effort.
How do you make Zucchini Swirl Bread?
Quick Overview
Making this Marbled Zucchini Swirl Bread is surprisingly straightforward, and that’s one of its greatest charms! We’ll start by grating our zucchini and then quickly whip up the spiced, moist bread batter. In parallel, we’ll mix together a simple, dreamy cream cheese filling. The magic happens when we layer and swirl these two components, creating those beautiful ribbons. Then it’s off to the oven, and before you know it, your kitchen will smell absolutely heavenly, and you’ll have a loaf of pure comfort ready to enjoy. It really is that easy, I promise!
Ingredients
For the Main Batter:
- 2 cups all-purpose flour (unbleached, always gives the best texture!)
- 1 teaspoon baking soda
- 1 teaspoon ground cinnamon (good quality makes all the difference!)
- 1/2 teaspoon salt
- 1/4 teaspoon ground nutmeg (freshly grated if you can – game changer!)
- 1/4 cup unsalted butter, melted (makes for a tender crumb)
- 1/2 cup granulated sugar
- 1/4 cup packed light brown sugar (adds depth and moisture)
- 2 large eggs, at room temperature (helps with emulsion)
- 1/4 cup milk (any kind works, I often use whole milk)
- 1 teaspoon vanilla extract (pure vanilla, please!)
- 1 1/2 cups grated zucchini (about 1 medium zucchini, squeezed dry)
For the Cream Cheese Swirl:
- 4 ounces cream cheese, softened (full-fat for the best richness)
- 1/4 cup granulated sugar
- 1 tablespoon all-purpose flour
- 1 large egg yolk
- 1/2 teaspoon vanilla extract
For the Glaze:
- 1 cup powdered sugar (sifted for no lumps!)
- 1-2 tablespoons milk or cream (start with one and add more for desired consistency)
- 1/4 teaspoon vanilla extract (or a tiny squeeze of lemon juice for a tang)
Step-by-Step Instructions
Step 1: Preheat & Prep Pan
First things first, let’s get the oven ready. Preheat your oven to a cozy 350°F (175°C). Then, grab a 9×5-inch loaf pan. I always line mine with parchment paper, leaving a little overhang on the sides. This makes it super easy to lift the whole loaf out once it’s baked and cooled. If you don’t have parchment, a good greasing and flouring will do the trick.
Step 2: Mix Dry Ingredients
In a medium bowl, whisk together your all-purpose flour, baking soda, ground cinnamon, salt, and ground nutmeg. Just a quick whisk until everything’s nicely combined. This ensures all those lovely spices and leavening agents are evenly distributed throughout the bread, so you don’t get a surprise pocket of salt or cinnamon!
Step 3: Mix Wet Ingredients
Now for the wet magic! In a separate, larger bowl, whisk together your melted butter, granulated sugar, and brown sugar until it’s smooth and creamy. Next, crack in the two large eggs, one at a time, beating well after each addition. You want that mixture to be light and fluffy. Finally, stir in the milk and vanilla extract. It should look cohesive and wonderfully aromatic already!
Step 4: Combine Wet and Dry
This is a crucial step! Gently add the dry ingredients to the wet ingredients. Mix until just combined. Seriously, stop as soon as you don’t see any streaks of dry flour. Overmixing is the enemy of tender quick bread; it can make your bread tough. Once it’s mostly mixed, gently fold in your squeezed-dry grated zucchini. Don’t worry if there are a few lumps; that’s perfectly normal.
Step 5: Prepare Cream Cheese Swirl
Time for that glorious swirl! In a small bowl, beat together the softened cream cheese, granulated sugar, all-purpose flour, egg yolk, and vanilla extract until it’s perfectly smooth and lump-free. The flour in this mixture helps it to set nicely and not sink to the bottom during baking. You want it to be thick enough to hold its shape a bit but still spreadable.
Step 6: Layer & Swirl
Now for the fun part that gives this Marbled Zucchini Swirl Bread its name! Pour about two-thirds of the zucchini bread batter into your prepared loaf pan, spreading it evenly. Then, dollop spoonfuls of the cream cheese mixture over the batter. Take a knife or a skewer and gently swirl it through the cream cheese and batter. Don’t overdo it, or you’ll lose that gorgeous marbling effect; a few gentle S-shapes are perfect. Finally, carefully spoon the remaining zucchini batter over the swirl. You can do another quick, gentle swirl on top if you like, just to peek out a bit of that cream cheese.
Step 7: Bake
Pop your loaf pan into the preheated oven. Bake for about 50-65 minutes. Baking times can vary wildly depending on your oven, so start checking around the 50-minute mark. You’ll know it’s done when a wooden skewer or toothpick inserted into the center of the zucchini bread (avoiding the cream cheese swirl area if possible) comes out clean or with just a few moist crumbs attached. If the top starts browning too quickly, you can tent it loosely with aluminum foil.
Step 8: Cool & Glaze
Once baked, let the Marbled Zucchini Swirl Bread cool in the pan for about 10-15 minutes. This helps it firm up before you move it. Then, use the parchment paper overhang to carefully lift the loaf out and transfer it to a wire rack to cool completely. While it’s cooling, whisk together your powdered sugar, milk (or cream), and vanilla for the glaze. I usually start with one tablespoon of milk and add a tiny bit more if needed, until it reaches that perfect pourable-but-not-too-thin consistency. Once the bread is completely cool – and I mean COMPLETELY, or your glaze will just melt – drizzle that beautiful glaze over the top.
Step 9: Slice & Serve
The hardest part is waiting! Once the glaze has set, grab a sharp, serrated knife and slice into thick, generous pieces. This Marbled Zucchini Swirl Bread is best served at room temperature, allowing all those flavors to truly shine. Watch it disappear!
What to Serve It With
This Marbled Zucchini Swirl Bread is so incredibly versatile, it feels right at home in almost any situation. It’s definitely one of those recipes that becomes a family favorite because you can enjoy it so many ways!
For Breakfast: Oh, this is a no-brainer. A thick slice with a steaming hot cup of coffee or a milky chai latte? Absolutely divine. It’s sweet enough to feel like a treat but wholesome enough to kickstart your day. My morning ritual often includes this, especially if I’ve baked a loaf the night before. Sometimes I’ll even warm a slice gently in the microwave for 10-15 seconds; it just brings out all the cozy spices.
For Brunch: Elevate your brunch spread! Slice it elegantly and arrange it on a platter with some fresh berries on the side – raspberries or blueberries work beautifully. It pairs wonderfully with a mimosa or a sparkling cider. It adds a touch of homemade sophistication without any fuss, and it’s always a hit with guests. I’ve even seen friends serve it alongside a fruit salad and some Greek yogurt, creating a lovely balance of flavors and textures.
As Dessert: While it’s not overly sweet, a warm slice makes a fantastic light dessert. Imagine it with a small scoop of vanilla bean ice cream melting over it, or a dollop of freshly whipped cream. The contrast of the warm bread with cold, creamy ice cream is just out of this world. Sometimes, for a truly decadent treat, I’ll even add a drizzle of salted caramel sauce. It’s perfect when you’re craving something sweet at 10pm but don’t want to bake a whole cake!
For Cozy Snacks: This is its natural habitat! Whether you’re curling up with a book, having friends over for an afternoon chat, or just need a little pick-me-up, a slice of Marbled Zucchini Swirl Bread hits the spot. It’s perfect with a cup of herbal tea or even a glass of cold milk. It’s my go-to for school snacks for the kids, and I always get requests for it to be packed in lunchboxes!
Top Tips for Perfecting Your Marbled Zucchini Swirl Bread
I’ve made this Marbled Zucchini Swirl Bread so many times, and I’ve learned a few tricks along the way that can really take it from good to absolutely phenomenal. Trust me on these; they’re little game-changers!
Zucchini Prep: This is probably the most crucial step! After you grate your zucchini, you HAVE to squeeze out the excess moisture. I usually place the grated zucchini in a clean kitchen towel or a few layers of paper towels and wring it out like crazy. You’ll be surprised how much liquid comes out! If you skip this, your bread will be soggy and dense, and we definitely don’t want that. Don’t even bother peeling the zucchini, the skin virtually disappears and adds a nice touch of green fleck.
Mixing Advice: When combining your wet and dry ingredients, less is definitely more. Mix until *just* combined; you should still see a few small streaks of flour. Overmixing develops the gluten too much, leading to a tough, chewy bread instead of that wonderfully tender crumb we’re aiming for. My mantra is always: mix until barely combined, then stop!
Swirl Customization: For that beautiful marble effect, don’t over-swirl! A few gentle passes with a knife or skewer, making an S-shape or figure-eight pattern, is all you need. If you go too wild, the cream cheese will just mix completely into the batter, and you’ll lose those lovely distinct ribbons. Sometimes I’ll even leave the cream cheese in larger dollops for a chunkier, more defined swirl – it’s really up to your artistic preference!
Ingredient Swaps: Feel free to experiment! I’ve successfully swapped half of the all-purpose flour for whole wheat pastry flour for a slightly nuttier, healthier twist. For a dairy-free option, almond milk works beautifully in the batter, and you can even try a dairy-free cream cheese alternative for the swirl, though the texture might vary a bit. If you’re out of brown sugar, you can use all granulated sugar, but I love the depth brown sugar brings. A pinch of ginger or allspice can also add lovely warmth!
Baking Tips: Ovens can be notoriously quirky. If your loaf is browning too quickly on top before it’s cooked through, just loosely tent it with aluminum foil for the last 15-20 minutes of baking. Always use the toothpick test – insert it into the center of the bread, avoiding the cream cheese swirl, to check for doneness. If it comes out clean or with moist crumbs, you’re golden! My oven often bakes a little hotter, so I usually start checking around 45-50 minutes.
Glaze Variations: The simple vanilla glaze is classic, but you can totally jazz it up! A squeeze of fresh lemon juice in the glaze adds a lovely tartness that cuts through the sweetness beautifully. You could also try a maple glaze by swapping some of the milk for maple syrup, or even a spiced glaze with a tiny pinch of cinnamon. Make sure the bread is completely cool before glazing, or it’ll just melt into a messy puddle.
Storing and Reheating Tips
Once you’ve made a loaf of this incredible Marbled Zucchini Swirl Bread, you’ll want to make sure every last crumb is enjoyed at its best! Here’s how I keep mine fresh:
Room Temperature: If you’re planning to devour the loaf within 2-3 days (which, let’s be honest, is highly likely!), you can store it at room temperature. Just make sure it’s in an airtight container or tightly wrapped in plastic wrap. The cream cheese swirl means it’s best to err on the side of caution, but a couple of days on the counter is usually fine, especially if your kitchen isn’t super warm. I always do this when I know it’s going to be breakfast for the next two mornings!
Refrigerator Storage: For longer storage, or if your kitchen runs warm, popping it in the fridge is your best bet. Wrap the loaf tightly in plastic wrap, then place it in an airtight container. It’ll stay fresh and moist in the refrigerator for up to a week. Just let it come to room temperature before serving, or give it a quick zap in the microwave.
Freezer Instructions: Yes, you can absolutely freeze this bread! This one’s a lifesaver on busy nights when I want something homemade but don’t have time to bake. Make sure the loaf is completely cooled and unglazed. Wrap it tightly in several layers of plastic wrap, then an additional layer of aluminum foil. Label it with the date, and it’ll keep beautifully in the freezer for up to 2-3 months. When you’re ready to enjoy, thaw it overnight in the refrigerator, then let it come to room temperature on the counter before glazing and serving. You can also freeze individual slices, which are perfect for a quick snack!
Glaze Timing Advice: If you plan on freezing the bread, it’s always best to glaze it after it’s been thawed and has come to room temperature. This prevents the glaze from becoming sticky or weeping during the thawing process, ensuring a pristine finish every time.
Frequently Asked Questions
Final Thoughts
So, there you have it, my absolute favorite Marbled Zucchini Swirl Bread with Cream Cheese Glaze. This isn’t just a recipe I occasionally make; it’s one that evokes so many happy memories and consistently brings smiles to everyone’s faces. It’s truly a special bake that balances comfort with a touch of elegance, making it feel like a real treat any time of day. The moist texture, the warm spices, and that irresistible cream cheese swirl—it all just comes together in perfect harmony. If you loved the ease and comforting flavors of this bread, you might also enjoy exploring my recipes for classic banana nut bread or a spiced apple loaf! I can’t wait to hear how yours turns out, so please do leave a comment below with your thoughts or any tweaks you made. Happy baking!
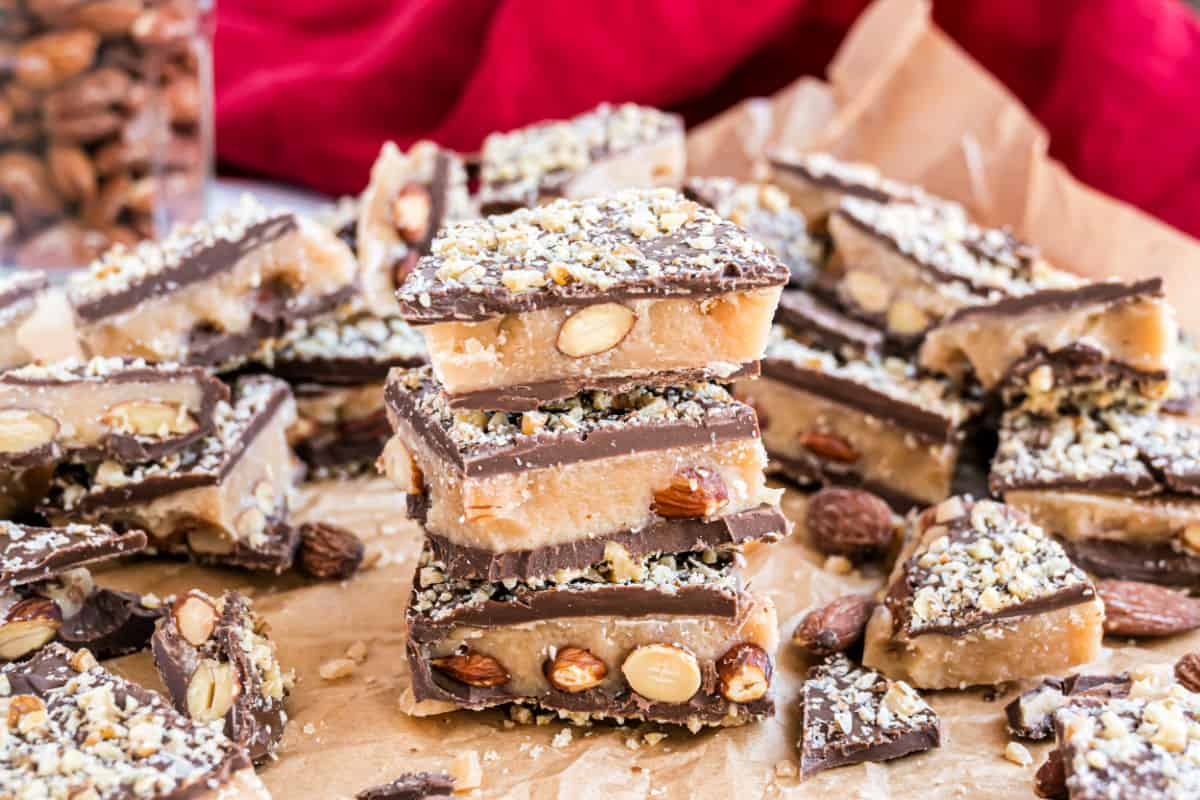
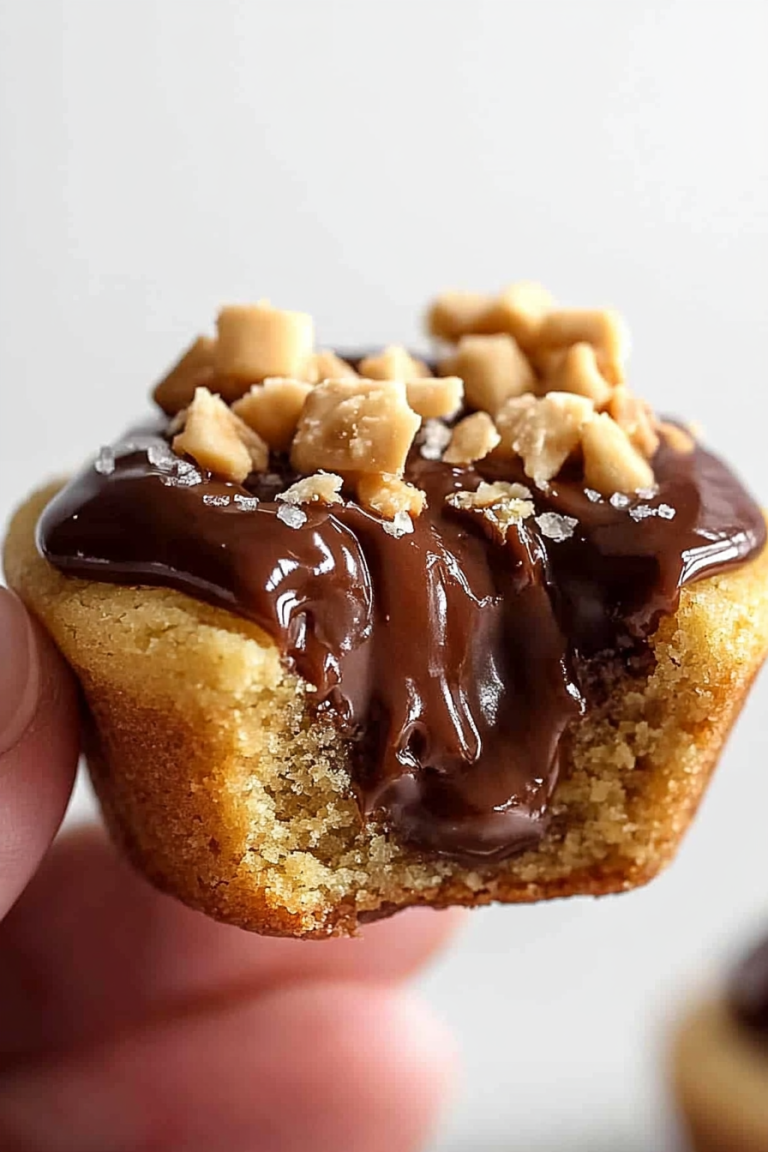
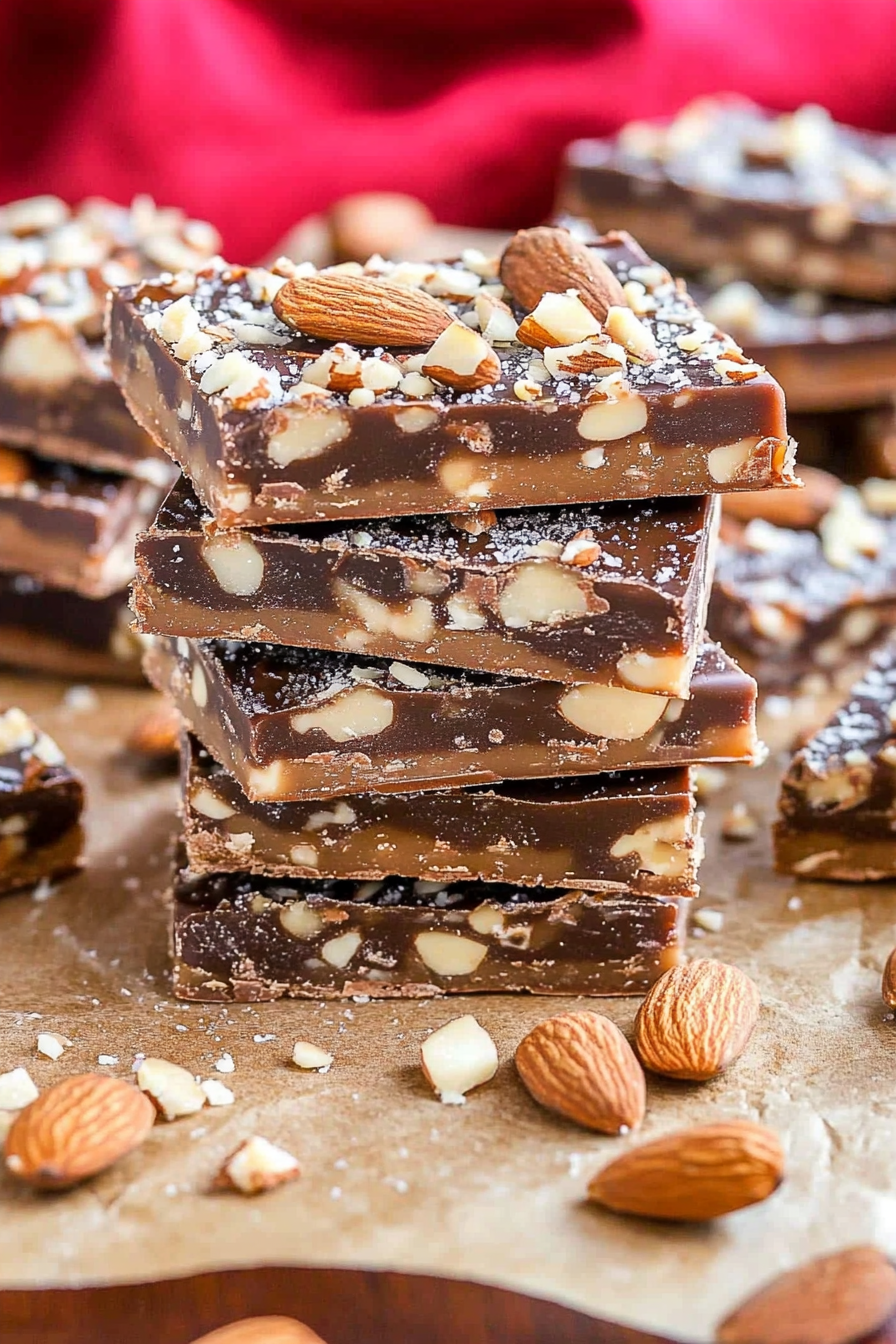
almond toffee
Ingredients
Method
- On a foil lined baking dish (11x7)- or in a silicone brownie bite pan (with 24 bites)- arrange almonds in a single layer. Set aside.
- In a heavy pan, combine butter, margarine, sugar, salt, and vanilla extract. Cook over medium-high heat with a wooden spoon until butter melts, stirring constantly. (REALLY STIRRING CONSTANTLY)! Bring mixture to a rolling boil.
- Continue boiling (AND STIRRING) an additional 5-7 minutes until candy turns the color of almonds (about 300 degrees). Pour over almonds. If using the brownie bite pan, I use a small metal scoop to get toffee into each bite, working quickly!
- Cool completely.
- When candy is cooled and set (about 2 hours), spread chocolate over top of toffee. Sprinkle generously with ground walnuts. If doing both sides, use only half of the chocolate and walnuts. Allow top to set before flipping over and doing bottom. When set, pop out of silicone pan and store in a airtight containers. OR cut into pieces. ENJOY!