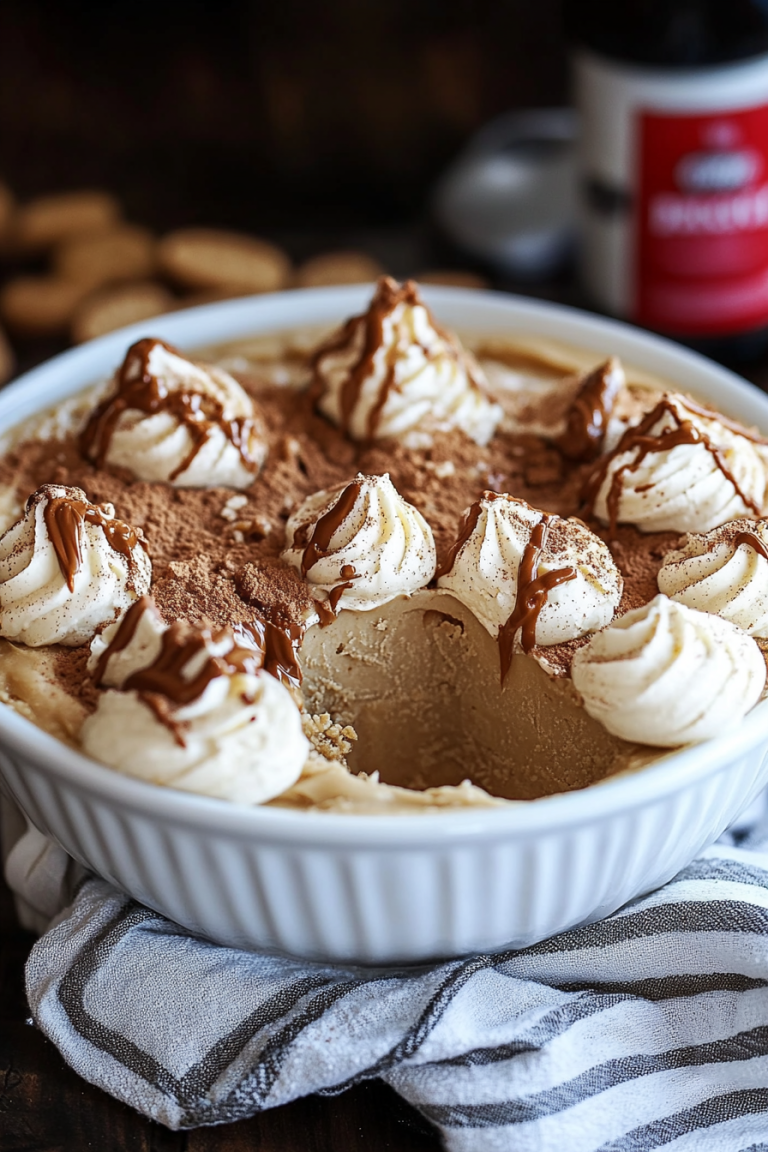
Tropical Sweet Pineapple Cake Delight
You know those recipes that just feel like a warm hug? The ones you can whip up even when you’re half-asleep on a Saturday morning, and they *still* turn out incredible? Yeah, this is one of those. It’s my absolute favorite zucchini bread, and honestly, calling it “bread” feels a little like an understatement. It’s more like a super moist, subtly sweet cake that happens to have vegetables hidden inside – a total win-win in my book. My kids, who are usually pretty picky about anything green, devour this without a second thought. It’s one of those recipes I’ve made countless times, and it never, ever fails. It’s that perfect something for when you’re craving a little sweetness but don’t want to go through the whole ordeal of a complicated cake. Think of it as my little secret weapon for happy taste buds and stress-free baking.
What is this delicious Zucchini Bread?
So, what exactly is this magical creation? At its heart, it’s a quick bread, meaning you don’t need yeast or any complicated rising techniques. It’s basically a moist, tender cake batter infused with shredded zucchini and a hint of warm spice. The zucchini, surprisingly, doesn’t really impart a strong flavor; instead, it works its magic by adding incredible moisture and a beautiful tender crumb. It’s a classic for a reason, but I’ve tweaked this one over the years to get it *just right*. The name itself, “zucchini bread,” probably came about because the original versions were likely simpler, more bread-like, but let’s be honest, the way I make it nowadays leans much more towards a decadent, yet guilt-free, treat. It’s the kind of thing that smells absolutely divine baking, filling your whole house with that comforting aroma.
Why you’ll love this recipe?
There are so many reasons why this zucchini bread has become my absolute kitchen staple, and I just know you’re going to fall in love with it too. First off, the flavor is just *chef’s kiss*. It’s perfectly sweet without being cloying, with just enough spice from the cinnamon and nutmeg to make it feel cozy and inviting. And that texture! It’s unbelievably moist and tender, thanks to that secret ingredient – zucchini! Seriously, you can’t taste the zucchini, but you can definitely taste the incredible moisture it adds.
Then there’s the simplicity. This is a lifesaver on busy weeknights or when unexpected guests pop over. You probably have most of the ingredients in your pantry already, and it comes together in a flash. No fancy equipment needed, just a couple of bowls and a whisk. It’s also surprisingly budget-friendly, using common ingredients that won’t break the bank. And talk about versatile! You can enjoy it for breakfast with a cup of coffee, as a delightful afternoon snack, or even as a light dessert with a dollop of whipped cream. It’s not quite as decadent as my chocolate cake recipe, but it hits that sweet spot perfectly. What I love most about this particular recipe is how forgiving it is. Even if you’re a beginner baker, you can nail this. It’s the kind of recipe that makes you feel like you’ve pulled off something truly special with minimal effort. It’s become a tradition in our house, and I’m so excited to share it with you!
How do I make Zucchini bread?
Quick Overview
The magic behind this zucchini bread is its straightforward approach. You’ll simply whisk together your dry ingredients, then your wet ingredients separately, and then combine them. The shredded zucchini gets mixed right into the wet ingredients, and the whole glorious batter is poured into a prepared loaf pan. After it bakes to golden perfection, a simple glaze finishes it off. It’s so easy, you’ll wonder why you ever bought it from a bakery!
Ingredients
For the Main Batter:
You’ll need about 2 cups of all-purpose flour. I usually just scoop it right from the bag, but if you want to be extra precise, spoon it into your measuring cup and level it off. It helps ensure the right texture!
1 teaspoon baking soda. This is what gives it that lovely lift.
1/2 teaspoon baking powder. A little extra insurance for a good rise.
1/2 teaspoon salt. Crucial for balancing the sweetness.
1 teaspoon ground cinnamon. This is my favorite spice for zucchini bread; it’s so warm and comforting. You could add a pinch of nutmeg too if you like!
1 cup granulated sugar. For sweetness. If you prefer it less sweet, you could probably get away with 3/4 cup, but I like it nice and sweet!
1/2 cup vegetable oil (or other neutral oil like canola). This is key for moisture!
2 large eggs. Make sure they’re at room temperature; they’ll incorporate better.
1 teaspoon vanilla extract. Never skip the vanilla; it enhances all the other flavors.
1 1/2 cups shredded zucchini. This is the star! Make sure to shred it fairly finely, and don’t worry about squeezing out all the moisture – that liquid gold is what makes it so tender!
For the Filling:
This is optional, but highly recommended for an extra special touch! I love to make a simple cinnamon-sugar swirl. You’ll need about 1/4 cup packed light brown sugar.
1 tablespoon ground cinnamon.
For the Glaze:
This is my secret weapon for taking it over the top! It’s super simple and adds that beautiful finishing touch. You’ll want about 1 cup powdered sugar.
2-3 tablespoons milk (any kind works – I’ve even tested this with almond milk and it actually made it even creamier!). You might need a little more or less to get the right consistency.
1/2 teaspoon vanilla extract. Again, for that extra flavor boost.
Step-by-Step Instructions
Step 1: Preheat & Prep Pan
First things first, get your oven preheated to 350 degrees Fahrenheit (175 degrees Celsius). While that’s warming up, grab a standard 9×5 inch loaf pan. Grease it really well with butter or cooking spray, and then dust it lightly with flour. This step is super important, trust me! It guarantees that your beautiful zucchini bread will slide right out of the pan without sticking. Nobody wants to try and rescue a crumbly, stuck loaf.
Step 2: Mix Dry Ingredients
In a large bowl, whisk together your flour, baking soda, baking powder, salt, and cinnamon. Give it a good whisk until everything is well combined. You want to make sure those leavening agents are evenly distributed so your bread rises beautifully and uniformly. It also helps to break up any little clumps of flour.
Step 3: Mix Wet Ingredients
In a separate medium bowl, whisk together the granulated sugar, vegetable oil, eggs, and vanilla extract until everything is smooth and well combined. Then, stir in your shredded zucchini. Don’t be alarmed if the mixture looks a little wet; that’s exactly what you want!
Step 4: Combine
Now, pour the wet ingredients into the bowl with the dry ingredients. Using a spatula or a wooden spoon, gently fold them together until *just* combined. This is crucial: do not overmix! Overmixing develops the gluten in the flour, which can lead to a tough, dense bread. You want to see just a few streaks of flour remaining. It’s better to have a few tiny pockets of flour than to overmix. Remember, we’re going for tender!
Step 5: Prepare Filling
If you’re making the cinnamon-sugar swirl (and I highly recommend it!), this is when you do it. In a small bowl, combine the brown sugar and cinnamon. Give it a quick mix with a fork.
Step 6: Layer & Swirl
Pour about half of the batter into your prepared loaf pan and spread it out evenly. Sprinkle about half of the cinnamon-sugar mixture over the top. Then, pour the remaining batter over that, and sprinkle the rest of the cinnamon-sugar mixture on top. Now, grab a knife or a skewer and gently swirl the cinnamon-sugar mixture into the batter. You don’t need to go crazy here; just a few gentle twists will create those beautiful ribbons of flavor and texture.
Step 7: Bake
Pop the loaf pan into your preheated oven. Bake for about 50-60 minutes. The exact time can vary depending on your oven, so start checking around the 50-minute mark. You’ll know it’s done when a wooden skewer or toothpick inserted into the center comes out clean, with maybe just a few moist crumbs attached. If the top is browning too quickly, you can loosely tent it with aluminum foil.
Step 8: Cool & Glaze
Once it’s done, take the loaf pan out of the oven and let it cool in the pan for about 10-15 minutes. This allows it to set up a bit. Then, carefully invert the loaf onto a wire rack to cool completely. It’s really important that it cools completely before you glaze it, otherwise, the glaze will just melt right off. While it’s cooling, whisk together the powdered sugar, milk, and vanilla extract for the glaze. Start with 2 tablespoons of milk and add more, a teaspoon at a time, until you get a thick but pourable consistency. It should be thick enough to coat the bread but still drizzle nicely. Once the bread is completely cool, drizzle that glorious glaze all over the top. Let the glaze set for a few minutes before slicing.
Step 9: Slice & Serve
Once the glaze has set, slice your beautiful zucchini bread. I find using a serrated knife works best. Serve it at room temperature for the best texture and flavor. It’s perfect on its own, but I also love it with a smear of butter or even cream cheese. Enjoy every delicious bite!
What to Serve It With
This zucchini bread is so versatile, it fits into almost any meal or craving! For a simple breakfast, a thick slice with a hot cup of coffee is pure bliss. The warmth of the bread and the richness of the coffee are just perfect together. I often make a batch on Sunday mornings, and we’ll have slices throughout the day. For a more substantial brunch, it’s a fantastic addition to a spread of eggs, bacon, and fresh fruit. It adds that touch of sweetness that balances out the savory dishes beautifully. I like to arrange slices artfully on a platter; it looks so elegant and homemade. As a dessert, it’s wonderful on its own, but for an extra treat, I sometimes serve it with a dollop of lightly sweetened whipped cream or a small scoop of vanilla bean ice cream. It’s not as rich as a dense chocolate cake, making it a lovely lighter option after a larger meal. And for those cozy, quiet evenings when you just need a little something sweet? This is it. It’s perfect with a mug of tea or a glass of milk. My kids’ favorite way to eat it is still just plain, straight from the pan after it’s cooled enough, which tells you all you need to know about how kid-approved it is!
Top Tips for Perfecting Your Zucchini Bread
After making this recipe more times than I can count, I’ve picked up a few tricks that I think you’ll find super helpful. First, when it comes to the zucchini, I always shred mine on the medium side of a box grater. You want some texture, but you don’t want huge chunks. And please, don’t worry about squeezing out all the moisture! That excess liquid is your friend; it’s what makes the bread incredibly moist. Just make sure to use fresh zucchini; older zucchini can be a bit more watery and might affect the texture.
Regarding mixing, I can’t stress enough the importance of not overmixing the batter. Once you combine the wet and dry ingredients, mix *just* until you no longer see dry flour. A few small lumps are okay; they’ll disappear during baking. Overmixing is the number one culprit for tough quick breads, so be gentle!
For that beautiful swirl effect, you don’t need to be an artist. Simply spoon the batter in layers and then use a knife to gently drag it through the batter a few times. You’re not looking to completely combine everything, just to create those lovely marbled ribbons of cinnamon-sugar goodness. Too much swirling can make it tough, so less is more here.
Ingredient swaps can be fun! If you don’t have vegetable oil, melted coconut oil or even a light olive oil can work, though they might impart a subtle flavor. For a slightly healthier twist, you could try swapping out half the sugar for unsweetened applesauce, but be aware it might make the bread a bit denser. I haven’t personally tested gluten-free flours extensively, but a good 1:1 gluten-free blend should work; you might just need to add a touch more liquid if it seems too dry.
When it comes to baking, ovens can be so finicky. My best advice is to know your oven. If it tends to run hot, start checking for doneness a little earlier. If it’s prone to uneven heating, rotating the pan halfway through baking can help ensure an even bake. And that toothpick test is your best friend – it’s the most reliable way to know when it’s perfectly baked through without being overdone.
Finally, the glaze is optional, but it truly elevates the bread. If you prefer a lighter touch, you can simply dust the cooled bread with powdered sugar. Or, for a more intense cinnamon flavor, try a cream cheese frosting! Whichever you choose, make sure the bread is completely cool before applying any topping to prevent it from melting or becoming a gooey mess.
Storing and Reheating Tips
This zucchini bread is quite resilient when it comes to storage, which is another reason I love it so much. If you’re planning to eat it within a day or two, storing it at room temperature is perfectly fine. Just wrap the cooled loaf tightly in plastic wrap or place it in an airtight container. It should stay wonderfully moist for about 2-3 days this way. Just keep it away from direct sunlight or heat, as that can make it go stale faster.
If you know you won’t be finishing it within a few days, your refrigerator is your best friend. Wrap the cooled loaf very securely in plastic wrap, and then again in aluminum foil, or store it in a good quality airtight container. It will keep well in the fridge for up to a week. When you want a slice, you can eat it cold, or if you prefer it a bit warmer, you can gently reheat a slice in the microwave for about 10-15 seconds. Just be careful not to overheat it, as it can dry out.
For longer-term storage, this zucchini bread freezes like a dream! You have a couple of options here. You can freeze the whole loaf or slice it first, which is super convenient for grabbing a single serving. If freezing the whole loaf, wrap it tightly in plastic wrap, then in aluminum foil, and place it in a freezer-safe bag or container. If freezing slices, wrap each slice individually in plastic wrap, then place them in a freezer bag. It will stay good in the freezer for up to 3 months. To thaw, simply remove the bread from the freezer and let it come to room temperature on the counter. If you froze slices, you can reheat them in the microwave or a toaster oven for a quick warm-up.
A note on the glaze: I almost always add the glaze *after* the bread has cooled completely, and then I let the glaze set for at least 30 minutes before slicing or storing. If you plan to freeze the bread with the glaze, I would recommend glazing it *after* it has thawed. Glazed bread can sometimes stick to freezer packaging, and the glaze can get a bit sticky when frozen and thawed. So, glaze it fresh once it’s thawed for the best results!
Frequently Asked Questions
Final Thoughts
Seriously, if you’re looking for a recipe that’s going to bring a smile to your face and a delicious treat to your table, this is it. My zucchini bread recipe is more than just a recipe; it’s a little piece of home, a comforting aroma that fills the kitchen, and a guaranteed hit with everyone who tries it. It’s proof that sometimes, the simplest ingredients can create the most extraordinary results. The fact that it uses up zucchini that might otherwise go to waste is just the icing on the cake, or rather, the glaze on the bread! I truly hope you give this a try and that it becomes a beloved staple in your kitchen, just as it has in mine. If you do bake it, please, please let me know how it turns out! I love hearing your stories and seeing your creations. Happy baking, and enjoy every single moist, tender, delicious bite!
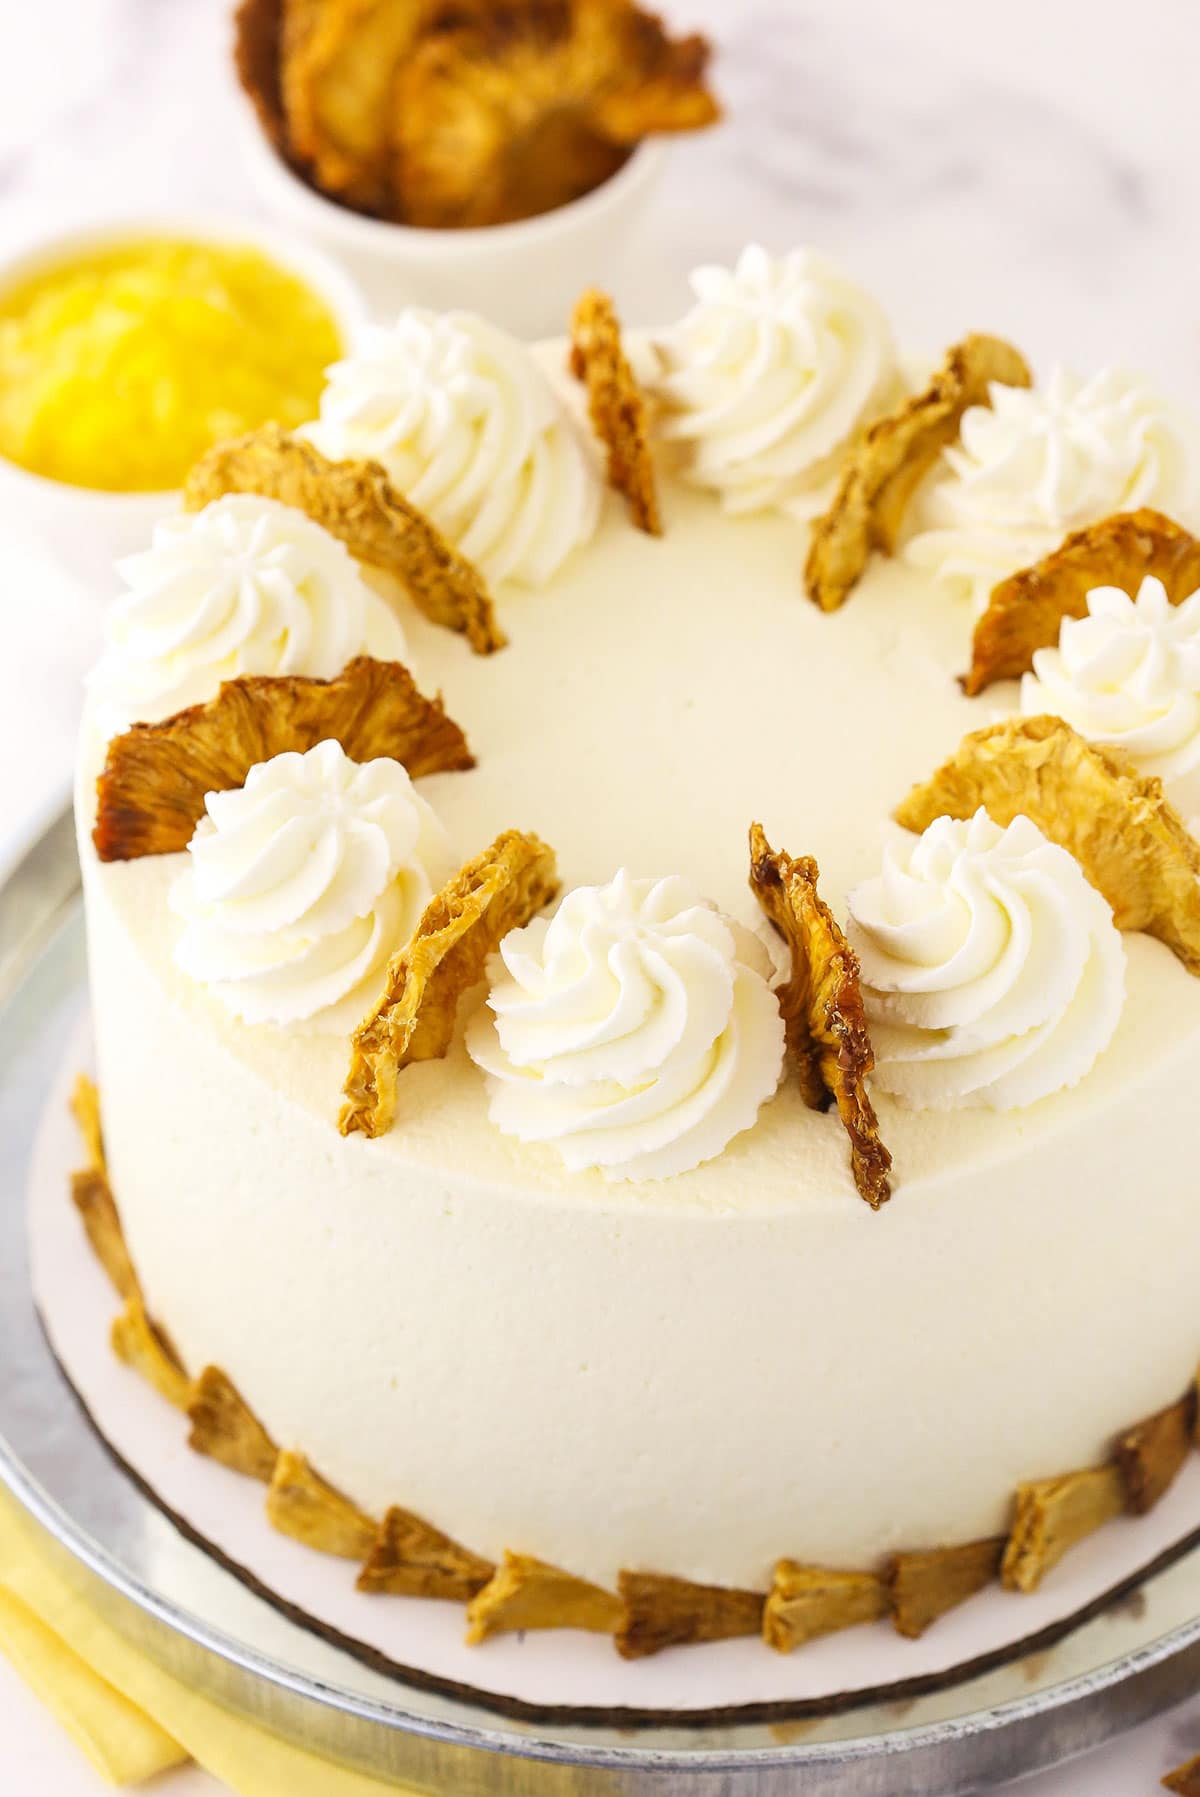
Pineapple Layer Cake
Ingredients
Method
- Prepare three 8-inch cake pans with parchment paper circles in the bottom and grease the sides. Preheat oven to 350°F.
- Combine the flour, baking powder, baking soda and salt in a medium-sized bowl and set aside.
- Add the butter, oil and sugar to a large mixer bowl and beat together until light in color and fluffy, about 2-3 minutes. Do not skimp on the creaming time. You should visibly see a change in color and texture.
- Add the eggs one at a time, mixing until mostly combined after each. Scrape down the sides of the bowl as needed to be sure all ingredients are well incorporated.
- Add half of the crushed pineapple and mix until well combined.
- Add half of the dry ingredients to the batter and mix until mostly combined.
- Add the remaining crushed pineapple and vanilla extract and mix until well combined.
- Add the remaining dry ingredients and mix until well combined. Scrape down the sides of the bowl as needed to be sure all ingredients are well incorporated. Do not over mix the batter.
- Divide the batter evenly between the cakes pans and bake for 22-25 minutes, or until a toothpick comes out with a few crumbs.
- Remove the cakes from the oven and allow to cool for about 2-3 minutes, then remove to cooling racks to cool completely.
- Combine the sugar and cornstarch in a large saucepan. Stir in the pineapple, including the juice, and the water.
- Cook over medium heat, stirring regularly until mixture thickens and come to a boil, about 10 minutes. Allow to boil for 1 minute, then remove from heat. Set in the fridge to cool completely.
- Make sure the cake layers and filling have fully cooled. Add the heavy whipping cream, powdered sugar and vanilla extract to a large mixer bowl and whip on high speed until stiff peaks form.
- Fold one cup of the whipped cream into the pineapple filling until well combined. Set aside.
- Use a large serrated knife to remove the domes from the top of the cakes so that they’re flat, if needed. These cakes don’t have a large dome, but I like to make sure they’re completely flat. Place the first cake on a serving plate or a cardboard cake round.
- Pipe a dam of whipped cream around the outer edge of the cake and fill it with half of the pineapple filling. Spread evenly.
- Top with the second layer of cake and add another layer of pineapple filling.
- Add the final layer of cake on top and frost the cake with the remaining whipped cream. Use remaining whipped cream to pipe swirls on top of the cake. Finish off the cake with some dried pineapple slices.
- Store the cake in the fridge until ready to cut and serve.