Oh, you know, it’s one of those rainy Saturday mornings where the whole house just smells like comfort. I’m standing here, hands dusted with flour, watching the steam rise from my coffee mug, and it hit me – I absolutely *have* to share this zucchini bread recipe with you. It’s not just any zucchini bread, mind you. This is *the* zucchini bread. The one that makes my kids actually put down their screens and ask for seconds (and sometimes thirds!). It’s moist, packed with flavor, and has this perfect, delicate crumb that just melts in your mouth. Honestly, it’s better than any bakery version I’ve ever tried, and way simpler than wrestling with a fussy chocolate cake when you’re craving something sweet. If you’ve ever felt intimidated by baking, or think zucchini bread is just… well, *basic*, stick with me. This recipe is about to change your mind, and it’s going to become your go-to for years to come. Think of it as the ultimate hug in loaf form.
What is Zucchini bread?
So, what exactly *is* this magical thing we call zucchini bread? At its heart, it’s a quick bread, meaning it uses leavening agents like baking soda and baking powder instead of yeast, so no complicated rising times or kneading. It’s essentially a sweet, moist cake that happens to have grated zucchini mixed into the batter. The name might sound a little… vegetable-y, and I get it. But trust me, you don’t taste the zucchini! What you *do* taste is pure, unadulterated deliciousness. The zucchini itself is a secret weapon; it’s mostly water and acts as a natural humectant, making the bread unbelievably moist and tender. It’s a genius way to sneak in some extra goodness without anyone batting an eye. It’s the kind of treat that’s perfect for a casual afternoon tea, a satisfying breakfast companion, or even a delightful dessert after dinner. It’s not a cake, it’s not quite a muffin, it’s in its own glorious category of cozy baked goodness.
Why you’ll love this recipe?
Okay, let’s get down to brass tacks. Why *this* zucchini bread recipe? Well, for starters, the flavor is just out of this world. It’s got that perfect balance of warm spices – cinnamon, nutmeg, a hint of cloves if you’re feeling it – that just sing. And it’s not just one-note sweet; there’s a depth there that keeps you coming back for more. But honestly, what I love most is how ridiculously easy it is. I’ve made this countless times, even when I’m rushing out the door or facing a mountain of laundry, and it *never* fails. It’s a lifesaver on busy weeknights when the sweet craving hits hard. Plus, it’s incredibly budget-friendly! Most of the ingredients are pantry staples, and zucchini is usually pretty affordable, especially when it’s in season. You get so much flavor and satisfaction for so little effort and cost. And the versatility! I’ll get into this more later, but you can switch up the add-ins, play with the spices, and even make it dairy-free if you need to. It’s truly a recipe that adapts to you. Compared to some other quick breads or even simple cakes, this one just hits all the right notes – incredible taste, minimal fuss, and a wonderfully tender texture. It’s the kind of recipe that makes you feel like a baking rockstar, even if you’re just a beginner.
How do I make Zucchini bread?
Quick Overview
This is about as straightforward as it gets, folks. You’ll whisk together your dry ingredients, then mix your wet ingredients, fold them together (gently!), add your beautiful grated zucchini, and bake until golden and fragrant. That’s pretty much it. No fancy techniques, no complicated steps. The beauty is in its simplicity, and the result is a supremely moist, wonderfully spiced loaf that smells like pure happiness as it bakes. I promise, even if your baking experience is limited to toast, you can nail this.
Ingredients
For the Main Batter:
You’ll need about 2 cups of all-purpose flour. I usually just use what’s in my pantry, but if you want to get fancy, a good quality unbleached all-purpose flour works wonders. For the sweeteners, I like to use a mix of granulated sugar and brown sugar – about ¾ cup granulated and ½ cup packed light brown sugar. The brown sugar adds this lovely depth and extra moisture, making it even more irresistible. We’ll need some baking soda (about 1 teaspoon) and baking powder (½ teaspoon) to give it a nice lift. And, of course, spices! 1 ½ teaspoons of ground cinnamon is my go-to, plus a generous ½ teaspoon of nutmeg. If you’re feeling adventurous, a tiny pinch of ground cloves can add a really warm, complex note, but it’s totally optional. A good pinch of salt (½ teaspoon) is crucial to balance all the sweetness. And for the wet ingredients, it’s 2 large eggs, beaten lightly. Then we have ½ cup of a neutral-flavored oil, like vegetable or canola oil. Some people use melted butter, and it’s delicious too, but oil keeps it super moist for longer. Finally, and this is key for that incredible moisture, 1 teaspoon of pure vanilla extract. And the star, of course: 2 cups of grated zucchini. Make sure you squeeze out some of the excess moisture – we’ll get to that!
For the Filling:
This is where we get to play! My absolute favorite filling is a simple swirl of cinnamon and brown sugar. I mix about 2 tablespoons of brown sugar with 1 teaspoon of cinnamon and a little pinch of extra nutmeg. Some days, though, I’m feeling more decadent and I’ll add in ½ cup of chopped walnuts or pecans. Chocolate chips are another huge hit with the kids, so a ½ cup of mini chocolate chips is always a win. You can even get creative with dried cranberries or shredded coconut if you like!
For the Glaze:
This is purely optional but highly recommended for that extra touch of gorgeousness and flavor. It’s a simple powdered sugar glaze. About 1 cup of powdered sugar, sifted to avoid lumps, mixed with 2-3 tablespoons of milk (or almond milk for a slightly different flavor profile – I tested this and it actually made it even creamier!). You can add a splash of vanilla extract here too, or even a bit of lemon zest for a brighter taste. The key is to get it to a pourable, but not too thin, consistency.
Step-by-Step Instructions
Step 1: Preheat & Prep Pan
First things first, get that oven preheating to 350°F (175°C). This is the perfect temperature for baking most quick breads. While the oven heats up, you’ll want to grease and flour a standard 9×5 inch loaf pan. I usually use butter or cooking spray, and then I dust it generously with flour, tapping out any excess. This ensures your beautiful loaf doesn’t stick. Some people like to line their pan with parchment paper for extra security, and that’s a great idea too. Just make sure the parchment doesn’t go too high up the sides, or it might scorch.
Step 2: Mix Dry Ingredients
In a large bowl, whisk together your flour, granulated sugar, brown sugar, baking soda, baking powder, cinnamon, nutmeg, and salt. Give it a really good whisk – you want everything evenly distributed. This is important because it ensures your leavening agents and spices are spread throughout the batter, meaning no dense spots or pockets of plain flour. I always do this step first because it’s so satisfying to see all the dry ingredients come together.
Step 3: Mix Wet Ingredients
In a separate medium bowl, whisk your lightly beaten eggs, oil (or melted butter), and vanilla extract until they’re well combined. The mixture should look smooth and emulsified. Again, this is about ensuring all those wet elements are ready to greet the dry.
Step 4: Combine
Now, pour the wet ingredients into the bowl with the dry ingredients. Here’s where you need to be gentle! Using a spatula or wooden spoon, fold everything together *just until combined*. It’s okay if there are still a few streaks of flour. Seriously, do not overmix! Overmixing develops the gluten in the flour, which can lead to a tough, dense loaf. We want tender and light, so less is more here. Once it’s *almost* combined, add your grated and squeezed zucchini to the bowl. Fold that in gently as well, just until it’s incorporated into the batter.
Step 5: Prepare Filling
While your batter is waiting patiently, quickly mix up your chosen filling. If you’re doing the cinnamon-sugar swirl, just combine the brown sugar and cinnamon in a tiny bowl. If you’re adding nuts or chocolate chips, have those ready to go.
Step 6: Layer & Swirl
Pour about half of the zucchini batter into your prepared loaf pan. Sprinkle your filling ingredients evenly over the top. If you’re using chocolate chips or nuts, make sure they’re distributed fairly well. Then, carefully pour the remaining batter over the filling. Now, for the swirl! If you’re doing the cinnamon-sugar swirl, you can lightly sprinkle some more of that mixture on top. For a more dramatic swirl effect, take a knife or a skewer and gently swirl it through the batter. Don’t overdo it – just a few passes will create beautiful ribbons of flavor and texture. If you’re just using chocolate chips or nuts, you can gently press them into the top of the batter now.
Step 7: Bake
Pop that pan into your preheated oven. Now, baking times can vary a bit depending on your oven, so start checking around 50 minutes. You’re looking for a golden brown crust and a toothpick inserted into the center should come out clean, or with just a few moist crumbs attached. If the top is browning too quickly before the inside is cooked, you can loosely tent it with aluminum foil. I usually bake mine for about 55-65 minutes.
Step 8: Cool & Glaze
Once it’s baked, take the loaf out of the oven and let it cool in the pan on a wire rack for about 10-15 minutes. This is important because it allows the bread to set up slightly. Then, carefully invert the loaf onto the wire rack to cool completely. If you try to glaze it while it’s hot, the glaze will just melt off and make a mess. Once it’s completely cool, you can whip up your glaze. Whisk the powdered sugar and milk together until smooth. You want a consistency that’s thick enough to coat the back of a spoon but thin enough to drizzle. Drizzle it all over the top of the cooled loaf, letting it drip down the sides. It looks so pretty and adds that extra bit of sweetness. If you’re not glazing, you can simply dust it with a little powdered sugar or enjoy it plain.
Step 9: Slice & Serve
Once the glaze is set (or if you skipped the glaze), it’s time to slice! A good sharp knife is your best friend here. I like to get nice, thick slices – about ¾ inch thick. This bread is absolutely divine when it’s still slightly warm, but it’s also fantastic at room temperature. It’s perfect for that morning coffee or an afternoon pick-me-up. You’ll want to serve it with… well, anything! But I’ll get into that next.
What to Serve It With
This zucchini bread is a chameleon, it just fits in everywhere! For a cozy breakfast, I love pairing a thick slice with a steaming mug of coffee or a glass of cold milk. It’s substantial enough to keep you full until lunch. For a more elegant brunch spread, I’ll sometimes cut it into smaller, bite-sized squares and arrange them on a platter with fresh berries or a dollop of whipped cream. It adds a lovely homemade touch. As a dessert, especially if you’ve gone with the chocolate chip or nut filling, it’s wonderful served slightly warm with a scoop of vanilla ice cream. The contrast of warm bread and cold ice cream is just divine! And for those moments when you just need a little something sweet to get you through the afternoon slump, this is your answer. I often just grab a slice while I’m working, no fuss, no ceremony. My absolute favorite way to serve it, though, is when we have friends over. I’ll slice it, maybe add a little smear of butter if people want it, and it’s always a hit. It’s that approachable, comforting treat that everyone can enjoy, and it feels so much more special than store-bought.
Top Tips for Perfecting Your Zucchini Bread
I’ve made this so many times that I’ve picked up a few tricks along the way that I just have to share! First, about the zucchini prep. Grating it is key, and make sure you squeeze out as much moisture as you can. I usually use my hands for this, just grabbing handfuls of grated zucchini and squeezing them over the sink. If you skip this step, your bread can end up gummy and heavy. Freshness is also important; try to use zucchini that isn’t too old. For mixing, remember my mantra: do *not* overmix! I’ve had batches that were a little too dense because I got impatient and stirred too much. The batter should be just combined, it’s better to have a few tiny flour streaks than a tough loaf. When it comes to swirling, don’t go crazy. A few gentle passes with a knife create those beautiful ribbons without messing up the cake’s structure. If you’re adding mix-ins like nuts or chocolate chips, make sure they’re not too large. Mini chocolate chips are perfect because they distribute more evenly. For baking, always trust the toothpick test. Ovens can be quirky, so don’t be afraid to adjust the time slightly. If your loaf is browning too fast, a piece of foil is your best friend. I’ve also experimented with ingredient swaps over the years! For instance, I once tried using all whole wheat flour, and it worked, but it was a bit denser, so I usually stick to all-purpose. I’ve also tested this with almond milk instead of regular milk in the glaze, and it actually made it even creamier and gave it a subtle nutty note, which was lovely! When it comes to glaze variations, you can play with citrus zest (lemon or orange are fantastic!), a touch of maple syrup instead of some powdered sugar, or even a bit of cocoa powder for a chocolate glaze. The possibilities are endless!
Storing and Reheating Tips
One of the best things about this zucchini bread is how well it keeps! At room temperature, I usually store it wrapped tightly in plastic wrap or in an airtight container. It stays wonderfully moist and delicious for about 3 to 4 days. It’s one of those things that somehow tastes even better on the second day! If you know you won’t get through it that quickly, or if it’s a particularly warm day, you can definitely store it in the refrigerator. Pop it into an airtight container, and it should be good for up to a week. The texture might be a little firmer straight from the fridge, but it’s still delicious. For longer storage, freezing is your best friend. You can wrap the entire loaf tightly in plastic wrap, then in foil, or cut it into slices and wrap each slice individually. It will keep beautifully in the freezer for up to 2-3 months. When you’re ready to enjoy it, you can thaw it overnight on the counter, or pop a slice in the microwave for about 20-30 seconds. Reheating is super simple. If you like it warm, you can pop a slice in a toaster oven for a few minutes until it’s gently warmed through. I sometimes like to warm it up slightly and then add a little extra pat of butter. As for the glaze, I always wait until the bread is completely cool before applying it. If I’m freezing the loaf, I usually wait to glaze it until *after* it’s thawed, to prevent any sogginess. Sometimes, if I’m just refrigerating it, I’ll put the glaze on, but I find it’s often best to glaze it right before serving if you want it to look its prettiest.
Frequently Asked Questions
Final Thoughts
So there you have it – my go-to zucchini bread recipe! It’s the kind of recipe that makes me smile every time I bake it, because I know it’s going to bring smiles to whoever eats it. It’s more than just a recipe; it’s a little bit of edible comfort, a reminder of simple pleasures, and proof that you don’t need to be a pastry chef to create something truly wonderful in your own kitchen. I really hope you give this one a try. It’s perfect for those days when you want something homemade, delicious, and surprisingly easy. If you love this zucchini bread, you might also enjoy my recipe for {{< amazon-link url=”YOUR_AMAZON_URL_FOR_A_RELATED_RECIPE” text=”Moist Blueberry Muffins” >}} or my {{< amazon-link url=”YOUR_AMAZON_URL_FOR_ANOTHER_RELATED_RECIPE” text=”Classic Banana Bread” >}} – they’re in the same cozy vein! I can’t wait to hear how yours turns out, so please, please leave a comment below and tell me your thoughts, or share any fun variations you tried. Happy baking!
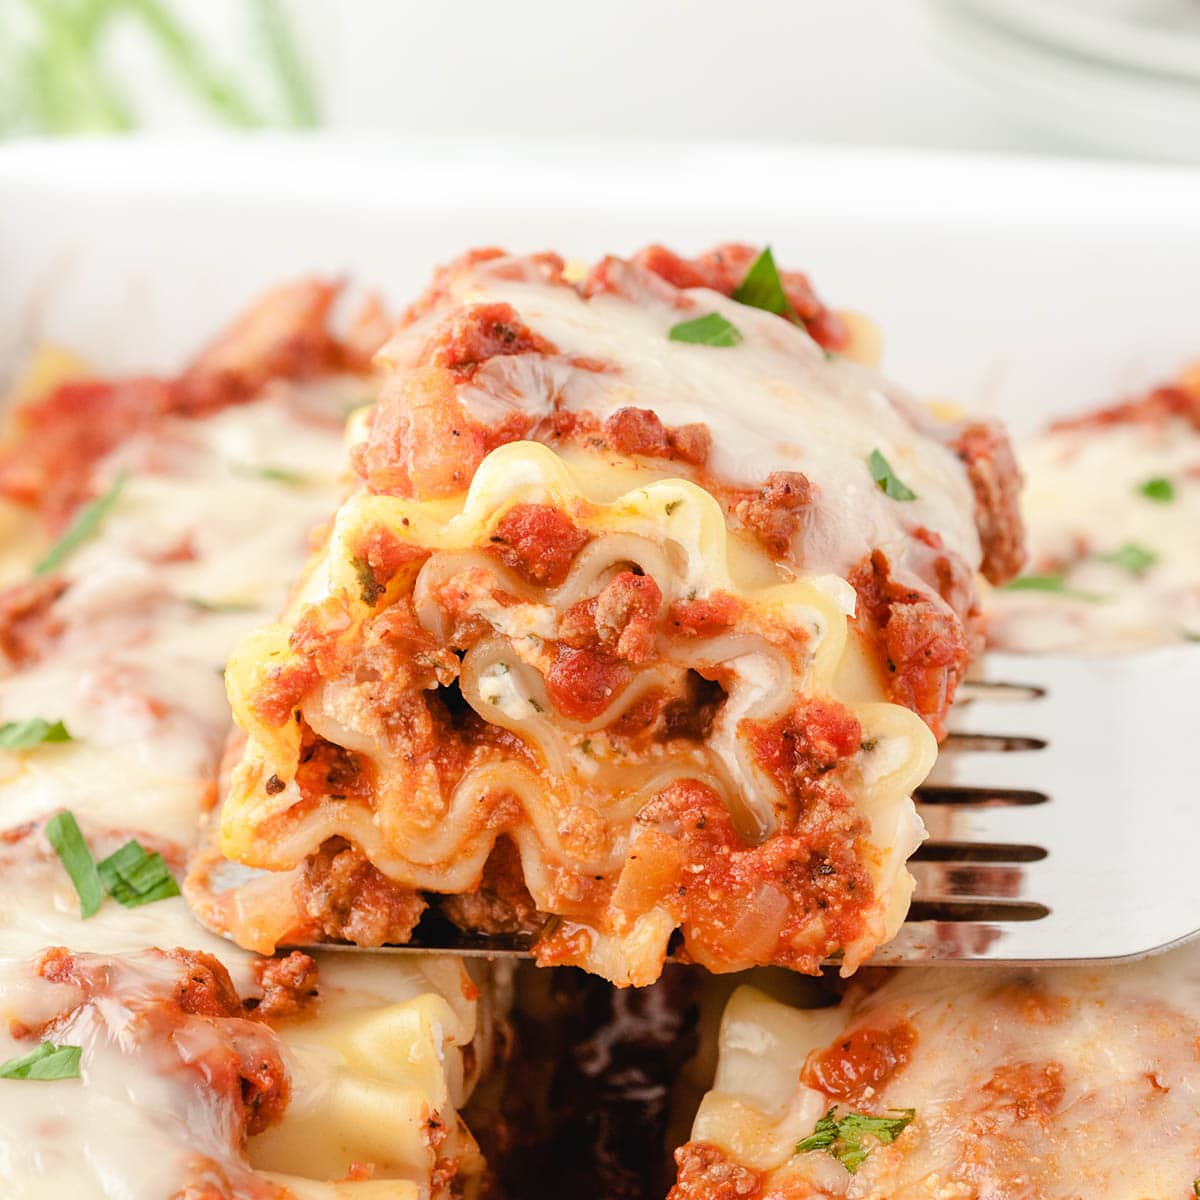
lasagna rolls recipe
Ingredients
Method
- In a large pot cook noodles according to package directions. Once the noodles are soft and cooked, drain hot water. With noodles still in the pot, add cold water to the noodles to stop the cooking process and to keep noodles from sticking together.
- In a large deep sided skillet cook ground beef until no longer pink. Drain grease and return beef to skillet. Add onion, Italian seasonings, garlic salt, minced garlic, salt, and ground black pepper.
- Stir and let cook for 5-7 minutes, or until onions are soft and tender.
- Add marinara sauce to the meat mixture and stir well. Bring the sauce to a simmer. Cover with a lid and let simmer for 5 minutes then remove from the heat.
- In a separate large mixing bowl combine ricotta cheese, egg, Parmesan cheese, ¾ of the mozzarella cheese, and dried parsley flakes. Stir to combine.
- On a large baking sheet lay out 5 lasagna noodles. Spread ¼ cup of ricotta filling on the lasagna noodle. Use a rubber spatula to spread mixture the entire length of the noodle. Add 3 tbsp meat sauce to each lasagna noodle on top of the ricotta mixture. Use a rubber spatula to spread the meat sauce the entire length of the noodle.
- Preheat the oven to 375 degrees F and spray a 9x13 baking dish with cooking spray. Add ½ cup of meat sauce on the bottom of the baking dish and use the rubber spatula to spread evenly across the bottom of the dish.
- Gently roll each lasagna noodle from one end to the other, and place in the baking dish. Repeat the process with the remaining 5 noodles and place them in the baking dish.
- Top the rolled lasagna noodles with the remaining meat sauce. Add remaining mozzarella cheese to the top of each lasagna roll.
- Cover with tin foil and place in the oven. Cook at 375 degrees F for 40 minutes. Remove tin foil and broil for 2-3 minutes, or until cheese is lightly browned.
- Serve immediately.