Okay, so if there’s one thing that always, *always* brings a smile to my face and a comforting warmth to my kitchen, it’s the smell of this zucchini bread baking. It’s the kind of scent that wraps around you like a cozy blanket on a chilly morning, or that perfect invitation to gather everyone around the table. You know, it reminds me a bit of those incredible cinnamon rolls my grandma used to make, but this is so much simpler. Seriously, I’ve tried a million zucchini bread recipes over the years, searching for that perfect balance of moistness, flavor, and just the right amount of sweetness, and I’ve finally landed on *the one*. This recipe is a lifesaver on busy weeknights when the sweet craving hits unexpectedly, and it’s honestly the star of every potluck or bake sale I bring it to. The secret? Well, you’ll have to read on, but trust me, it’s worth every single step.
What is Zucchini bread?
At its heart, zucchini bread is pretty much what it sounds like: a quick bread studded with finely grated zucchini. But oh, it’s so much more than just that! Think of it as a healthier, more naturally moist cousin to a classic coffee cake or a sweet muffin. The zucchini might sound a little… well, *vegetable-y* for a sweet bread, but I promise you, it’s the MVP here. It doesn’t add any discernible zucchini flavor, what it does is lend this incredible, almost unbelievable moisture and tenderness to the crumb. It’s the reason why this loaf stays soft for days, which is a huge win in my book. It’s essentially a sweet, tender, spiced loaf that feels like a treat but uses wholesome ingredients. The name itself is straightforward, but the magic it holds is anything but!
Why you’ll love this recipe?
There are so many reasons why this zucchini bread has become my go-to, and I just know you’re going to fall in love with it too. First off, let’s talk about the flavor and texture. It’s unbelievably moist and tender, thanks to that sneaky zucchini. It has this perfect crumb that’s not too dense and not too crumbly. The spices – a warm blend of cinnamon and nutmeg – just sing, and if you’re a fan of add-ins, this is your canvas! Chocolate chips? Pecans? Walnuts? They all work beautifully. And the simplicity! This recipe is genuinely so easy. You can whip up the batter in about 15 minutes, and the rest is just baking time. Plus, it’s incredibly cost-effective. Zucchini is usually pretty affordable, and the pantry staples like flour, sugar, and eggs make this a budget-friendly indulgence. What I love most about this recipe, though, is its versatility. It’s perfect for a quick breakfast on the go, a delightful afternoon snack with a cup of tea, or even a simple dessert after dinner. It’s like a more wholesome version of those fancy bakery muffins, but made right in your own kitchen. It’s the kind of recipe that makes you feel like a baking pro, even if you’re just starting out. It truly stands out because it delivers on all fronts: flavor, ease, and that comforting homemade goodness.
How do you make Zucchini bread?
Quick Overview
This is one of those recipes where the process is as enjoyable as the final product. In a nutshell, you’ll grate your zucchini, whisk together the wet and dry ingredients separately, then gently combine them. The magic happens with the addition of the zucchini, which keeps everything beautifully moist. I also like to add a swirl of something extra, like a cinnamon-sugar mix or even a dollop of jam, right before baking to take it to the next level. It’s a straightforward, no-fuss method that guarantees a delicious, tender loaf every single time. You’ll be amazed at how simple it is to create something so incredibly satisfying.
Ingredients
For the Main Batter:
You’ll need about 2 cups of grated zucchini. I usually use medium-sized zucchini and aim for about 2-3 medium ones. Don’t bother peeling them; the skin adds extra fiber and a lovely little fleck of green. Just give them a good wash! Make sure to squeeze out as much liquid as you can after grating – this is a crucial step for getting that perfect texture. I’ve tried it with more liquid before, and it made the bread a bit gummy, so don’t skip this part! You’ll also need 2 cups of all-purpose flour, 1 teaspoon of baking soda, half a teaspoon of baking powder, 1 teaspoon of ground cinnamon, a quarter teaspoon of ground nutmeg, and a pinch of salt. If you love spice, feel free to bump up the cinnamon a bit!
For the Filling:
This is where you can really have some fun! My absolute favorite swirl is a simple mix of 2 tablespoons of brown sugar and 1 teaspoon of cinnamon. It’s classic and delicious. But you can also add half a cup of chopped walnuts or pecans for a delightful crunch, or even a cup of chocolate chips (mini or regular work well!). If you’re feeling adventurous, a swirl of thick apple butter or even a dollop of cream cheese mixed with a little sugar can be divine. For the brown sugar swirl, I usually melt 2 tablespoons of butter and mix it with the brown sugar and cinnamon, then dollop spoonfuls over the batter before swirling.
For the Glaze:
This is optional but highly recommended for that extra touch of sweetness and shine. You’ll need 1 cup of powdered sugar, about 2-3 tablespoons of milk (or almond milk, which makes it even creamier!), and a tiny splash of vanilla extract. You want a glaze that’s thick enough to coat but still pourable. If it’s too thick, add milk a teaspoon at a time. If it’s too thin, add more powdered sugar.
Step-by-Step Instructions
Step 1: Preheat & Prep Pan
First things first, get your oven preheating to 350°F (175°C). You’ll want to grease and flour a 9×5 inch loaf pan really well. I like to use a baking spray or butter and flour it thoroughly to make sure it releases perfectly. Sometimes, I even line the bottom with parchment paper for extra insurance. This step ensures your beautiful zucchini bread doesn’t stick, and nobody wants that heartbreak after all the effort!
Step 2: Mix Dry Ingredients
In a large bowl, whisk together your flour, baking soda, baking powder, cinnamon, nutmeg, and salt. Give it a good whisk to make sure all the leavening agents and spices are evenly distributed. This is important because you don’t want pockets of baking soda or streaks of cinnamon in your finished loaf. It should look like a perfectly uniform pale brown powder.
Step 3: Mix Wet Ingredients
In a separate medium bowl, crack in your 2 large eggs. Add 1 cup of granulated sugar, half a cup of vegetable oil (or melted coconut oil for a subtle flavor), and 1 teaspoon of vanilla extract. Whisk these together until they’re well combined and slightly lighter in color. Make sure your oil isn’t too hot if you’re using melted coconut oil, you don’t want to cook the eggs!
Step 4: Combine
Now, pour the wet ingredients into the dry ingredients. Gently fold them together until *just* combined. Be careful not to overmix here! Overmixing can develop the gluten in the flour too much, leading to a tough loaf. A few streaks of flour are okay at this stage. Then, gently fold in your squeezed-out grated zucchini. The batter will be thick, and that’s exactly what you want.
Step 5: Prepare Filling
If you’re doing the cinnamon-sugar swirl, now’s the time to prepare it. In a small bowl, mix together your brown sugar and cinnamon. If you’re using the butter method, melt 2 tablespoons of butter and stir in the brown sugar and cinnamon until it forms a thick paste. If you’re adding nuts or chocolate chips, have them ready to go.
Step 6: Layer & Swirl
Spoon about half of the batter into your prepared loaf pan. If you’re using a swirl, dollop spoonfuls of your filling mixture over the batter. Then, add the remaining batter on top, trying to cover the filling as much as possible. If you’re adding nuts or chocolate chips, you can gently press them into the top now. For the swirl, take a butter knife or skewer and gently swirl it through the batter to create those beautiful marble-like patterns. Don’t over-swirl, or you’ll just mix everything together.
Step 7: Bake
Place the loaf pan in the preheated oven. Bake for 50-65 minutes, or until a wooden skewer or toothpick inserted into the center comes out clean. The baking time can vary depending on your oven and the moisture content of your zucchini, so start checking around the 50-minute mark. If the top is browning too quickly, you can loosely tent it with aluminum foil.
Step 8: Cool & Glaze
Once baked, let the zucchini bread cool in the pan for about 10-15 minutes. This allows it to firm up a bit. Then, carefully invert it onto a wire rack to cool completely. Once it’s mostly cooled, you can make your glaze. Whisk together the powdered sugar, milk, and vanilla until smooth. Drizzle or spread it over the top of the cooled loaf. If you add the glaze while it’s too warm, it’ll just melt right off!
Step 9: Slice & Serve
Once the glaze has set a little, slice your zucchini bread with a serrated knife for nice, clean cuts. Serve it at room temperature for the best flavor and texture. It’s honestly perfect on its own, but a little butter on the side never hurt anyone!
What to Serve It With
This zucchini bread is incredibly versatile, and I love how it fits into almost any meal or occasion. For breakfast, it’s divine simply sliced and enjoyed with a steaming mug of coffee or a glass of fresh orange juice. The warm spices are just the perfect way to start the day. For a more leisurely brunch spread, I love serving it alongside some fresh fruit salad, maybe some scrambled eggs and a few slices of crispy bacon. It adds that touch of sweetness and homemade charm to the table. As a dessert, it’s surprisingly satisfying. I’ll sometimes warm up a slice and serve it with a dollop of whipped cream or a scoop of vanilla bean ice cream – talk about decadent! And for those cozy, quiet evenings when you just need a little pick-me-up, a thick slice of this with a cup of hot tea is pure comfort. My kids always ask for this when they’re looking for a “special snack,” and it never disappoints. I’ve also found it pairs beautifully with a glass of milk, which always brings me back to my own childhood!
Top Tips for Perfecting Your Zucchini Bread
Over the years of making this, I’ve picked up a few tricks that I think make a big difference. First, when it comes to the zucchini, really give it a good squeeze! I use my hands for this, and then I’ll even wrap it in a clean kitchen towel and wring out every last drop of liquid. This step is paramount to preventing a soggy or gummy bread. For mixing, remember the rule of thumb: don’t overmix! Just combine until you don’t see dry flour streaks. A few lumps are fine. When it comes to the swirl, don’t go crazy with it. You want distinct ribbons of flavor, not a completely blended batter. For ingredient swaps, I’ve tested this with a mix of whole wheat and all-purpose flour (using about 1 cup of each), and it works wonderfully, adding a slightly nuttier flavor and even more fiber. The texture will be a bit denser, but still delicious. Baking can be tricky, so if your oven tends to run hot, I recommend using a reliable oven thermometer and perhaps slightly lowering the temperature or covering it with foil a bit earlier. For the glaze, if you find it too sweet, a tiny pinch of salt can balance it out beautifully. Oh, and don’t be afraid to add in chocolate chips! I always throw in at least a cup, sometimes more. They melt into little pockets of gooey goodness, and it’s just heavenly.
Storing and Reheating Tips
One of the best things about this zucchini bread is how well it keeps! At room temperature, I find it stays perfectly moist and delicious for about 3-4 days. I always store it in an airtight container or wrap the loaf tightly in plastic wrap, then maybe a layer of foil. This prevents it from drying out. If you think you won’t get through it that quickly, or if your kitchen is quite warm, popping it into the refrigerator is a great option. Wrapped well, it should last for up to a week in the fridge. The texture might firm up a little in the fridge, but that’s easily remedied! For longer storage, freezing is your best friend. You can freeze the whole loaf or individual slices. Wrap them tightly in plastic wrap, then place them in a freezer-safe bag or container. It’ll keep well for up to 3 months. To reheat, you can gently warm slices in the oven at a low temperature (around 300°F or 150°C) for about 10-15 minutes, or pop them in the toaster oven or microwave for a quick warm-up. If you’ve glazed your bread, I recommend adding the glaze *after* reheating if you’re freezing it, as the glaze can sometimes become a bit sticky or separate in the freezer. If you’re storing it at room temp or in the fridge, glazing it before storing is perfectly fine!
Frequently Asked Questions
Final Thoughts
So there you have it – my foolproof, utterly delicious zucchini bread recipe! It’s more than just a recipe to me; it’s a little slice of comfort and joy that I’m so happy to share. The way it stays so wonderfully moist, the perfect balance of spices, and the sheer ease of making it all combine to make this my absolute favorite baked good. If you’re looking for a way to use up that surplus zucchini from your garden, or if you’re just craving something sweet, wholesome, and incredibly satisfying, you really can’t go wrong with this. It’s the kind of bake that makes your home smell amazing and your taste buds sing. If you enjoy this recipe, you might also love my Pumpkin Bread with Cream Cheese Swirl or my Lemon Poppy Seed Muffins – they have that same comforting, homemade vibe! I can’t wait to hear how yours turns out, so please leave a comment below and let me know your favorite add-ins or any variations you try. Happy baking!
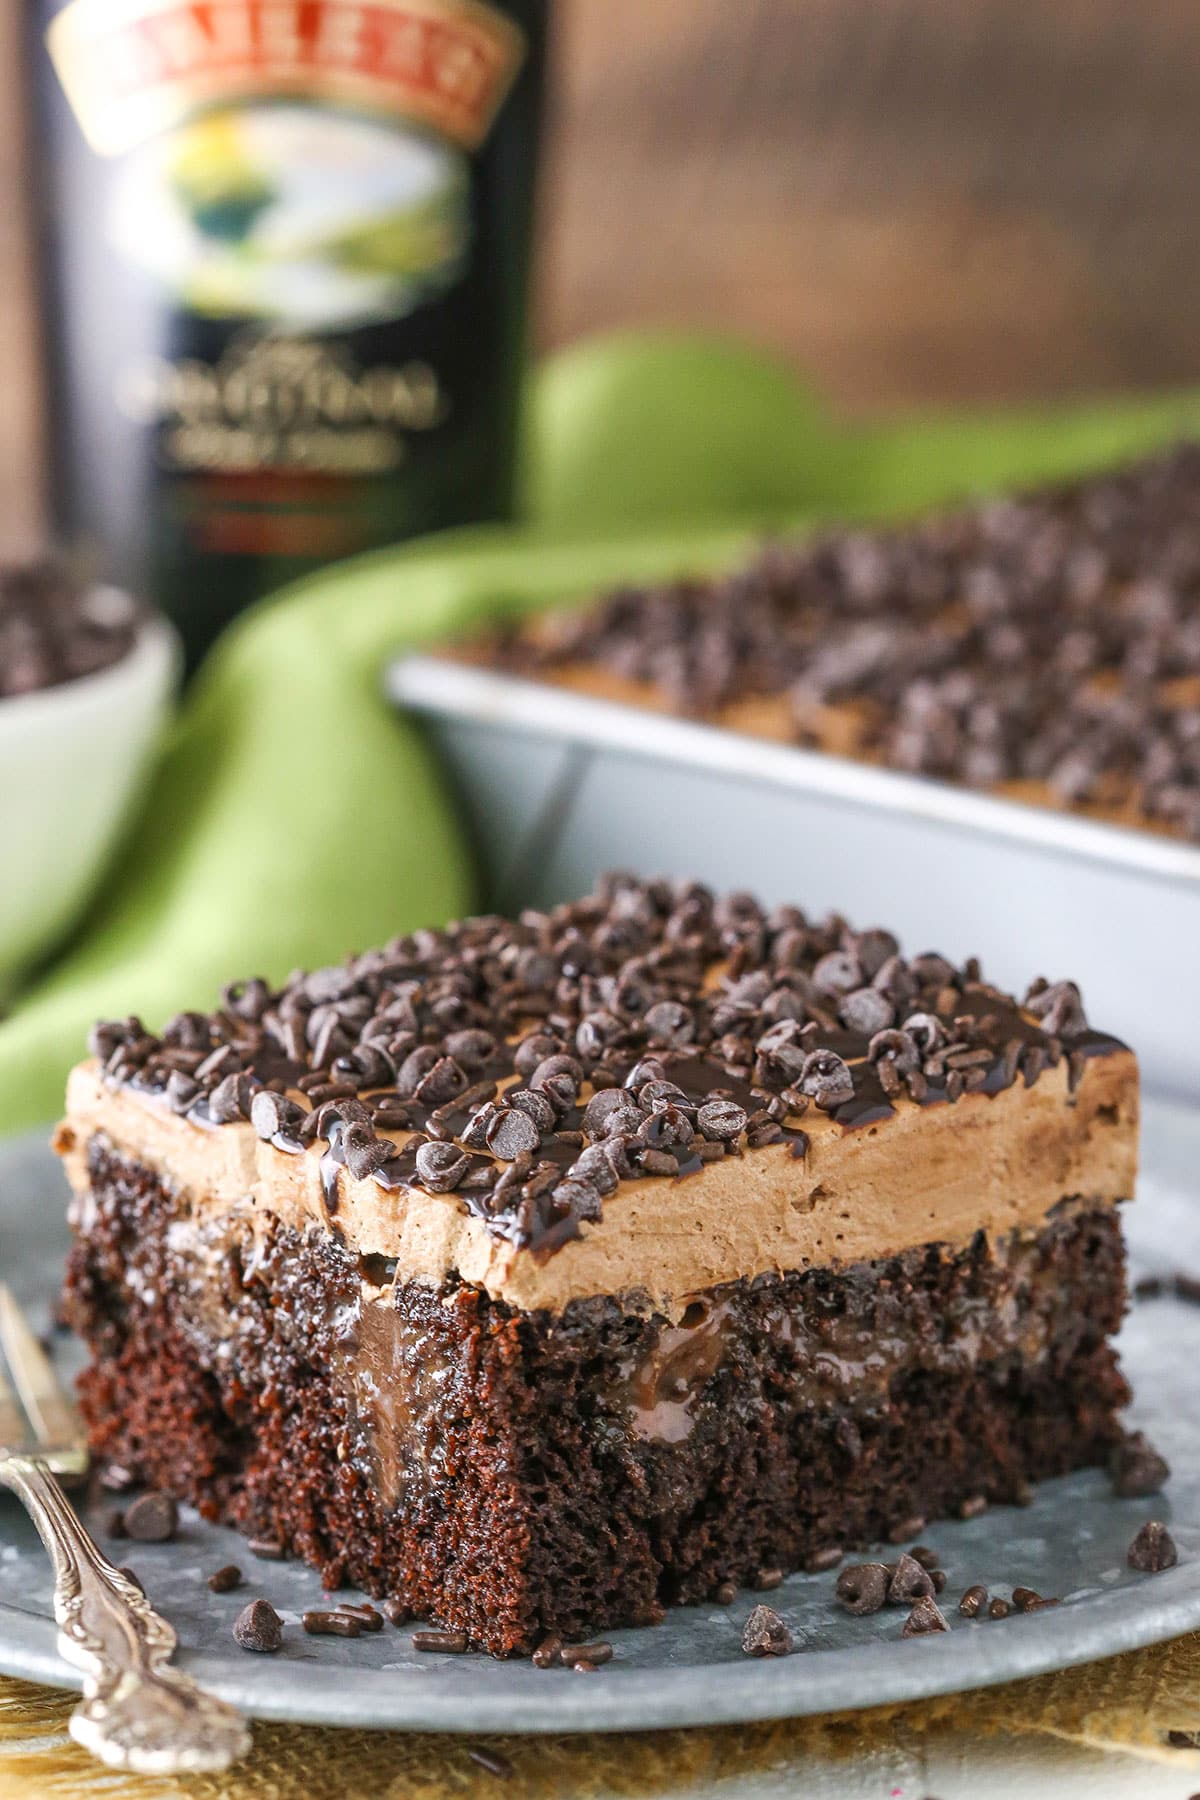
Baileys Chocolate Cake
Ingredients
Method
- Preheat your oven to 300°F. Grease the sides of a 9x13 inch cake pan.
- In a large mixing bowl, combine all the dry ingredients: all-purpose flour, granulated sugar, natural unsweetened cocoa powder, baking soda, and salt. Mix until well combined.
- Add the eggs, milk, vegetable oil, 0.5 cup of Baileys Irish Cream, and 1 teaspoon of vanilla extract to the dry ingredients. Mix on medium speed until well combined and smooth.
- Slowly and carefully pour the boiling water into the batter while mixing. Be cautious of splashing. Mix until the batter is smooth.
- Pour the prepared batter into the greased 9x13 inch cake pan. Bake for 40-45 minutes, or until a toothpick inserted into the center comes out with a few moist crumbs.
- Once the cake is removed from the oven, immediately poke holes all over the top. A knife sharpening rod or a thick straw works well for this.
- While the cake is still warm, place the semi-sweet chocolate chips in a medium-sized heatproof bowl. In a microwave-safe measuring cup, combine the sweetened condensed milk and the remaining 0.5 cup of Baileys Irish Cream. Heat until the mixture begins to boil, then immediately pour over the chocolate chips.
- Whisk the chocolate mixture until smooth and the chocolate chips are fully melted. Immediately pour this warm mixture over the cake, spreading it evenly and ensuring it seeps into all the poked holes. Do not let the mixture sit before pouring, as it will thicken and not soak into the cake as effectively.
- Transfer the cake to the refrigerator to cool completely and allow the soak to fully absorb, about 1-2 hours.
- Once the cake has completely cooled, prepare the whipped cream topping. In a large mixer bowl, combine the cold heavy whipping cream, powdered sugar, 0.25 cup natural unsweetened cocoa powder, 2 tablespoons Baileys Irish Cream (if using), and 0.5 teaspoon vanilla extract. Whip on high speed until stiff peaks form.
- Spread the Baileys whipped cream evenly over the cooled cake. Garnish with mini chocolate chips and a drizzle of chocolate sauce, if desired. Refrigerate the cake until you are ready to serve.