You know those recipes that just *feel* like a warm hug? This zucchini bread is one of those for me. It’s not just another quick bread; it’s the kind of thing I whip up when I’m feeling a bit nostalgic for my grandma’s kitchen, or when I need a serious pick-me-up after a long day. Honestly, it’s my go-to when I’ve got a couple of zucchinis sitting around that need a good home. And the cream cheese swirl? Oh, it’s a game-changer. It takes it from just good zucchini bread to something truly decadent, almost like a dessert but perfectly acceptable for breakfast. Forget those dry, crumbly versions you might have tried; this one is incredibly moist, tender, and packed with subtle spice. It’s the kind of treat that makes your whole house smell amazing. I’ve tried a million zucchini bread recipes, and some are okay, but this one? This one is the winner. It’s like the love child of a perfect loaf cake and a decadent pastry, and I just can’t get enough.
What is Zucchini bread with cream cheese swirl?
So, what exactly *is* this magical creation? At its heart, it’s a super moist, tender quick bread made with grated zucchini. The zucchini itself is pretty neutral in flavor, but it adds incredible moisture and tenderness, making the bread almost melt in your mouth. The “swirl” part comes from a luscious, tangy cream cheese mixture that gets gently swirled into the batter before baking. Think of it as a ribbon of creamy goodness running all through your loaf. It’s not a cake, not quite a muffin, but firmly in the realm of a deeply satisfying baked good. The name itself, “Zucchini Bread with Cream Cheese Swirl,” probably sounds a little fancy, but don’t let that intimidate you. It’s essentially a humble loaf of deliciousness elevated by that irresistible creamy pocket. It’s the kind of thing that makes people ask, “What’s your secret?” and you can just smile.
Why you’ll love this recipe?
Let’s talk about why this particular zucchini bread recipe has earned a permanent spot in my baking rotation. First off, the flavor is just out of this world. It’s delicately spiced with cinnamon and a hint of nutmeg, perfectly complementing the subtle sweetness of the bread. But the real star, besides the amazing moisture from the zucchini, is that cream cheese swirl. It adds this wonderful tanginess that cuts through the sweetness beautifully and makes every bite feel a little bit luxurious. And I mean, who doesn’t love a good swirl? It looks gorgeous, too!
Secondly, it’s surprisingly simple to make. Even if you’re not an experienced baker, you can totally nail this. There’s no fancy equipment needed, just a couple of bowls and a whisk. It comes together pretty quickly, which is a lifesaver on busy mornings or when you have unexpected guests.
Third, it’s incredibly budget-friendly. Zucchini is often abundant and affordable, especially in season, and the other ingredients are pantry staples. You get a fantastic return on your investment with a loaf that feels far more gourmet than the cost of the ingredients.
And versatility? Oh, it’s so versatile! This bread is perfect as is, but you can also add nuts, chocolate chips, or even a handful of berries to the batter if you’re feeling adventurous. It’s wonderful for breakfast, a delightful afternoon snack, or even a light dessert. What I love most about this recipe is that it’s incredibly forgiving. I’ve forgotten to let the eggs come to room temperature, I’ve used slightly less sugar when I ran out, and it *still* turns out amazing. That’s the sign of a truly great recipe, right?
How do you make Zucchini bread with cream cheese swirl?
Quick Overview
The process is straightforward: you’ll make a simple batter by combining wet and dry ingredients, prepare a creamy cheese filling, swirl the two together, and then bake until golden and fragrant. It’s a two-bowl wonder that requires minimal fuss but yields maximum flavor. The beauty of this method is how effortlessly the moisture from the zucchini melds with the other ingredients, creating that signature tender crumb. It’s genuinely one of the easiest, most rewarding loaves you can bake, perfect for getting that homemade goodness without a ton of effort.
Ingredients
For the Main Batter:
2 cups all-purpose flour (I usually use unbleached, it seems to give a slightly better texture)
1 teaspoon baking soda
1/2 teaspoon baking powder
1/2 teaspoon salt
1 teaspoon ground cinnamon (don’t skimp on this!)
1/4 teaspoon ground nutmeg (optional, but I love the warmth it adds)
1 and 3/4 cups granulated sugar (you can reduce this slightly if you prefer, but I find this is the sweet spot)
2 large eggs, at room temperature (this really helps them incorporate better)
1 cup vegetable oil (or another neutral oil like canola; melted butter works too, but oil makes it extra moist)
1/4 cup milk (any kind works, dairy or non-dairy!)
1 teaspoon vanilla extract
2 cups grated zucchini (about 2 medium zucchinis, packed lightly)
For the Filling:
8 ounces cream cheese, softened (this is key – make sure it’s nice and soft!)
1/2 cup granulated sugar
1 large egg yolk (save the white for another use or whisk it into the main batter)
1/2 teaspoon vanilla extract
For the Glaze:
1 cup powdered sugar
2-3 tablespoons milk (or lemon juice for a tangier flavor)
1/2 teaspoon vanilla extract
Step-by-Step Instructions
Step 1: Preheat & Prep Pan
Get your oven preheated to 350°F (175°C). You’ll need a standard 9×5 inch loaf pan. Grease it really well with butter or cooking spray, and then I like to lightly flour it too, or even better, line it with parchment paper, leaving some overhang. This makes lifting the finished loaf out SO much easier. Trust me on this one; no one wants to wrestle their beautiful baked goods out of the pan!
Step 2: Mix Dry Ingredients
Grab a medium-sized bowl and whisk together the flour, baking soda, baking powder, salt, cinnamon, and nutmeg if you’re using it. Give it a good whisk until everything is evenly distributed. This ensures your leavening agents and spices are spread throughout the batter, so you don’t get any funny pockets of flavor or texture.
Step 3: Mix Wet Ingredients
In a larger bowl (this is where your batter will come together), whisk together the sugar and eggs until they’re well combined and a little lighter in color. Then, pour in the oil, milk, and vanilla extract. Whisk until everything is smooth and emulsified. It should look like a cohesive liquid mixture.
Step 4: Combine
Now, pour the dry ingredients into the wet ingredients. Mix them together with a spatula or wooden spoon *just until* they’re combined. Seriously, don’t overmix! A few streaks of flour are okay. Overmixing develops the gluten too much, which can lead to a tough bread, and we want this to be tender. Then, gently fold in your grated zucchini. Make sure it’s distributed evenly but still be careful not to overwork the batter.
Step 5: Prepare Filling
While your batter is resting, let’s whip up that glorious cream cheese swirl. In a separate bowl, beat the softened cream cheese and sugar together until it’s smooth and creamy. You don’t want any lumps. Then, beat in the egg yolk and vanilla extract until it’s well combined and glossy. This mixture should be thick but pourable.
Step 6: Layer & Swirl
Now for the fun part! Pour about half of your zucchini batter into the prepared loaf pan. Dollop about half of the cream cheese mixture over the top. Then, pour the remaining zucchini batter over the cream cheese. Finally, dollop the rest of the cream cheese mixture on top. Now, grab a knife or a skewer and gently swirl the cream cheese mixture into the batter. Make figure-eights or just gentle zig-zags. Don’t over-swirl, or you’ll end up with just pinkish batter. We want distinct ribbons of cream cheese!
Step 7: Bake
Pop the pan into your preheated oven. Bake for 50-65 minutes. The baking time can vary depending on your oven, so start checking around the 50-minute mark. You’ll know it’s done when a wooden skewer or toothpick inserted into the center comes out clean, or with just a few moist crumbs attached (not wet batter!). If the top is browning too quickly, you can loosely tent it with foil.
Step 8: Cool & Glaze
Once it’s baked, let the bread cool in the pan for about 10-15 minutes. This helps it set up properly. Then, carefully remove it from the pan and place it on a wire rack to cool completely. It’s *really* important to let it cool almost entirely before glazing, otherwise, the glaze will just melt off. For the glaze, whisk together the powdered sugar, vanilla, and enough milk (or lemon juice) until you get a drizzly consistency. Once the bread is cool, drizzle that over the top.
Step 9: Slice & Serve
Once the glaze has set a bit, slice it up and enjoy! I usually wait until it’s mostly cool, but sometimes I can’t resist a slightly warm slice with a dollop of extra cream cheese. It’s pure bliss. Slicing is easiest with a serrated knife.
What to Serve It With
This zucchini bread is pretty much a meal in itself, but it’s also fantastic when paired with other goodies.
For Breakfast: Honestly, a thick slice of this is all I need! But if I’m feeling fancy, I’ll pair it with a perfectly brewed cup of coffee or a tall glass of cold milk. It’s also lovely with a side of fresh berries, like raspberries or blueberries, which add a nice tartness.
For Brunch: This makes a more elegant addition to a brunch spread. Serve it alongside some scrambled eggs, crispy bacon, or a fresh fruit salad. A little dollop of Greek yogurt or extra whipped cream on the side is always a welcome addition, especially for the kids. It looks beautiful on a tiered stand.
As Dessert: For a lighter dessert option, serve a warm slice with a scoop of vanilla bean ice cream or a drizzle of chocolate sauce. The warmth of the bread and the cold of the ice cream is just heavenly. It’s also a great accompaniment to a cup of tea after dinner.
For Cozy Snacks: This is where this bread truly shines for me. When that 3 pm or 10 pm craving hits, a slice of this is the perfect answer. It’s comforting, satisfying, and doesn’t feel overly heavy. I often have it with a warm mug of spiced apple cider in the fall, or a simple glass of water when I just need that little sweet something. It’s the kind of thing that makes a quiet afternoon feel special.
Top Tips for Perfecting Your Zucchini Bread with Cream Cheese Swirl
Over the years of making this, I’ve picked up a few tricks that I think really elevate it.
Zucchini Prep: The most important thing is to grate your zucchini and then gently squeeze out as much excess moisture as you can. You don’t want a soggy bread! I usually use the large holes on my box grater. After grating, I put it in a clean kitchen towel or cheesecloth and twist to wring out the liquid. Don’t skip this step! Using pre-shredded zucchini often has more moisture, so I recommend grating it yourself right before you use it.
Mixing Advice: Remember what I said about overmixing? It’s really crucial here. Just mix until the dry ingredients are *barely* incorporated into the wet. A few little flour streaks are perfectly fine. Once you add the zucchini, fold it in gently. We’re aiming for tenderness, not toughness!
Swirl Customization: When you’re swirling, less is often more. You want distinct ribbons of cream cheese, not a uniform pinkish batter. A few gentle passes with a knife or skewer are all you need. You can also add a tiny drop of food coloring to the cream cheese mixture if you want to make the swirls extra vibrant, but I usually keep it natural.
Ingredient Swaps: I’ve experimented a lot! For a richer bread, you can substitute half of the oil with melted butter. If you’re out of milk, a splash of yogurt or sour cream can add extra moisture. For the spices, feel free to adjust to your liking – more cinnamon, a pinch of ginger, or even some cardamom can be wonderful. I once tried adding a tablespoon of finely chopped candied ginger to the batter, and it was divine!
Baking Tips: Ovens can be so finicky! If you find your loaf is browning too quickly on top, loosely tent it with aluminum foil for the last 20-30 minutes of baking. Make sure to test for doneness with a skewer in the thickest part of the loaf, avoiding any pockets of cream cheese. If the skewer comes out with wet batter, it needs more time.
Glaze Variations: If you’re not a fan of the powdered sugar glaze, you can skip it entirely, and it’s still delicious. Or, for a citrusy kick, use lemon juice instead of milk in the glaze. A simple dusting of powdered sugar through a stencil can also look very elegant. For a richer finish, a chocolate ganache drizzle is an indulgent option.
Storing and Reheating Tips
This zucchini bread is so good, you’ll want to savor every bite, and thankfully, it stores beautifully.
Room Temperature: Once completely cooled and glazed, store the loaf in an airtight container at room temperature for up to 2-3 days. If it’s a warm day, or you’ve cut into it, I find it stays fresher if you wrap the cut end tightly with plastic wrap. It keeps its lovely moist texture this way.
Refrigerator Storage: If you want it to last longer, say 4-5 days, store it in the refrigerator. Wrap the loaf tightly in plastic wrap, then place it in an airtight container. The texture might become a little firmer when cold, but it’s still perfectly delicious.
Freezer Instructions: This bread freezes like a dream! Once it’s completely cooled (and glazed, if you like), wrap the loaf tightly in plastic wrap, then in a layer of aluminum foil, and finally place it in a freezer-safe bag or container. It can stay frozen for up to 3 months. To thaw, remove it from the freezer the night before and let it thaw at room temperature. If you want to reheat a slice, you can warm it gently in a toaster oven or microwave for a few seconds.
Glaze Timing Advice: If you plan on freezing your bread, I highly recommend glazing it *after* thawing. The glaze can sometimes become a bit sticky or uneven after freezing and thawing. If you do glaze before freezing, ensure it’s fully set and then proceed with the wrapping steps.
Frequently Asked Questions
Final Thoughts
This Zucchini Bread with Cream Cheese Swirl isn’t just a recipe; it’s an experience. It’s that perfect balance of comforting, wholesome goodness and a little touch of indulgence, all thanks to that glorious cream cheese swirl. It’s the kind of bake that makes your kitchen smell like a bakery and your heart feel full. I truly believe this is one of those recipes that everyone should have in their repertoire. It’s proof that simple ingredients, treated with a little love, can create something truly spectacular. If you love a good quick bread, or if you’re looking for a fantastic way to use up those summer zucchinis, give this one a go. I promise, you won’t be disappointed. It’s incredibly forgiving, endlessly delicious, and always a crowd-pleaser. I can’t wait to hear how yours turns out! Let me know in the comments if you try it, or if you have any favorite additions!
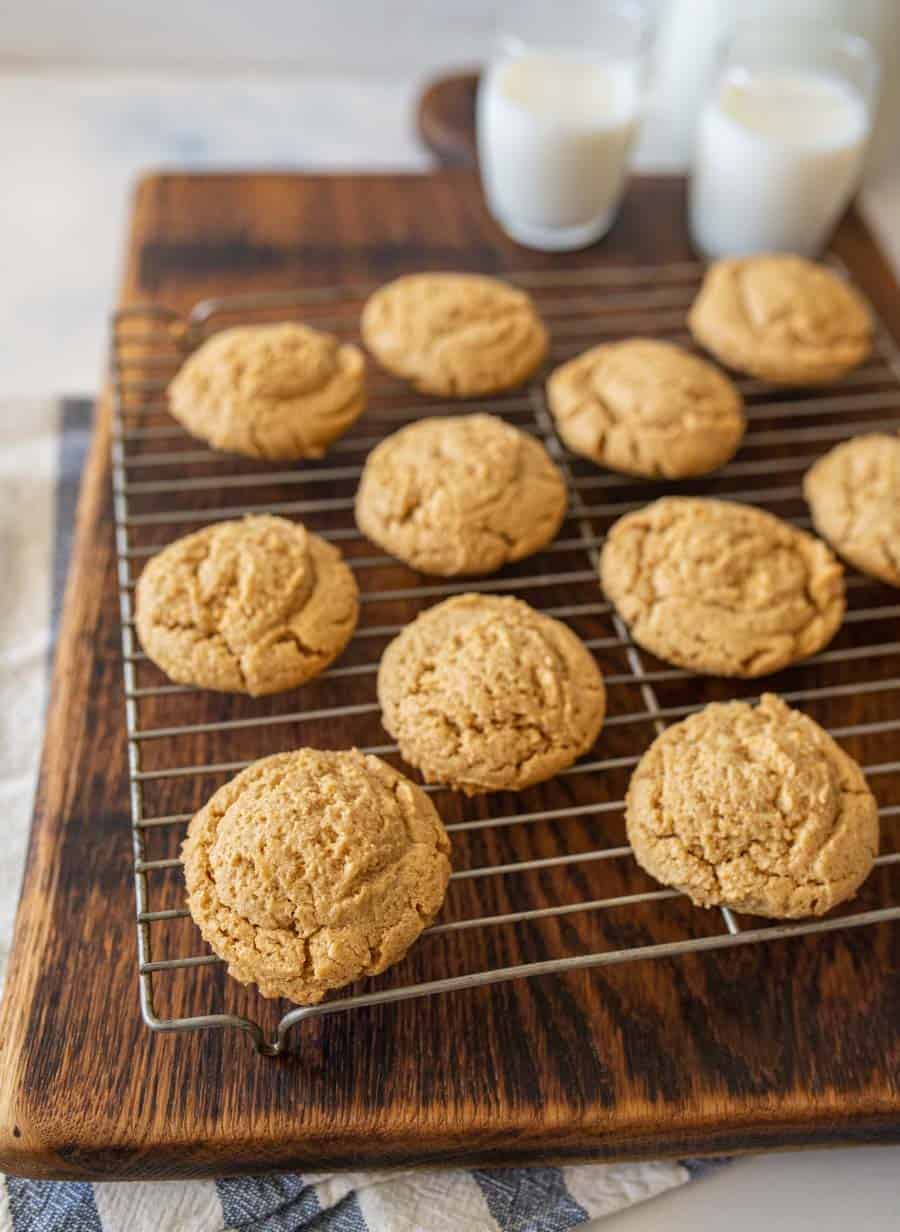
Flourless Peanut Butter Cookies
Ingredients
Method
- Preheat the oven to 350 degrees F (175 C) and line a baking sheet with parchment paper or a silicon baking mat.
- In a medium bowl, mix the peanut butter and the sugar together until the mixture is smooth and lightly fluffy, about 2 minutes. Add the egg and mix to combine. Add the baking soda, salt, and vanilla extract and mix to combine.
- Roll 1 tablespoon of dough in your hand to make a ball and then roll the ball in coarse sugar before placing the ball of dough on a baking sheet.
- If you want a chewier cookie bake for 10 minutes and let the cookies cool on the baking sheet for 5 minutes before removing. If you'd like a crunchier cookie bake for 12 to 13 minutes.