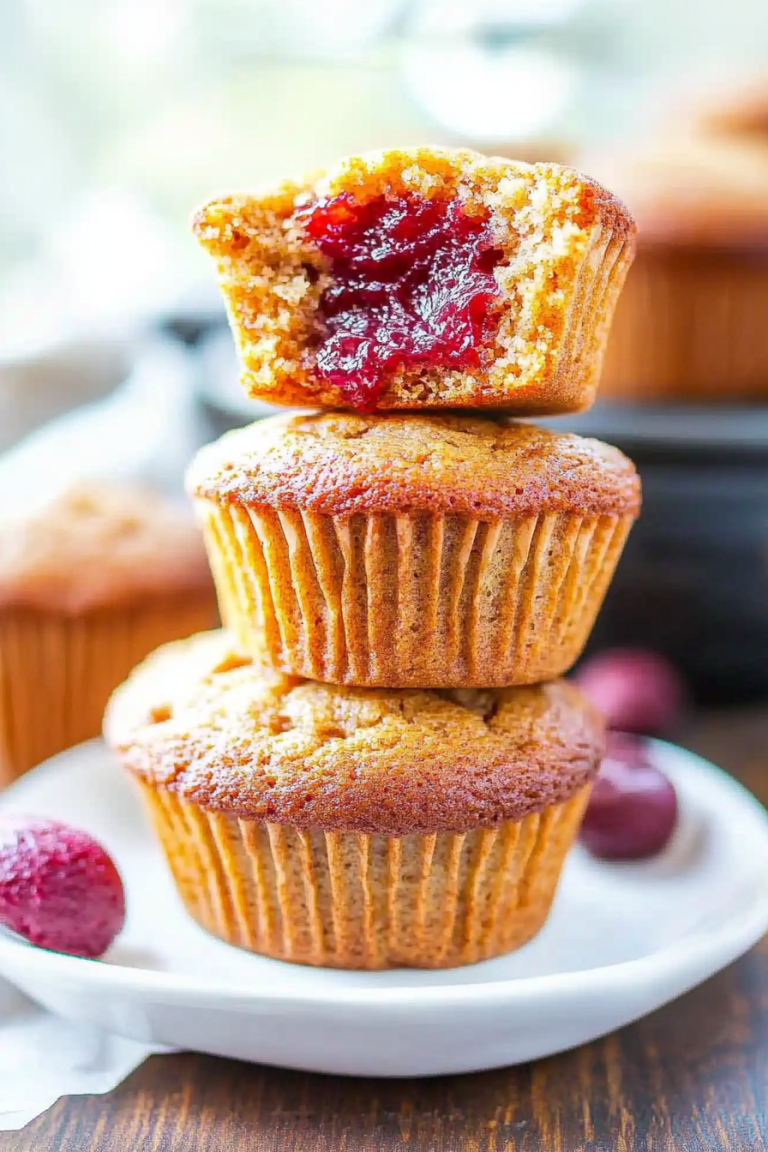
I remember the first time I baked this zucchini bread. It was a sweltering July afternoon, the kind where the air feels thick and heavy, and the thought of turning on the oven felt like a personal challenge. My garden was absolutely bursting with zucchini, the green torpedoes multiplying faster than I could figure out what to do with them. My mom, bless her heart, had always made this incredibly moist, perfectly spiced zucchini bread, and I’d begged her for the recipe a million times. But life gets busy, and sometimes those handwritten recipes get tucked away. So, there I was, armed with a mountain of zucchini and a vague memory of my mom’s kitchen smells. I decided to wing it, combining what I recalled with a few tweaks of my own. And oh my goodness, friends, it was a revelation! It came out so tender, so perfectly spiced, and that subtle sweetness was just divine. It’s become my go-to for everything from impromptu bake sales to a “surprise!” treat for my kids after school. Honestly, if you think zucchini bread is just for summer or just “okay,” prepare to have your mind changed. This isn’t just *any* zucchini bread; it’s the kind that makes people stop, close their eyes, and ask, “What is in this?!” It’s that good, and shockingly easy to pull off, even on a chaotic Tuesday.
What is Zucchini bread?
So, what exactly *is* this magical zucchini bread I’m raving about? At its core, it’s a quick bread, meaning no yeast involved – just a simple batter that bakes up beautifully. The “zucchini” part might sound a little strange if you’re not used to it, but trust me, it’s the secret ingredient that makes this bread unbelievably moist and tender. You won’t taste the zucchini itself, I promise! Instead, it lends a subtle sweetness and a fantastic texture that’s just heavenly. Think of it as the ultimate flavor sponge. The spices – cinnamon, nutmeg, maybe a touch of cloves if you’re feeling it – mingle with the natural sweetness, creating a warm, comforting aroma that fills your entire house. It’s basically a hug in loaf form. It’s not a cake, not quite a muffin, but a glorious in-between that’s perfect for any time of day. The beauty of this particular recipe is its simplicity; it’s the kind of thing you can whip up with ingredients you likely already have in your pantry, making it a lifesaver when that sweet craving hits unexpectedly.
Why you’ll love this recipe?
There are so many reasons why this particular zucchini bread recipe has earned a permanent spot in my baking repertoire. Firstly, the flavor is just out of this world. It’s got that perfect balance of sweet and spice that makes you want to devour the whole loaf. It’s not overly sweet, so you don’t get that cloying feeling, but it’s sweet enough to satisfy any dessert craving. What I absolutely adore about this recipe is how incredibly *easy* it is. Seriously, if you can stir two bowls together, you can make this. It’s my go-to on nights when I’m exhausted and just need a little pick-me-up, or when unexpected guests pop over. I can have it ready to go in less than 15 minutes of active prep time. And the cost? Practically pennies! Zucchini is often super affordable, and the other ingredients are pantry staples. It’s a budget-friendly treat that tastes like a million bucks. The versatility is another huge plus. It’s fantastic on its own, of course, but it’s also amazing warm with a smear of butter, or even toasted the next day. You can easily add nuts, chocolate chips, or even a hint of orange zest for a twist. Compared to other baked goods, it’s so forgiving. I’ve accidentally overmixed it once or twice (don’t tell anyone!), and it still turned out wonderfully moist. It’s that reliable friend in the kitchen that never lets you down. It’s my personal favorite because it’s proof that you don’t need fancy ingredients or complicated techniques to create something truly special and delicious. It’s pure comfort food, elevated.
How do you make Zucchini bread?
Quick Overview
This recipe is wonderfully straightforward, making it perfect for beginners and busy bees alike. You’ll essentially mix your dry ingredients in one bowl, your wet ingredients in another, then gently combine them before folding in that glorious zucchini and any add-ins you fancy. A quick swirl of a simple glaze on top, and into the oven it goes! The whole process from start to finish, including baking time, is surprisingly efficient. It’s that kind of recipe you can get done while the kids are doing homework or while you’re catching up on your favorite podcast.
Ingredients
For the Main Batter:
This is where all the magic starts! I always try to use fresh zucchini, and grating it yourself makes a world of difference compared to pre-shredded stuff. If your zucchini looks a little waxy, give it a quick rinse and pat dry before grating. Don’t worry about peeling it; the skin has lots of good stuff in it and bakes up beautifully. For the flour, all-purpose is perfect, but I’ve had great success with a 1:1 gluten-free blend too. The sugar gives it that lovely sweetness, and you can adjust it slightly based on your preference. A touch of baking soda and baking powder ensures a nice rise, and salt just balances everything out. My favorite spices are cinnamon and nutmeg – they just scream comfort to me. Make sure your spices are fresh for the best flavor!
For the Filling:
Okay, so technically, the zucchini *is* the filling here, but I wanted to call out how you prepare it. Grating is key, and then a good squeeze to get out excess moisture is a must. You want it damp, not dripping wet. This step is crucial for avoiding a gummy bread. Some people like to add nuts like walnuts or pecans, or even chocolate chips for an extra layer of indulgence. If you do, I usually toss them in a little bit of flour before adding them to the batter, which helps prevent them from sinking to the bottom. A tablespoon or two of extra flavor, like vanilla extract or even a bit of lemon zest, can really elevate the whole thing. I once accidentally grabbed almond extract instead of vanilla, and it was surprisingly delicious – a subtle nutty hint!
For the Glaze:
This is totally optional, but oh-so-worth-it! It’s just a simple mix of powdered sugar, a little milk or water, and a splash of vanilla. The trick is to get the consistency just right – thick enough to coat but still pourable. You can make it thinner if you like a more delicate drizzle or thicker for a more substantial topping. I’ve even added a tiny bit of orange juice or a pinch of cinnamon to the glaze for extra zing. It’s the perfect finishing touch that makes this bread look as good as it tastes.
Step-by-Step Instructions
Step 1: Preheat & Prep Pan
First things first, let’s get your oven ready. Preheat it to 350 degrees Fahrenheit (175 degrees Celsius). While the oven is warming up, grab a standard loaf pan – the 9×5 inch kind is perfect. Grease it really well with butter or cooking spray, and then give it a little dust of flour. This two-step process is my secret weapon for ensuring the bread releases cleanly every single time. No one wants their beautiful loaf stuck to the pan!
Step 2: Mix Dry Ingredients
In a large mixing bowl, whisk together your all-purpose flour, granulated sugar, baking soda, baking powder, salt, cinnamon, and nutmeg. Give it a good whisk to make sure everything is evenly distributed. This helps ensure your leavening agents and spices are spread throughout the batter, leading to a consistent rise and flavor.
Step 3: Mix Wet Ingredients
In a separate medium bowl, whisk together your eggs, melted butter (make sure it’s cooled slightly so it doesn’t scramble the eggs!), vegetable oil, and vanilla extract. Whisk until everything is well combined and looks smooth and a little frothy.
Step 4: Combine
Now, pour the wet ingredients into the bowl with the dry ingredients. Using a spatula or a wooden spoon, gently fold everything together until *just* combined. It’s really important not to overmix here! A few streaks of flour are okay; they’ll disappear as you add the zucchini. Overmixing can lead to a tough, dense bread, and we definitely don’t want that.
Step 5: Prepare Filling
Grate your zucchini – about 1.5 to 2 cups is perfect. You can use the large holes on a box grater or a food processor. Once grated, place the zucchini in a clean kitchen towel or cheesecloth and give it a good squeeze to remove as much excess liquid as possible. You want it moist, but not watery. If you’re adding nuts or chocolate chips, stir them into the squeezed zucchini now. This helps them distribute evenly.
Step 6: Layer & Swirl
Gently fold the squeezed zucchini mixture into the batter. Mix until it’s just incorporated. Don’t overwork it! Pour the batter evenly into your prepared loaf pan. If you’re feeling fancy, you can make a little swirl on top with a knife or toothpick, but honestly, it’s delicious with or without it.
Step 7: Bake
Pop the loaf pan into your preheated oven. Bake for about 50-65 minutes. The exact time will depend on your oven, so start checking around the 50-minute mark. You’ll know it’s done when a toothpick inserted into the center comes out clean, or with just a few moist crumbs attached (no wet batter!). If the top starts browning too quickly, you can loosely tent it with aluminum foil.
Step 8: Cool & Glaze
Once baked, let the loaf cool in the pan on a wire rack for about 10-15 minutes. This allows it to set up properly. Then, carefully invert the pan to release the bread onto the wire rack to cool completely. Once it’s fully cooled, it’s time for the glaze! Whisk together about 1 cup of powdered sugar with 1-2 tablespoons of milk or water and a tiny splash of vanilla until smooth. Drizzle it over the top and let it set for a few minutes before slicing.
Step 9: Slice & Serve
Use a serrated knife for the cleanest slices. This bread is absolutely divine served at room temperature, but a little warm is also heavenly. I love it on its own, but it’s also fantastic with a cup of coffee or tea. Enjoy every delicious bite!
What to Serve It With
This zucchini bread is so versatile, it can honestly fit into any meal or snack occasion! For a simple, satisfying Breakfast, I love slicing it thick and serving it warm with a good dollop of butter. It pairs beautifully with a strong cup of coffee or a refreshing glass of iced tea. It’s just enough sweetness to start your day without being overwhelming. For a more elegant Brunch spread, I’ll often slice it thinner and arrange it on a pretty platter. It looks lovely alongside fresh fruit salads, quiches, or even a yogurt parfait. A small bowl of honey or a light cream cheese spread on the side can be a nice addition for guests. When we’re having it as Dessert, especially after a hearty meal, I like to serve it with a small scoop of vanilla bean ice cream or a dollop of whipped cream. A drizzle of chocolate sauce is also a hit with the kids! For those quiet, Cozy Snacks, which is probably my favorite time to enjoy it, I just grab a slice (or two!) and a mug of hot cocoa or a soothing herbal tea. It’s the perfect companion for curling up with a good book or catching up with family. My personal favorite family tradition is to have it as an after-school treat on Fridays, usually with a glass of cold milk – it just signals the start of the weekend for us!
Top Tips for Perfecting Your Zucchini Bread
I’ve made this zucchini bread more times than I can count, and I’ve learned a few tricks along the way that really make a difference. For Zucchini Prep, the most important thing is to really squeeze out that moisture. If you skip this step, you risk a gummy, heavy loaf. I usually grate my zucchini into a fine shred – it incorporates better into the batter. And don’t be afraid to press down hard with the towel; get as much water out as you can! When it comes to Mixing Advice, remember, gentle is key. Overmixing develops the gluten in the flour, making the bread tough. Just mix until you don’t see any large dry pockets of flour. A few little lumps are perfectly fine. For Swirl Customization, if you decide to add things like chocolate chips or nuts, gently fold them in *after* you’ve combined the wet and dry ingredients. Tossing them in a tablespoon of flour first can also help keep them from sinking. If you want to get fancy with a chocolate swirl, melt some chocolate chips with a tiny bit of oil or butter, dollop spoonfuls over the batter, and then use a knife to swirl them through. For Ingredient Swaps, I’ve found that you can substitute about half of the all-purpose flour with whole wheat flour for a heartier loaf, but don’t go for 100% whole wheat as it can get too dense. I also tested this with almond milk and it actually made it even creamier, so feel free to experiment with different non-dairy milks if you like! For Baking Tips, always trust the toothpick test. Ovens can vary wildly, so it’s your best bet for doneness. If the top is browning too fast, loosely tenting with foil is a game-changer. And for Glaze Variations, you can play with the flavor. A pinch of lemon zest in the glaze adds a lovely brightness, or a tiny bit of espresso powder can give it a sophisticated mocha twist. Don’t be afraid to adjust the liquid to get your desired glaze consistency!
Storing and Reheating Tips
This zucchini bread is so good, you’ll want to savor every last bite, and thankfully, it stores beautifully. For Room Temperature storage, once the bread has cooled completely (and this is important – storing warm bread can create steam and make it soggy!), wrap it tightly in plastic wrap or store it in an airtight container. It will stay fresh and delicious for about 2-3 days. This is perfect for when you know you’ll be snacking on it throughout the day. If you think you’ll need it for longer, Refrigerator Storage is your best bet. Wrap it well, and it can last up to a week in the fridge. Just a heads-up, the texture might change slightly, becoming a bit firmer. It’s still perfectly edible, though! For longer preservation, Freezer Instructions are your friend. Let the bread cool completely, then wrap it tightly in a layer of plastic wrap, followed by a layer of aluminum foil, or place it in a freezer-safe bag. It can keep in the freezer for up to 3 months. To thaw, simply unwrap it and let it come to room temperature on the counter, or if you’re impatient like me, pop a slice in the microwave for a few seconds! Reheating is super simple: a few seconds in the microwave or a minute or two in a toaster oven will bring back that lovely warmth and softness. For Glaze Timing Advice, if you plan to store it for more than a day or two, I highly recommend adding the glaze *after* it’s cooled completely and just before serving. If you glaze it and then store it in the fridge or freezer, the glaze can sometimes become sticky or weep. But if you’re planning to eat it all within a day or two, glazing it right after it cools is perfectly fine and makes it look so inviting!
Frequently Asked Questions
Final Thoughts
This zucchini bread recipe is more than just a way to use up extra garden produce; it’s a little slice of comfort and joy. It’s the kind of recipe that makes your kitchen smell amazing and brings a smile to everyone’s face. I truly believe it’s one of the easiest and most rewarding bakes you can tackle. If you love this recipe, you might also enjoy my recipe for Easy Banana Bread Muffins or my Classic Apple Crumble – they both have that same cozy, homemade feel. I really hope you give this zucchini bread a try. It’s a recipe that’s been perfected through countless bakes, and I’m so excited for you to experience its deliciousness. Please, please let me know in the comments how yours turns out, or if you’ve tried any fun variations! I’d love to hear all about it. Happy baking, my friends!
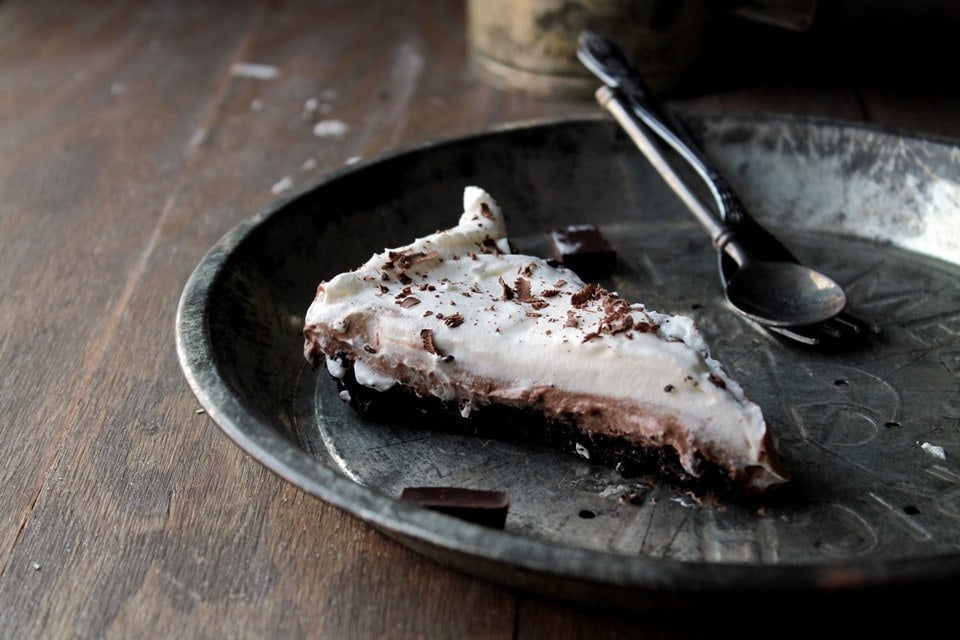
French silk recipe
Ingredients
Method
- Combine the crushed Oreos and melted butter in a small bowl; mix well and press evenly onto the bottom of an 8-inch springform pan.
- Refrigerate the crust until needed to fill.
- For the chocolate filling: Pour 1.5 cups of whipping cream into a medium-sized mixing bowl and microwave for 1.5 to 2 minutes, or until hot.
- Add in chocolate chips and whisk until completely melted and smooth.
- Refrigerate the chocolate mixture for at least one hour; it needs to be cold and slightly thickened.
- Prepare the Whipped Cream Topping by combining together 1 cup of whipping cream, vanilla extract, and sugar in a separate bowl.
- Cover and chill the whipped cream mixture in the refrigerator for 30 minutes.
- Once chilled, beat the whipped cream mixture until stiff peaks form.
- Take out the chilled chocolate mixture and beat on medium speed until stiff peaks form.
- Spread the chocolate mixture evenly over the chilled Oreo crust.
- Spoon whipped cream topping over the chocolate layer and spread evenly.
- Refrigerate for at least one hour, or until the tart is fully set.
- Garnish with chocolate shavings (optional) and serve chilled.